
Frame editor
The Frame Editor is a powerful canvas-based tool for creating and editing your storyboard frames. You can draw, add text and shapes, import images, and annotate your frames with camera movement indicators.
This guide covers the Frame Editor's manual canvas tools. To generate or edit frame images, open the Generate tab in the frame-focus sidebar on your storyboard, or see Generating images. For the per-frame image history that those generations populate, see Frame revisions.
Opening the Frame Editor
To open the Frame Editor, double-click on any frame in your storyboard. The editor opens in a modal window with your frame canvas in the centre, a toolbar at the bottom, and a sidebar on the right.
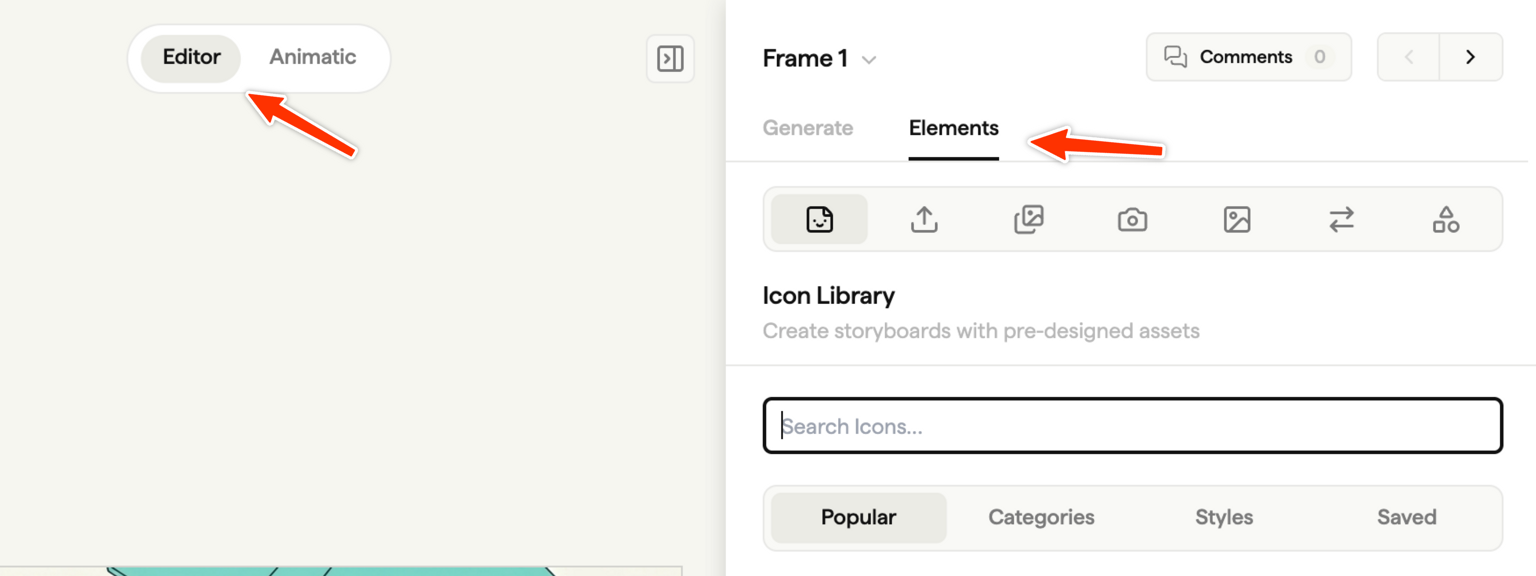
Tip: if you can't see the editor or sidebar, check you have the Editor & Elements tabs enabled.
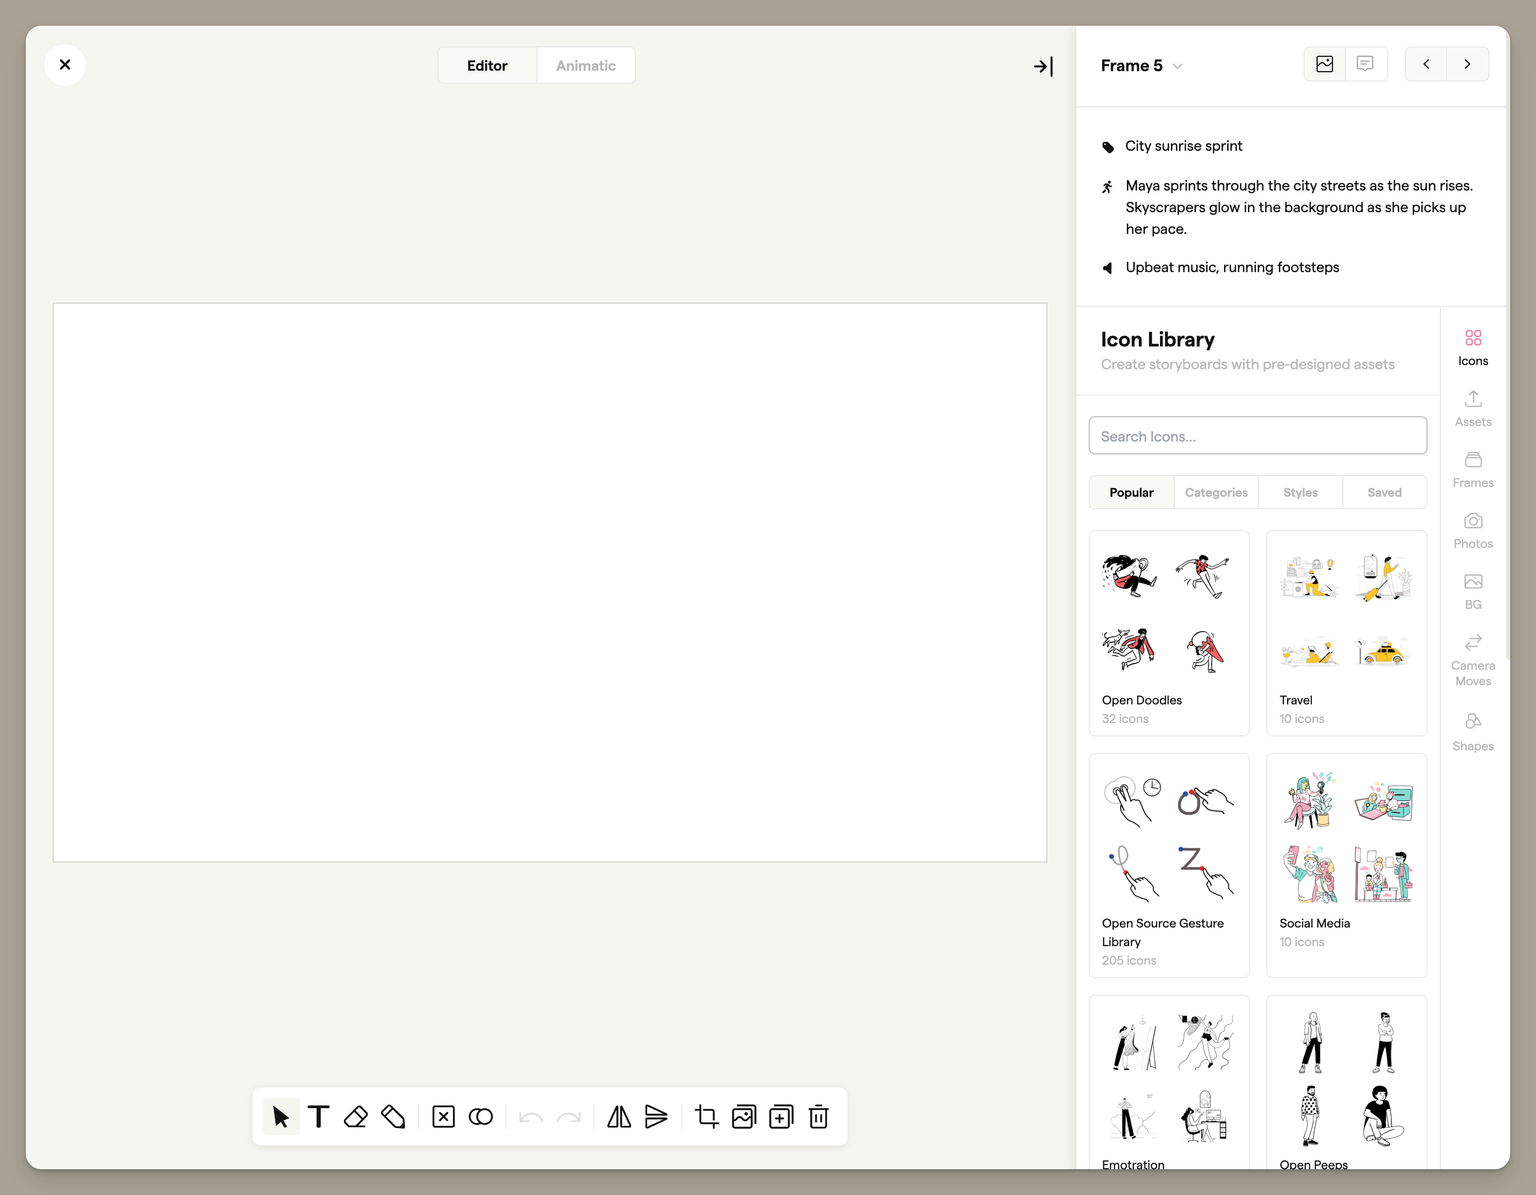
The Sidebar
The sidebar on the right side of the editor gives you access to images, frames, and camera movement overlays.
The Frame Editor sidebar covers manual elements like photos, icons, overlays, and shapes. For AI generation, sketch-to-frame composition, and image edits, use the Generate tab in the frame-focus sidebar on your storyboard. See Generating images for the full guide.
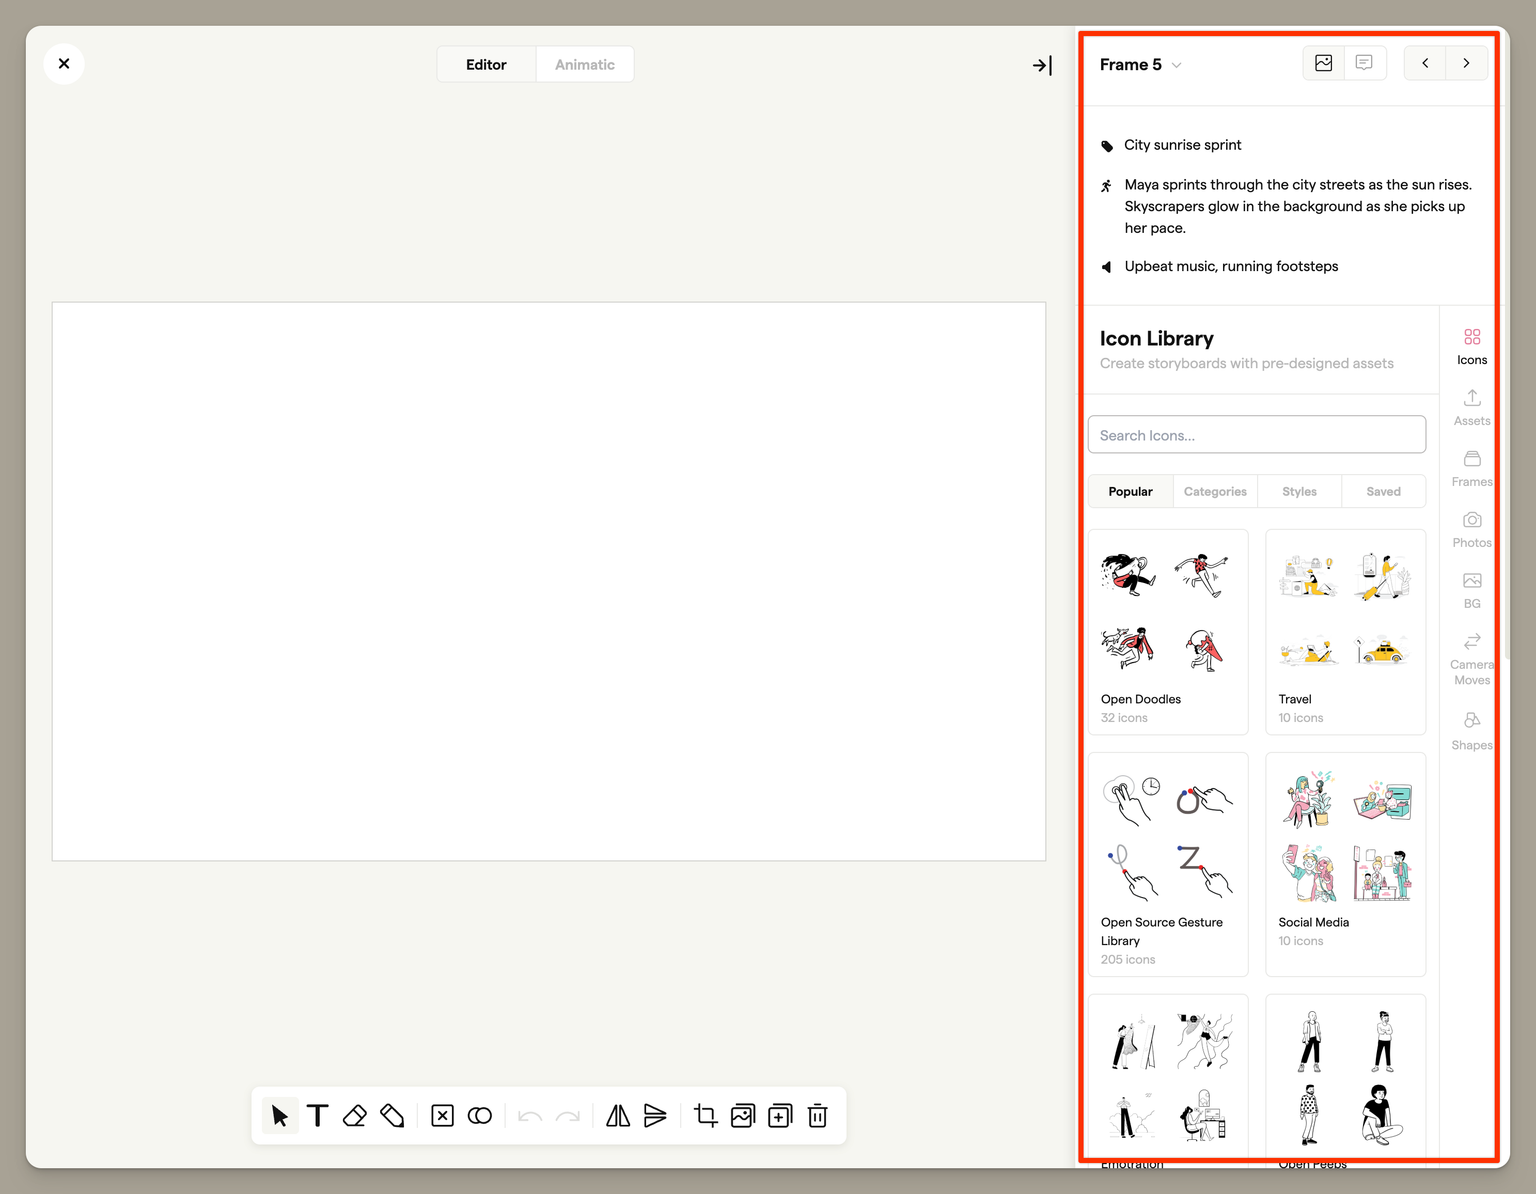
Image Library
There are several ways to add images to your frame using the sidebar.
Unsplash
Search millions of free, high-quality photographs from Unsplash. Enter a search term or browse by category to find images.
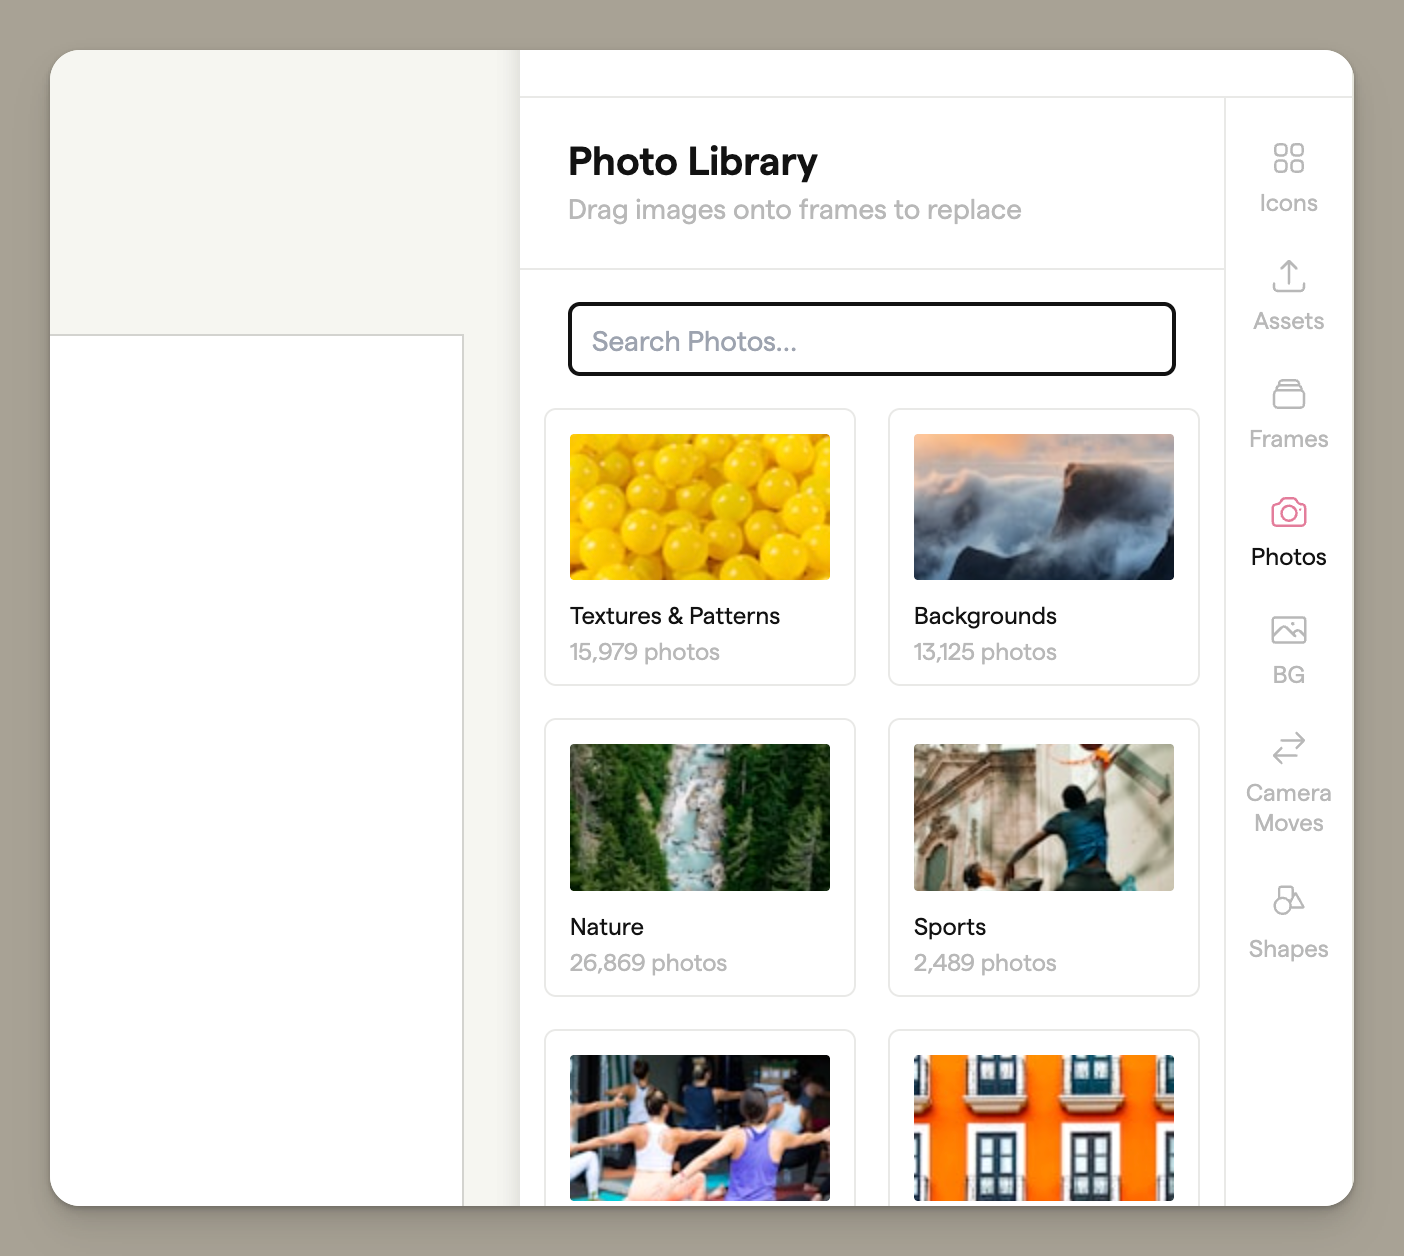
Click an image to add it to your canvas. The image will be placed in the centre of your frame, ready to be moved and resized.
IconFinder
Search for icons and illustrations from IconFinder. These are perfect for adding visual elements, symbols, or simple graphics to your frames.
![]()
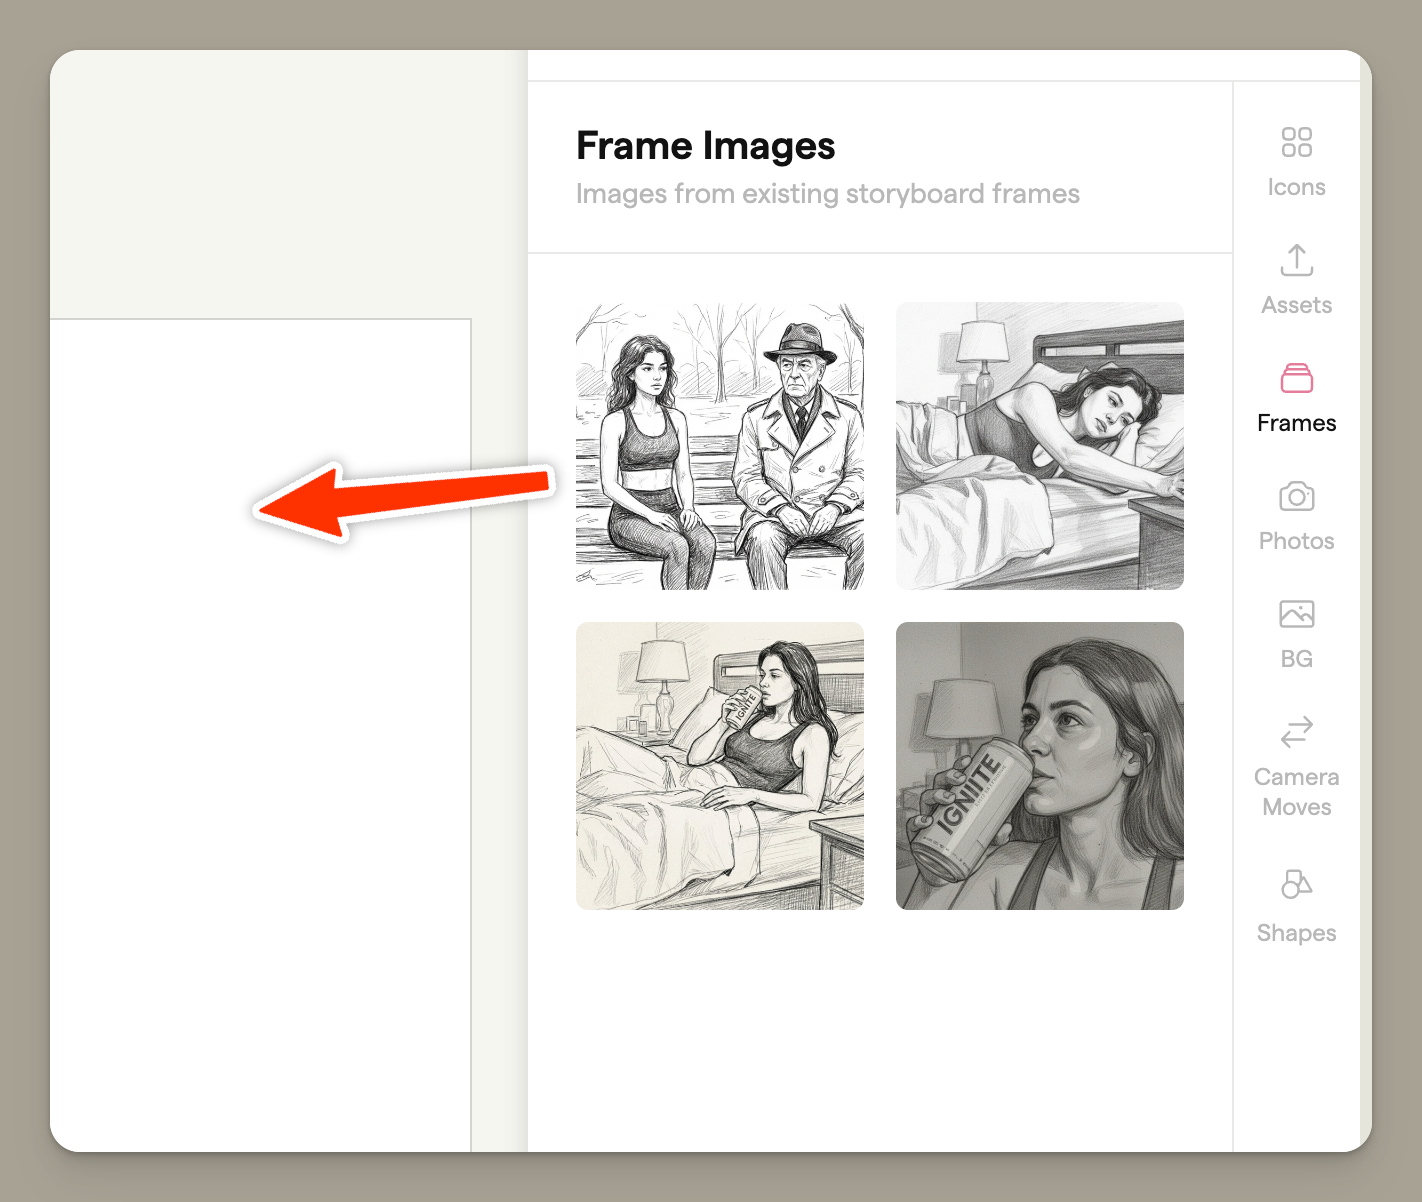
Adding Images from Other Frames
Click the Frames tab in the sidebar to see all frames in your storyboard. Click any frame to add its image to your canvas as an object you can move, resize, and transform.
This is useful for:
- Copying elements from one frame to another
- Building composite images from multiple frames
- Referencing previous frames while working
Adding Images from Your Computer
You can also add your own images:
- Drag and drop — Drag an image file from your computer directly onto the canvas
- Paste from clipboard — Copy an image and press Ctrl+V (Windows) or Cmd+V (Mac)
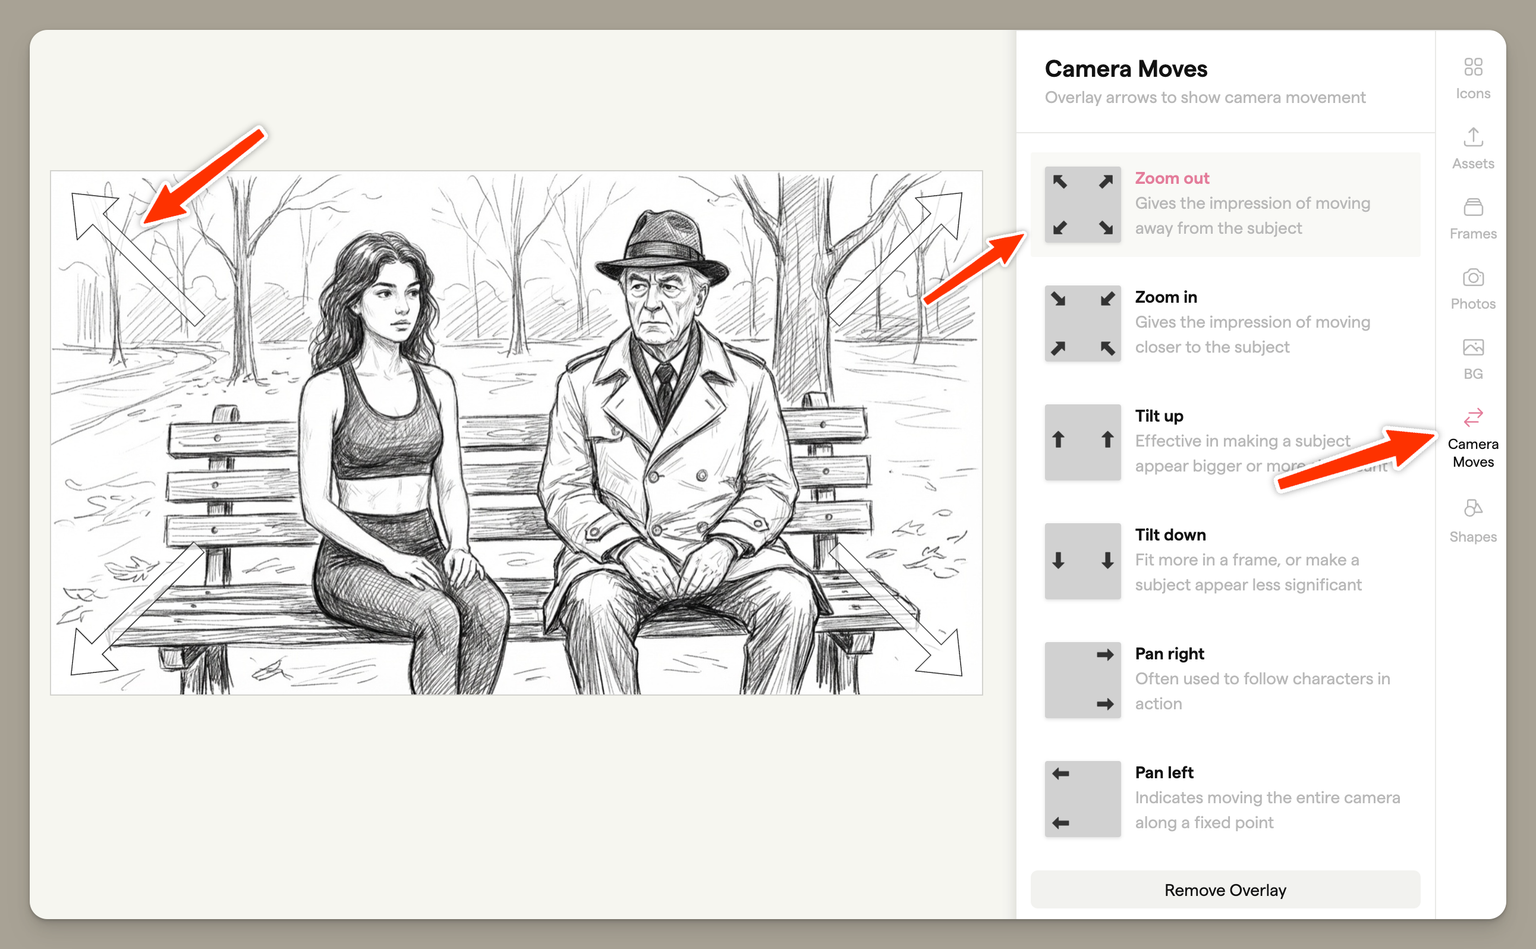
Camera Movement Overlays
Camera movement overlays are visual indicators that show planned camera movements on your frame. These are essential for communicating shot direction to your team or client.
Click the Overlays tab in the sidebar to see the available options:
| Overlay | Description |
|---|---|
| Zoom In | Indicates the camera moving closer to the subject |
| Zoom Out | Indicates the camera pulling away from the subject |
| Pan Left | Indicates the camera moving to the left |
| Pan Right | Indicates the camera moving to the right |
| Tilt Up | Indicates the camera tilting upward |
| Tilt Down | Indicates the camera tilting downward |
Click an overlay to apply it to your frame. Overlays appear as semi-transparent graphics on top of your frame content. They're automatically sized to match your storyboard's aspect ratio.
To remove an overlay, click it again in the sidebar to deselect it.
Adding Shapes
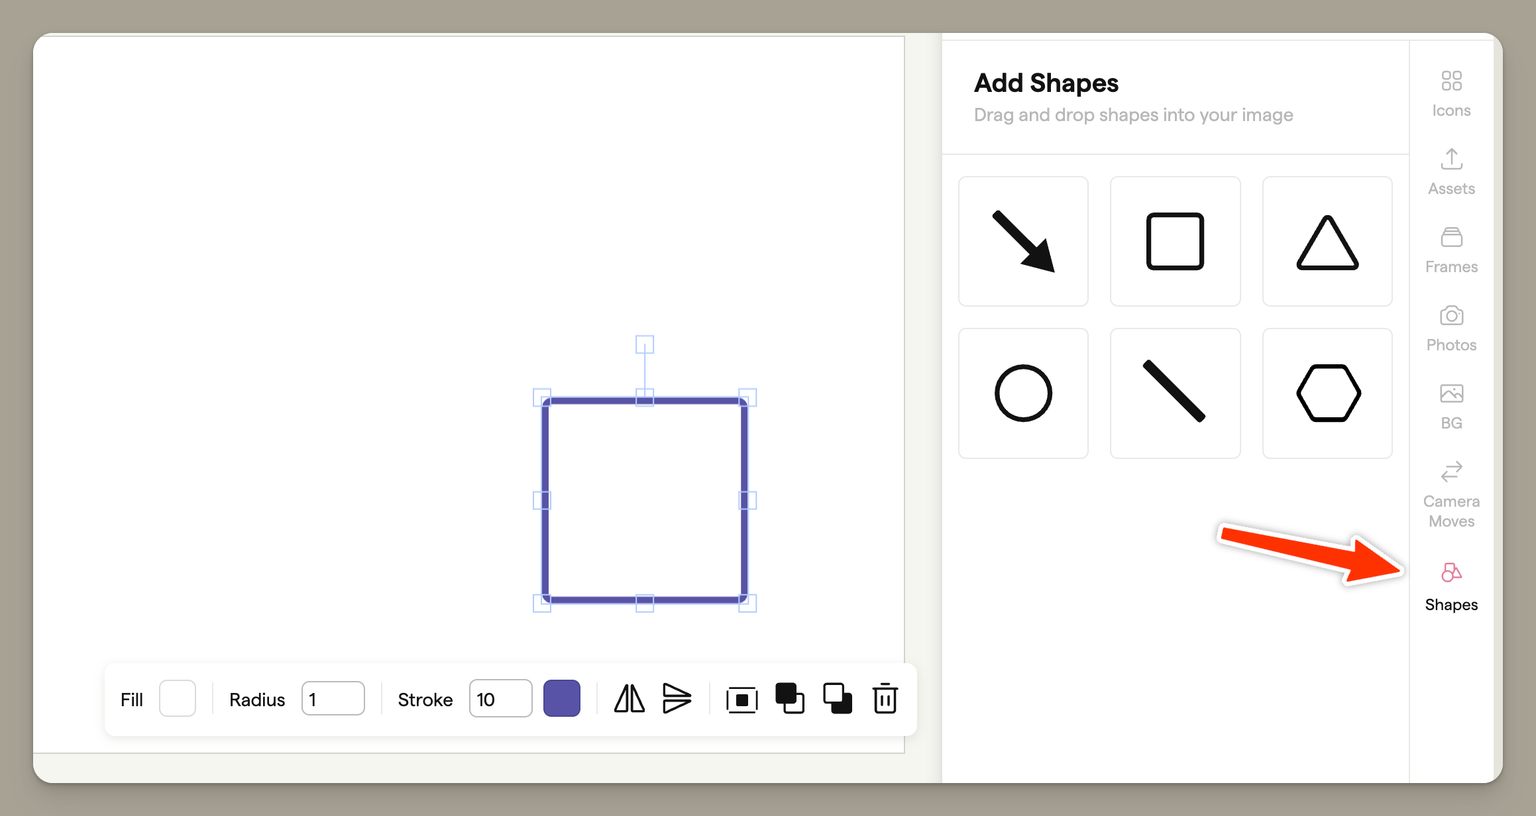
Click the shapes icon in the sidebar to select from:
- Circle — An ellipse that can be resized
- Rectangle — A rectangle with adjustable rounded corners
- Triangle — An equilateral triangle
- Arrow — A directional arrow for indicating movement or focus
Click and drag on the canvas to draw your shape. Once placed, select a shape to see its context menu with these properties:
| Property | Description |
|---|---|
| Fill colour | The interior colour of the shape |
| Stroke colour | The border colour |
| Stroke width | The thickness of the border (0–100px) |
| Border radius | Rounded corners (rectangles only) |
Tip: Hold Shift while creating a shape to maintain equal proportions (e.g., a perfect circle or square).
The Toolbar
The toolbar at the bottom of the editor contains your drawing tools and canvas actions.
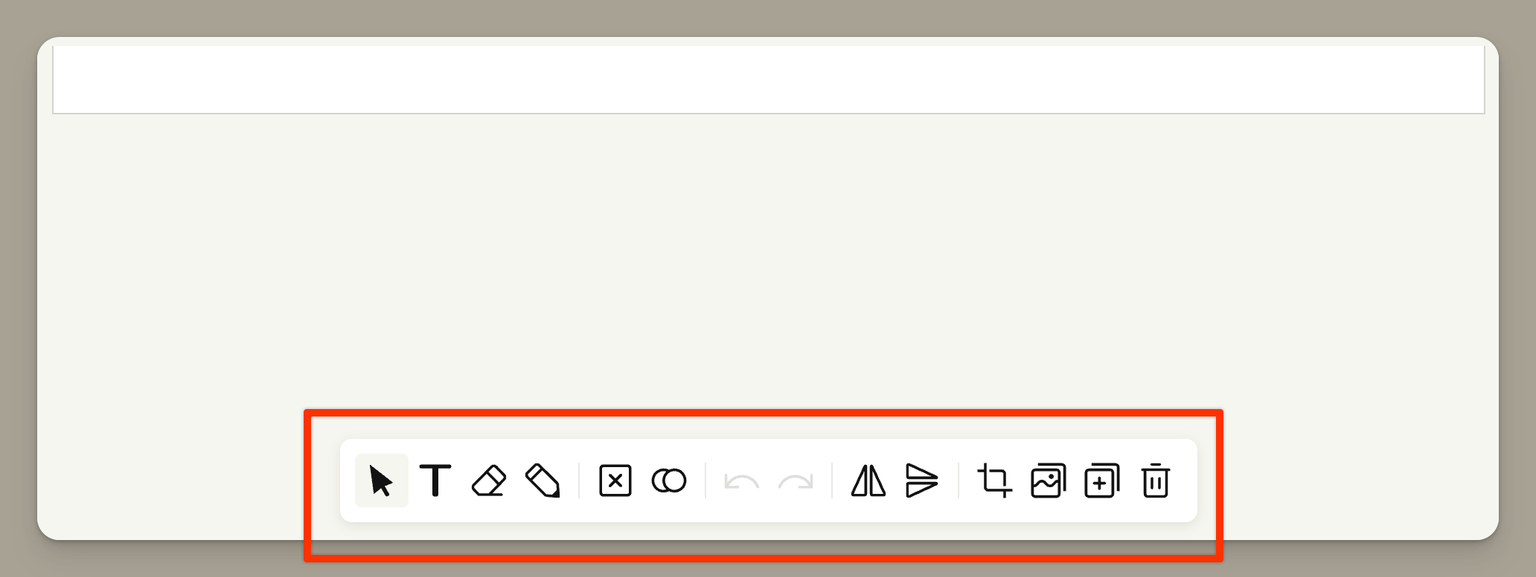
Editing Modes
The left side of the toolbar contains four editing modes:
| Tool | Description |
|---|---|
| Select | Click to select, move, resize, and rotate objects on your canvas |
| Text | Click on the canvas to add a text box |
| Eraser | Remove brush strokes from your drawing |
| Draw | Freehand drawing with a pressure-sensitive brush |

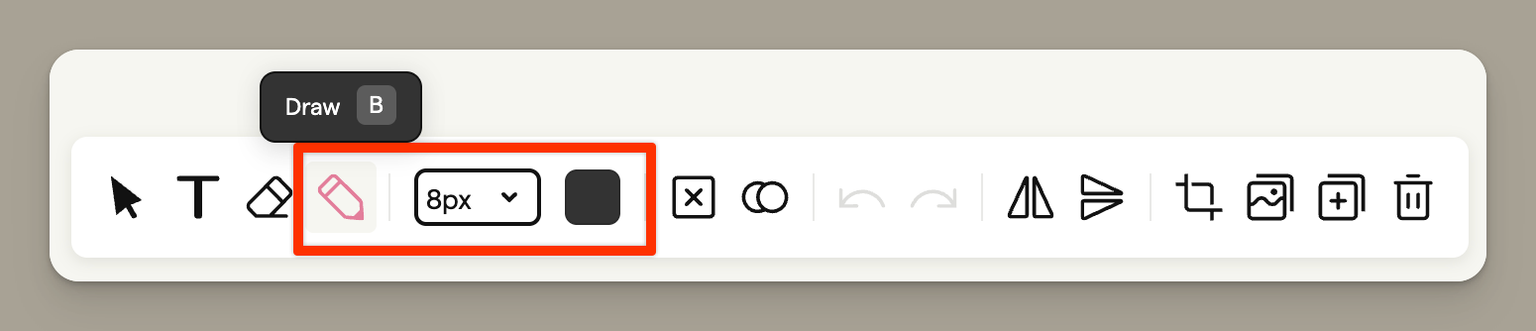
Drawing with the Brush
Select the Draw tool to start freehand drawing on your canvas. A context menu appears above your cursor where you can adjust:
- Brush size — Choose from 5 preset sizes (8px to 64px)
- Colour — Pick from 9 preset colours or use the colour picker for a custom colour
- Opacity — Adjust the transparency of your brush strokes
Tip: Hold Shift while drawing to create perfectly straight lines.
Using the Eraser
The Eraser tool removes brush strokes you've drawn. It doesn't affect other objects like shapes, text, or images — only freehand drawing.
Adding Text
Click the Text tool, then click anywhere on the canvas to create a text box. Start typing to add your text.

With text selected, a context menu appears with these options:
| Property | Description |
|---|---|
| Font | Choose from the Google Fonts library |
| Size | 8 size levels from small to large |
| Alignment | Left, centre, or right |
| Colour | Any colour with opacity support |

Double-click existing text to edit it.
Canvas Actions
The right side of the toolbar contains actions that affect your entire canvas or manage frames:

| Button | Description |
|---|---|
| Clear | Remove all objects from the canvas |
| Onion Skin | Toggle the previous frame overlay (see below) |
| Undo | Undo your last action |
| Redo | Redo an undone action |
| Flip Horizontal | Mirror the entire canvas left to right |
| Flip Vertical | Mirror the entire canvas top to bottom |
| Resize and Crop | Adjust your frame's background image |
| Duplicate Frame | Create a copy of the current frame |
| New Frame | Add a new blank frame after this one |
| Delete Frame | Remove this frame from the storyboard |
Tip: Hold Shift and click Clear to remove only the background image while keeping your drawings and objects.
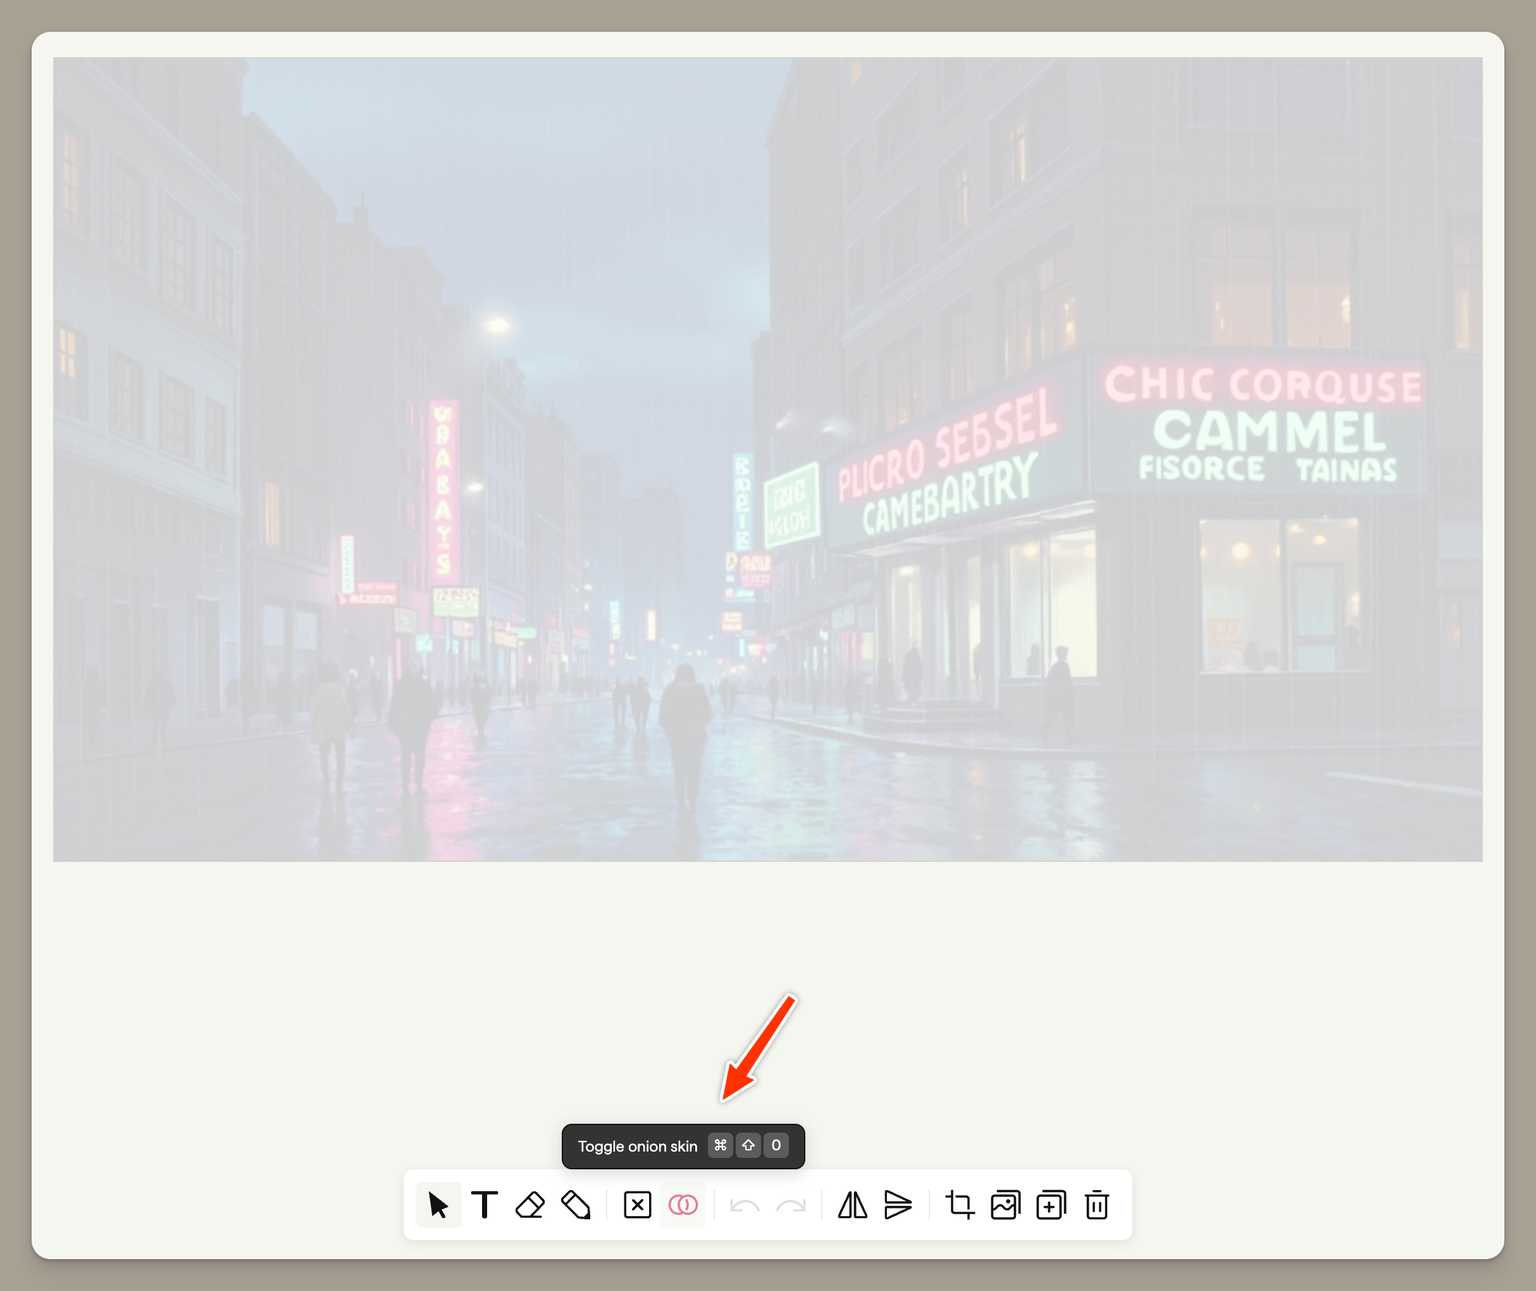
Onion Skinning
Onion skinning is an animation technique that shows a faint image of the previous frame as a reference. This helps you create smooth transitions and consistent positioning between frames — particularly useful when planning animated sequences or ensuring continuity between shots.
To toggle onion skinning, click the Onion Skin button in the toolbar. When active, you'll see a semi-transparent overlay of the previous frame behind your current canvas.
Note: Onion skinning is only available from the second frame onwards — the first frame has no previous frame to reference.
Working with Objects
Selecting Objects
Switch to the Select tool, then:
- Single select — Click on any object to select it
- Multi-select — Hold Shift and click to add objects to your selection, or drag across multiple objects
- Select all — Press Ctrl+A (Windows) or Cmd+A (Mac)
- Deselect — Click on an empty area of the canvas or press Escape
Moving and Transforming
With an object selected, you'll see handles around it:
- Drag the object to move it
- Drag the corner handles to resize
- Drag the rotation handle (top) to rotate
- Hold Shift while resizing to maintain proportions
Copy, Paste, and Duplicate
- Copy — Ctrl+C / Cmd+C
- Paste — Ctrl+V / Cmd+V (pastes with a slight offset)
- Quick duplicate — Hold Alt and drag an object to create a copy
Layer Order
Objects can overlap. Right-click an object or use the context menu to change the stacking order:
- Send to Front — Bring the object to the top
- Send to Back — Move the object behind everything else
Flipping Objects
You can flip individual objects horizontally or vertically using the context menu:
Alignment
When you select an object, alignment options appear in the context menu. These align the object relative to the canvas:
| Option | Description |
|---|---|
| Centre | Centre the object on the canvas |
| Centre horizontally | Align to the horizontal centre |
| Centre vertically | Align to the vertical centre |
| Align top | Align to the top edge |
| Align bottom | Align to the bottom edge |
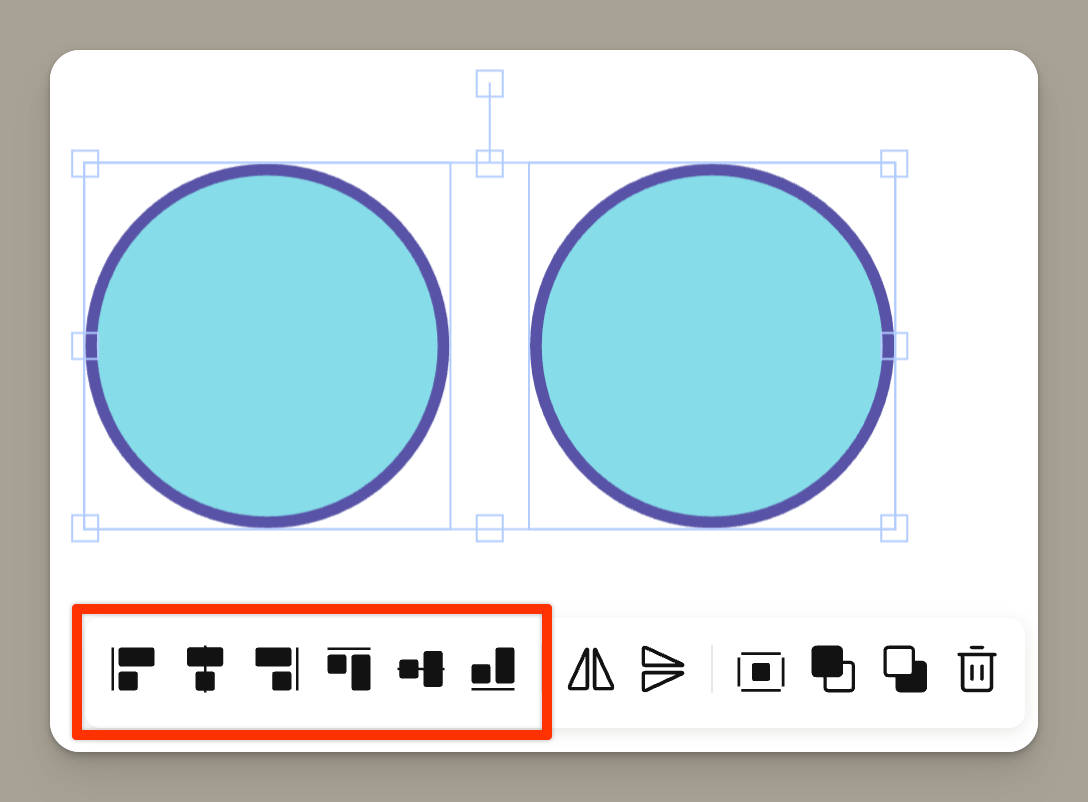
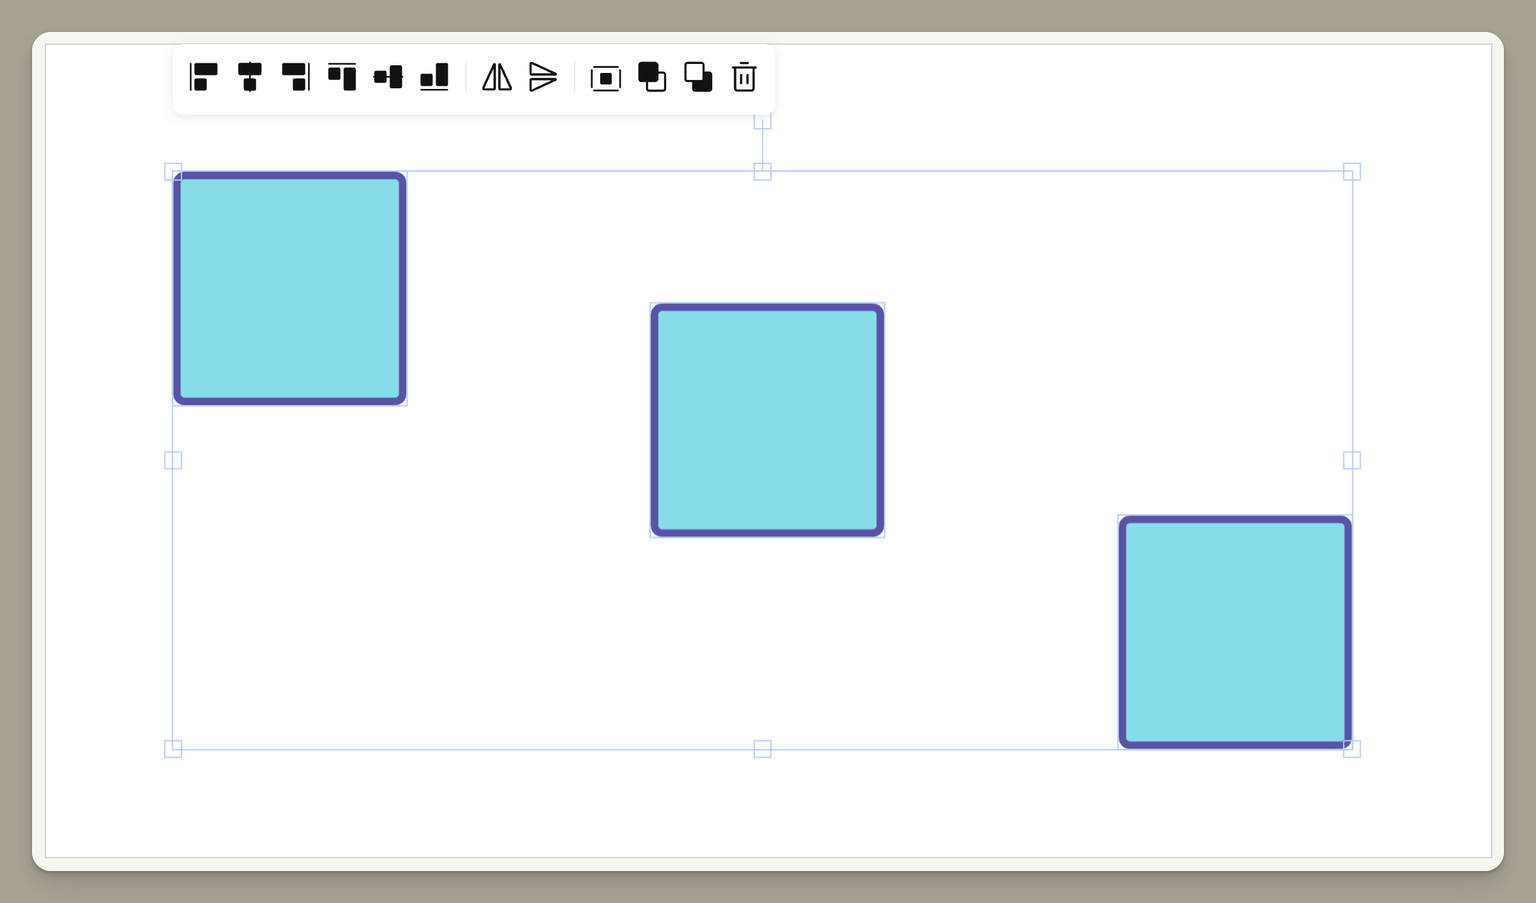
Arranging Multiple Objects
When you select multiple objects, you can arrange them relative to each other:
| Option | Description |
|---|---|
| Align left | Align all objects to the leftmost edge |
| Centre horizontally | Centre all objects horizontally |
| Align right | Align all objects to the rightmost edge |
| Align top | Align all objects to the topmost edge |
| Centre vertically | Centre all objects vertically |
| Align bottom | Align all objects to the bottommost edge |
Deleting Objects
Select an object and press Delete or Backspace to remove it, or use the delete option in the context menu.
Keyboard Shortcuts
Here are the most useful keyboard shortcuts for the Frame Editor:
| Shortcut | Action |
|---|---|
| V | Select tool |
| B | Brush/Draw tool |
| E | Eraser tool |
| T | Text tool |
| R | Rectangle shape |
| O | Circle/Ellipse shape |
| A | Arrow shape |
| [ | Decrease brush size |
| ] | Increase brush size |
| Ctrl/Cmd + Z | Undo |
| Ctrl/Cmd + Y | Redo |
| Ctrl/Cmd + A | Select all |
| Ctrl/Cmd + C | Copy |
| Ctrl/Cmd + V | Paste |
| Delete | Delete selected |
| Escape | Deselect all |
| Shift (while drawing) | Draw straight line |
| Alt (while dragging) | Duplicate object |
Saving Your Work
Your changes are saved when you close the Frame Editor. If you have unsaved changes and try to close or navigate away, you'll be prompted to save or discard your work.