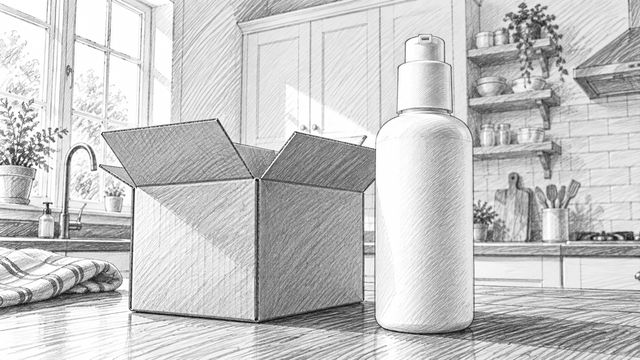
To make an animatic, put your storyboard images in sequence, add a soundtrack, and adjust how long each frame stays on screen. Review the timing before production, then export an MP4 for playback, or a timeline for After Effects, Premiere Pro or DaVinci Resolve to continue in production.
- Why are animatics used?
- How to make an animatic step-by-step
- Timing and handoff template
- Tips & examples
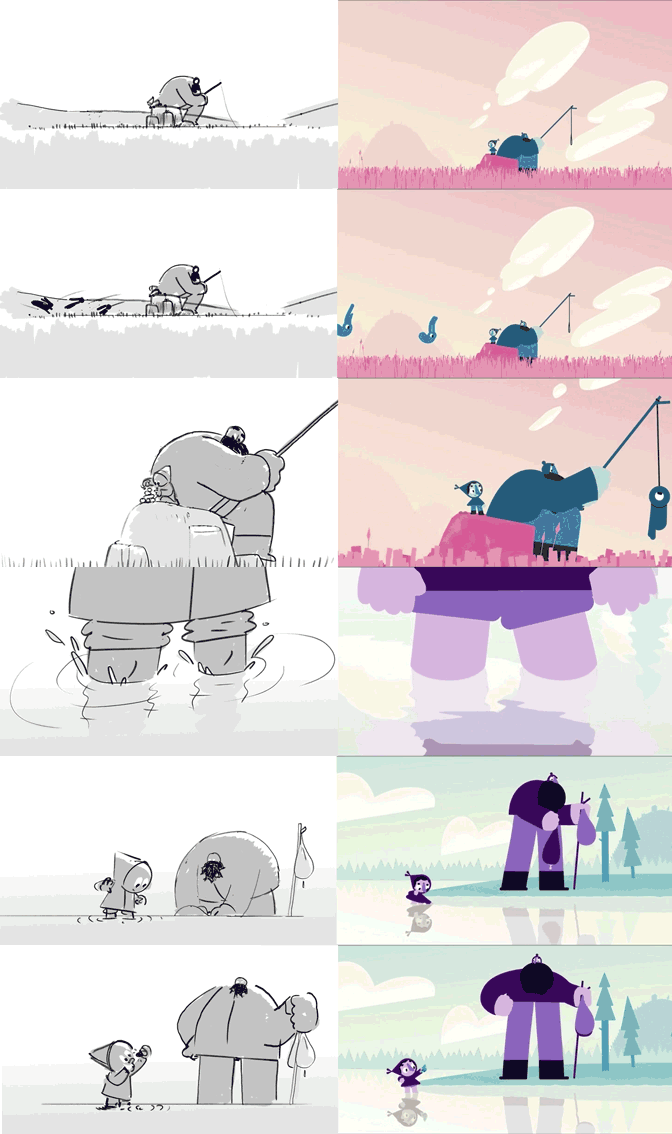 Animatic vs Animation
Animatics are created by playing a series of images in order and adjusting the timing for each frame. Timing changes are used to create a sense of pace.
You can create an animatic in Photoshop, After Effects, or in a specialist animatic software, like Boords.
Transform your storyboard into an animatic in a single click
One workspace for storyboards, animatics, comments, and approvals. Spend time on the creative, not the back-and-forth.
Why are animatics used?
1. To create consensus
The animatic may be the first time your teammates or clients see what you've been working on. It's the perfect time to gather feedback and make changes before you begin the video editing process.
2. To make quick changes
An animatic should be seen as a work in progress, rather than a polished piece of art. It's much easier to scrap a scene or character at this point rather than later in the production process. With an animatic to hand, you'll save a lot of time and heartache down the line.
3. As a benchmark
Once you move into the production phase, your animatic can be used as a benchmark to refer back to. As an animator, it can be tempting to get lost in the details, but with your animatic as a stable reference point, it'll be easier to stay on track. The animatic should act as your North Star.
What software should I use?
Historically, animatics were made by filming still images, then editing that film to the required length for each scene. Things have moved on, and now they're created using a dedicated animatic software.
If you've already made your storyboard in Boords, open the animatic player to work with the same frames and notes. You can send the timed sequence into After Effects, Premiere Pro or DaVinci Resolve later without installing a plugin.
If you're not using Boords, you'll need to choose some software. Many people use an editing program like Photoshop or After Effects for making animatics. Both of these are more than up to the task. That said, the complexity of both tools means there can be quite a learning curve if you choose to go down this route.
How to create an animatic in Boords
| Step | What to check |
|---|---|
| Gather images | One frame for each shot or beat |
| Open the animatic | Frames play in the right order |
| Add audio | Dialogue and sound cues match the sequence |
| Set timings | Every action and title has enough screen time |
| Review | Feedback refers to the right frames and version |
| Export | MP4 for playback, or a timeline for After Effects, Premiere Pro or Resolve |
Step 1: Round up your images
You'll need images to make an animatic. Animatics are made using sketches or 'scamps' - rough versions which indicate what's happening in a frame. Your images just need to convey action within each scene. Generally, these are the same images used at the storyboarding stage.
Remember, the goal of your animatic is to create a rough version of your final piece, not the final piece itself. Avoid using 'finished' images. Focus on timing, not visual detail. There'll be plenty of time for that later.
In Boords, upload your own images, reuse assets, or draw in the frame editor. For icons and illustrations, open Editor → Elements → Icons to browse the Boords Icon Library. You can also generate images if you need a starting point.
Step 2: Convert to animatic
Both storyboards and animatics use the same images, but there are some fundamental differences between the two. Unlike a storyboard, animatics usually have subtitles, varying frame lengths and an accompanying audio file or soundtrack.
Open a frame and choose the Animatic tab, or use the monitor-shaped animatic button in the storyboard toolbar. The player uses your existing storyboard frames; you do not need to make a separate copy.
Play through the sequence once before adjusting it. Check that the shot order makes sense and that there are no missing images.
Step 3: Add audio
An audio track can be considered the pillar of an animatic. It adds depth to the piece and gives the viewer a feel for how the finished production will flow. The audio track could be in the form of a voiceover, background track or other specific sound effects.
Choose Add audio track in the animatic player to select a file from your computer. Use the waveform to line up visual changes with dialogue, music, or sound cues.
Step 4: Time it out
If you've added a voiceover or soundtrack, that will define the length of your animatic. Equally, you might have a pre-defined length. For example, videos for social media often have to be made to a given length.
Once the overall length is determined, you can begin setting the duration of each frame in a process known as timing out your animatic.
Drag the frame boundaries on the timeline to adjust the timing. Roll edit moves the boundary between neighbouring frames without changing the sequence's total length. Ripple edit shifts later frames when you change a frame's length.
Use the waveform to match cuts to the soundtrack, then play the whole sequence. Leave time for viewers to read text and understand each action.
Step 5: Share for feedback
An animatic's strength is in its flexibility; they are not finished pieces. Therefore, it's easier to cut sections of your film based on feedback. If you have committed time and energy into creating a finished animated movie, cuts like this are harder to make.
The in-built commenting feature in Boords makes the process of gathering frame-specific feedback much more manageable.
At this point, your animatic should be right on track for feedback.
- Open Share storyboard in the storyboard header.
- Choose Review link and copy the URL.
- Check Allow comments, then send the link to your reviewers.
Reviewers can add comments to specific frames. Use the sharing settings to control access and review permissions.
Step 6: Export for playback or production
An animatic is a stepping stone. When you're happy with the timing of your film, you'll want to move into production. Your animatic then becomes the reference for your final film.
Check your film's timing before production
One workspace for storyboards, animatics, comments, and approvals. Spend time on the creative, not the back-and-forth.
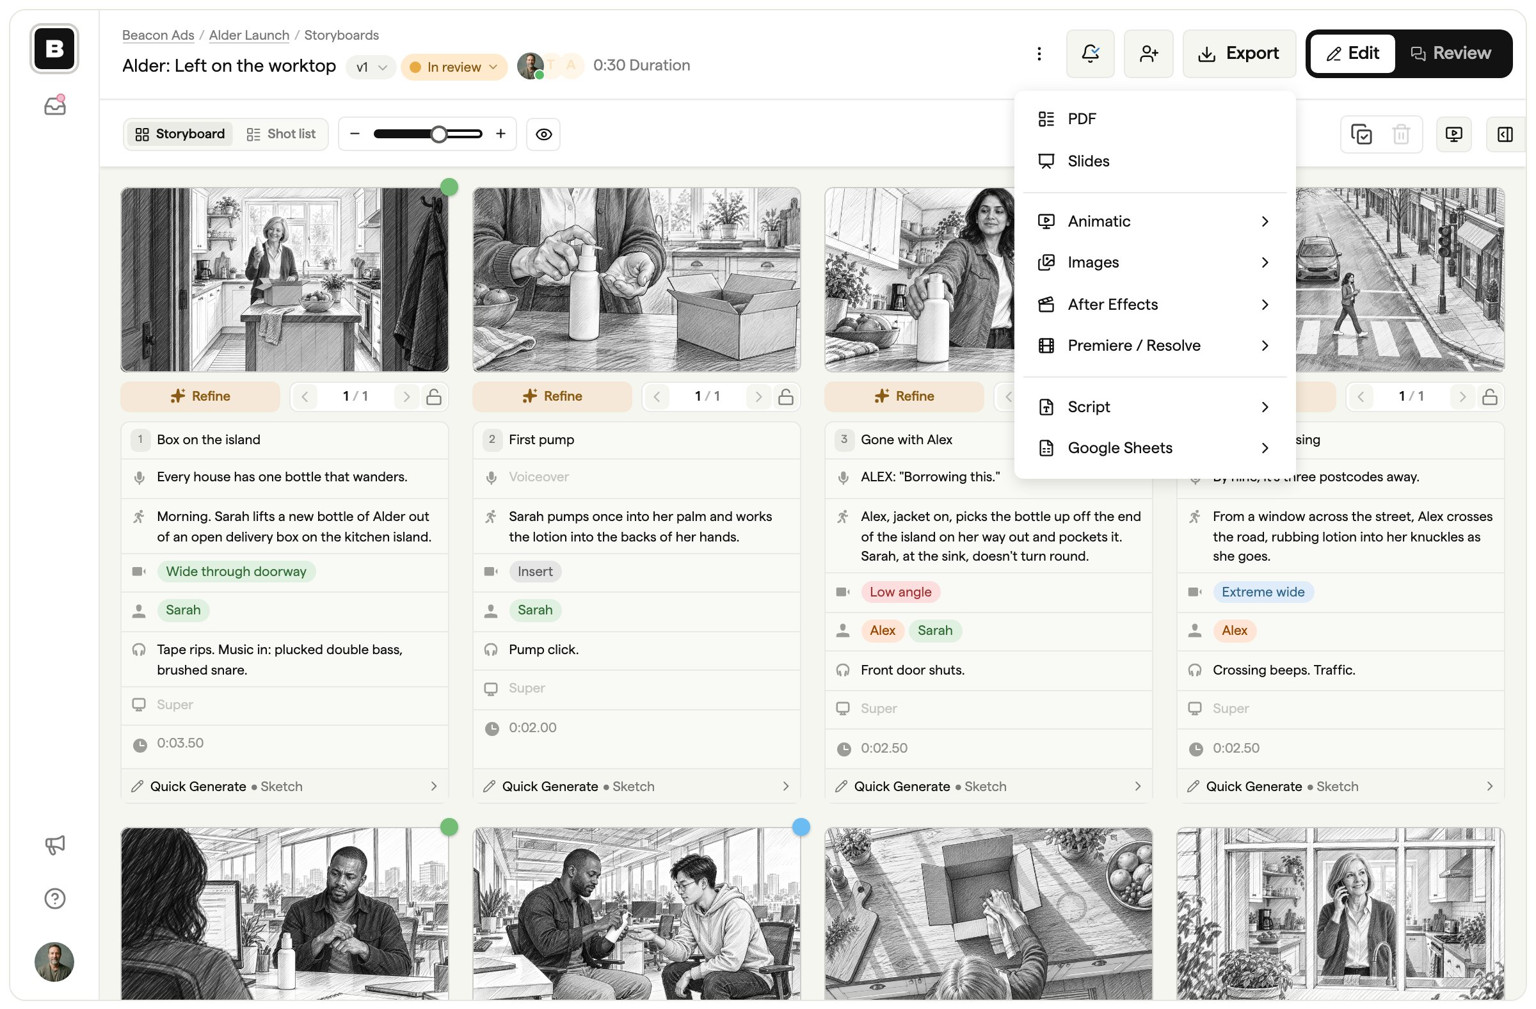
For a video you can play outside Boords, open Export → Animatic and click Start a new render. Boords renders the MP4 in the background, and a Download button appears in the same panel when it is ready. See export formats for the current options.
To continue in After Effects, choose Export → After Effects → Download AE project. Boords emails you a link to a ZIP containing the images, export data, your soundtrack if you have one, Open in After Effects.jsx, and a README.txt. The link works for 24 hours.
Unzip the download and keep the files together. In After Effects, choose File → Scripts → Run Script File and open Open in After Effects.jsx. It builds a composition with frame timings, notes, and your soundtrack, if you have one. Choose File → Save afterward, and keep the linked asset folder with the project. No plugin installation or restart is needed. See the After Effects export guide for the full steps.
To start the edit in Premiere Pro or DaVinci Resolve, choose Export → Premiere / Resolve → Download XML timeline. Boords emails you a link to a ZIP with an XML timeline, the frame images, your soundtrack if you have one, and a README.txt. The timeline runs at 25fps with every frame at its Boords timing and a marker holding each frame's notes. See export formats for the import steps.
Timing and handoff template
Download the animatic timing and handoff template (.txt). Copy a shot block for each frame, then record the visual action, sound cue, duration, and feedback to resolve. It also includes an After Effects handoff checklist.
Before exporting, check:
- The sequence plays through with the intended sound and pacing.
- Titles stay on screen long enough to read.
- Reviewers have approved the version you are handing over.
- Your export includes the assets the production team needs.
BONUS: Tips & examples
Show character movement
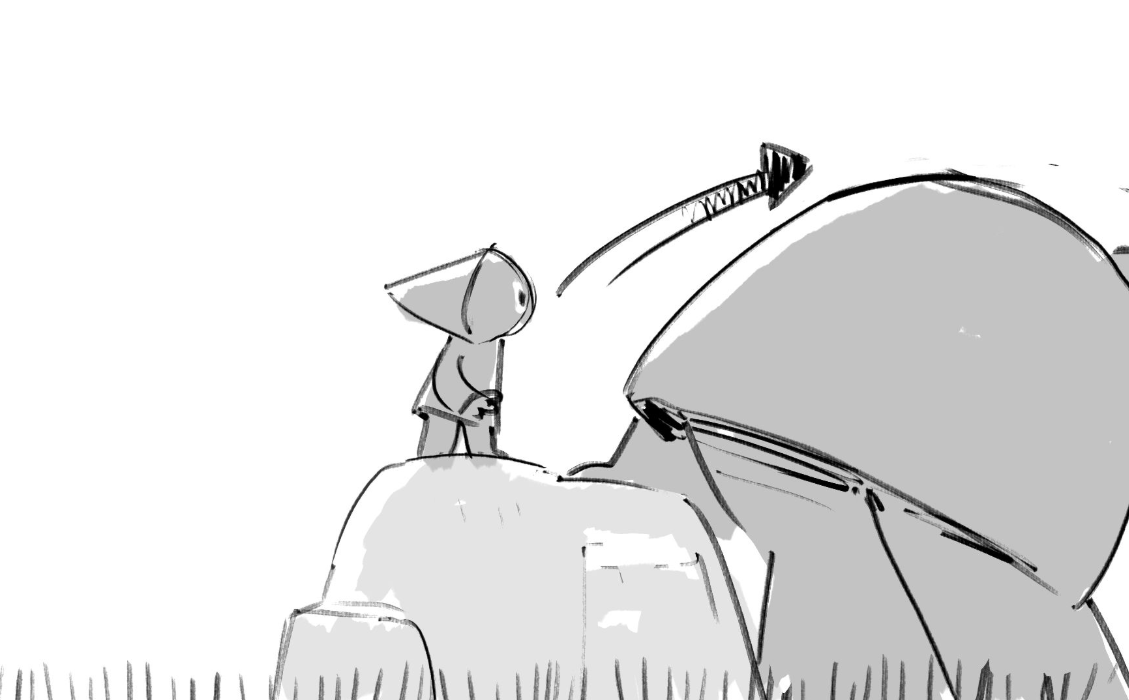
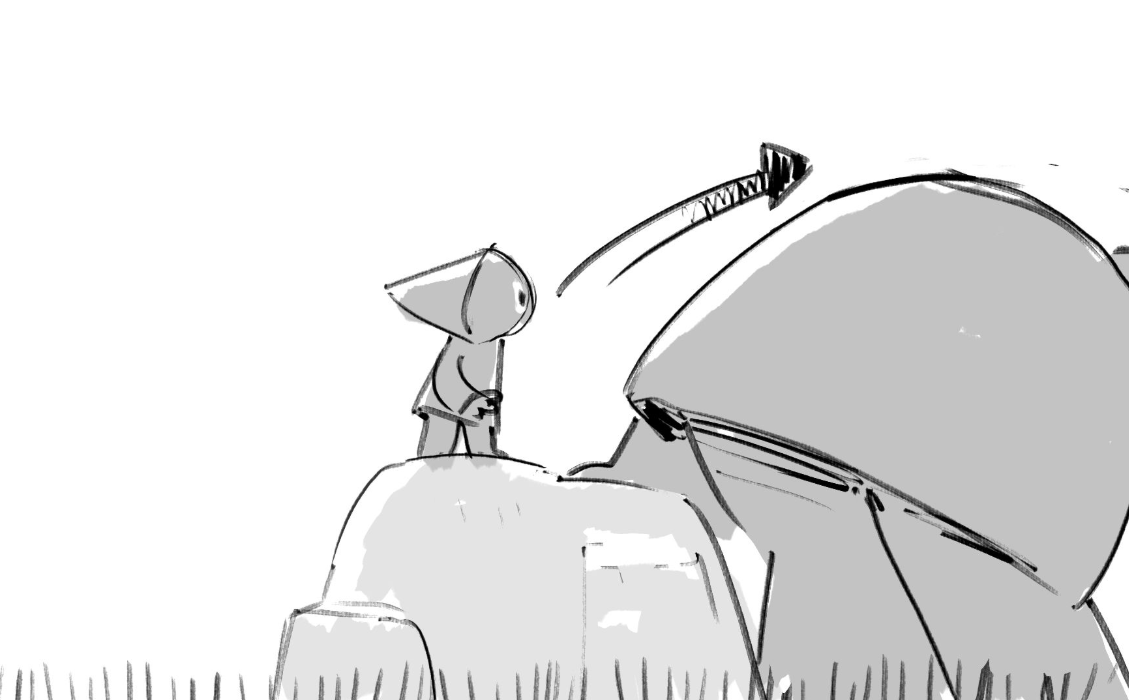
Movement within animatics is shown using arrows. For example, this frame uses an arrow to indicate the small character jumping onto the large character's back.
 Using arrows to indicate character movement
Using arrows stops you falling into the trap of animating too early. The goal of an animatic is to create a general sense of timing, so stay away from granular animation references. Arrows are your friend.
Show camera movement
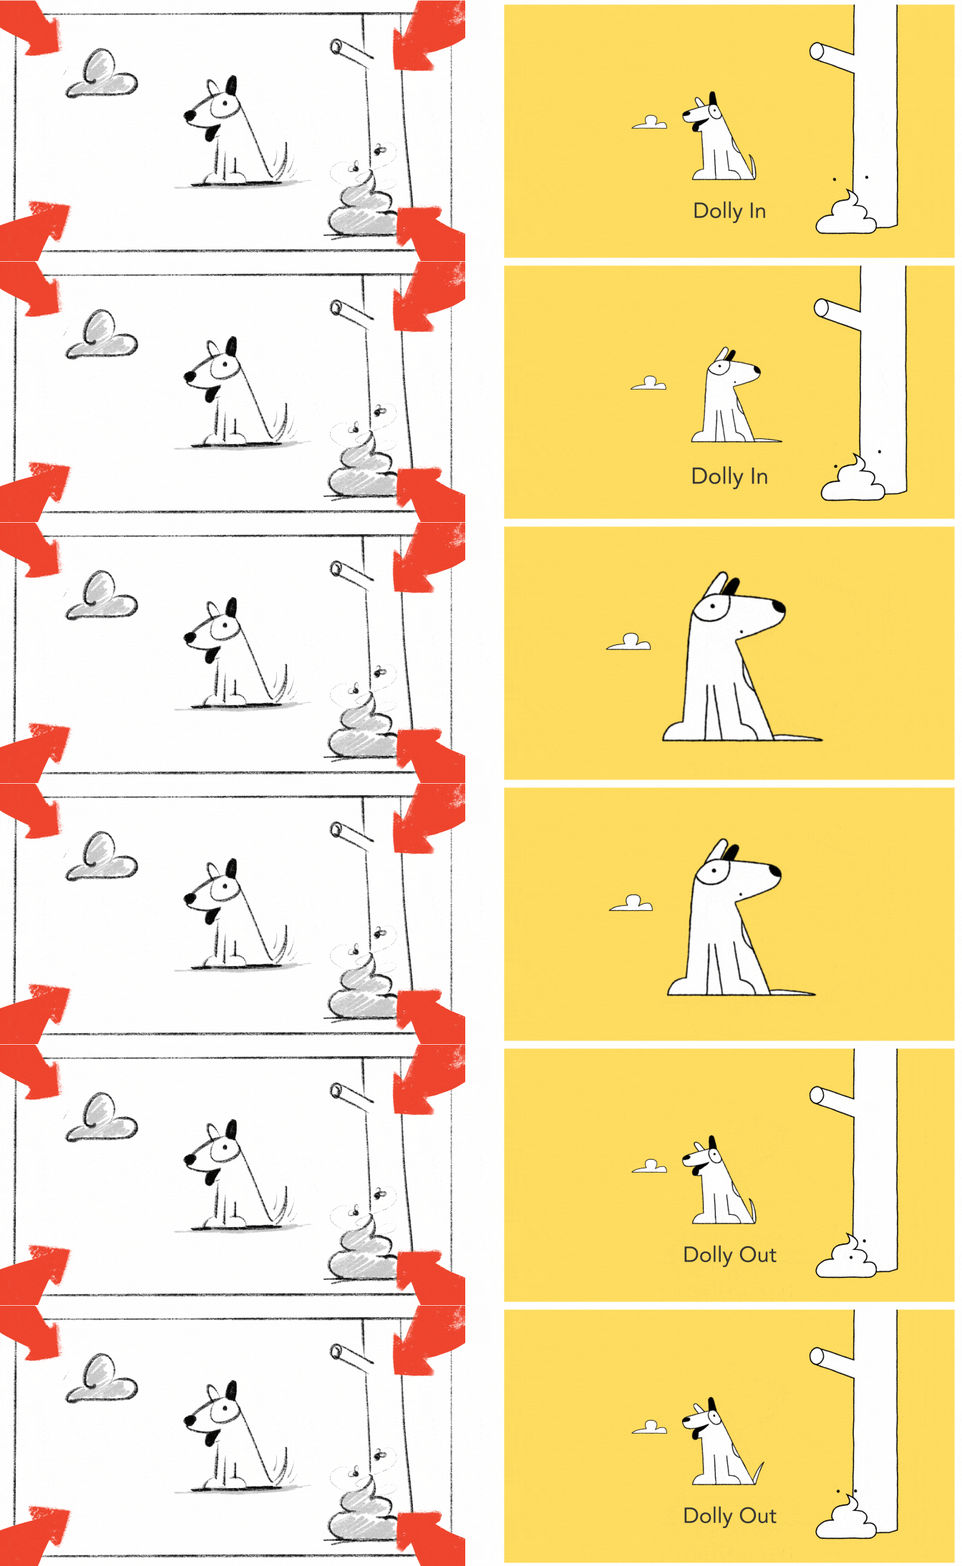
Arrows are also used to indicate camera moves, like this dolly out transition (as used in the famous Jaws scene). There is a world of directional techniques out there but use them sparingly.
 The Dolly Out transition
Give the viewer space
Some images take time to process. You may choose to use a longer frame duration if you're showing the audience a particularly complex scene. Holding a little longer on a frame will give them time to take in details they may otherwise miss.

Sharper preproduction, less back-and-forth
Workflow tips and Boords product updates for video and brand teams, twice a week.
Create animatics automatically from your storyboards.
With our online animatic maker you can add frame timings, audio, and subtitles, then hand it on as an MP4 or a timeline for After Effects, Premiere Pro or DaVinci Resolve.