
Commenting overview
Gather feedback on your frames
Gather feedback from clients and collaborators directly on your storyboard frames, keeping all your revision notes in one place.
Adding comments
You can add comments to any frame in your storyboard from multiple locations, making it easy to capture feedback wherever you're working.
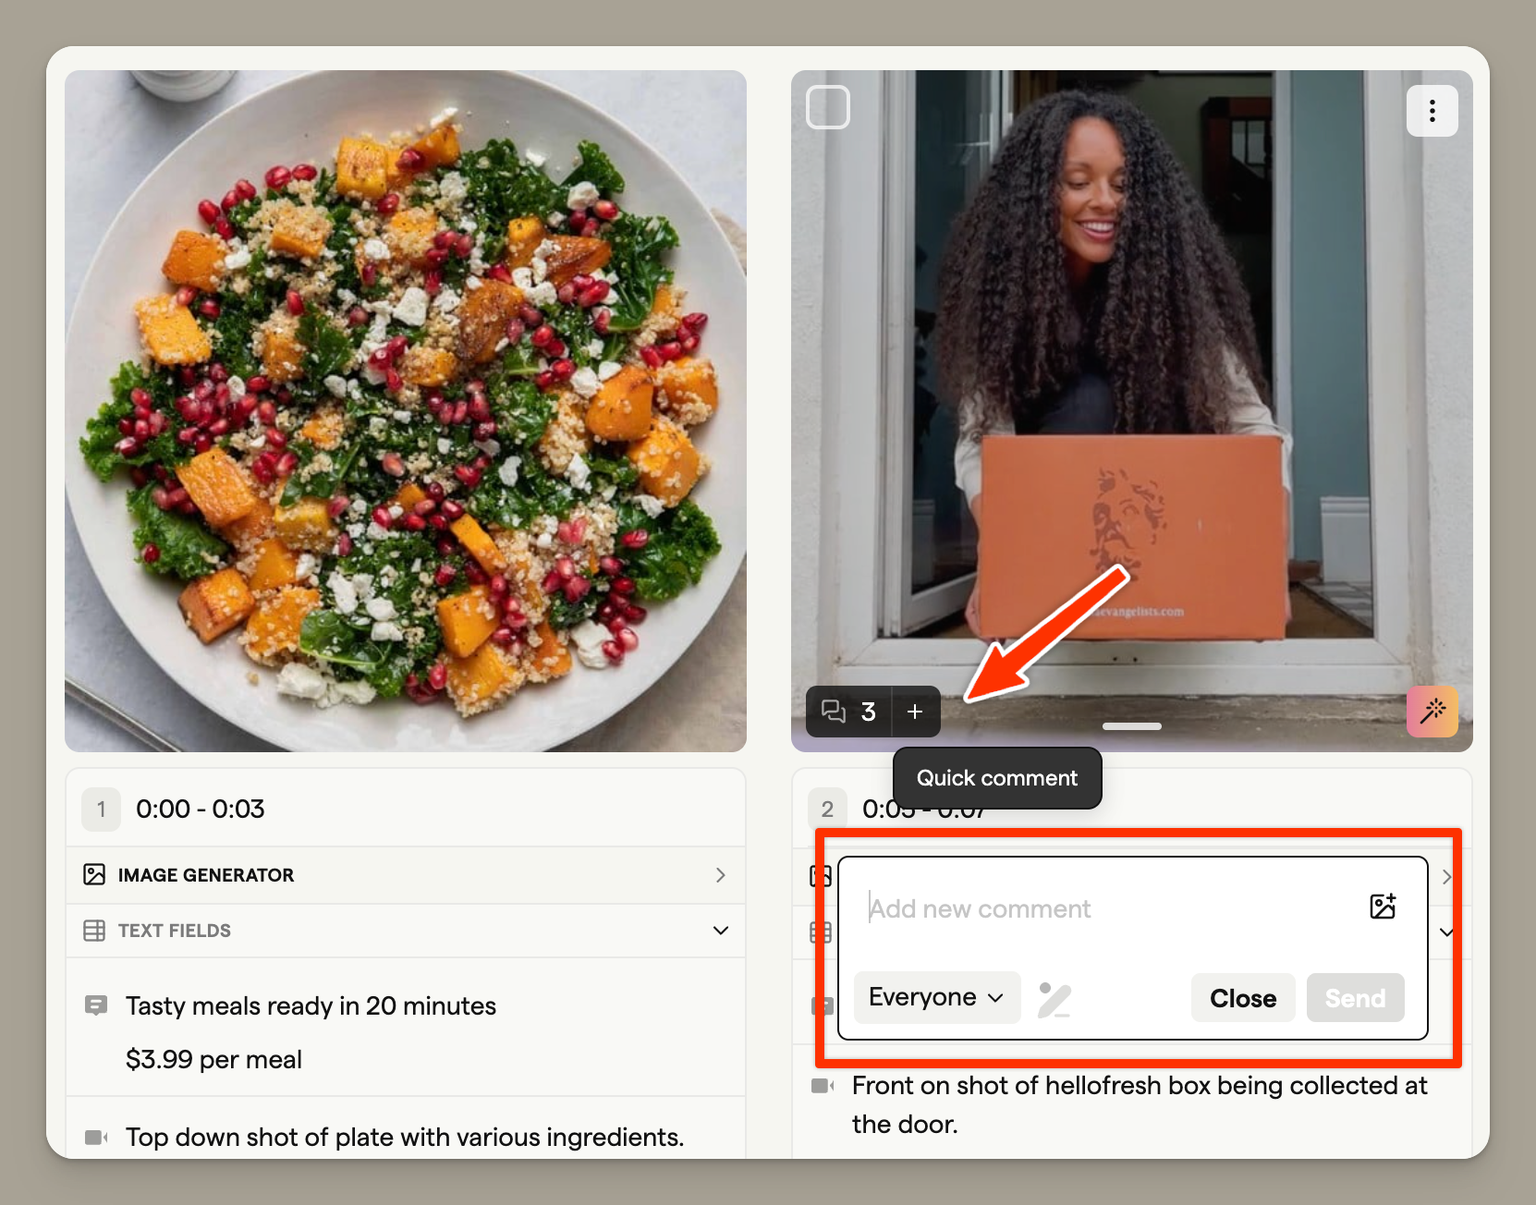
Grid view (quick comments)
Click the comment icon on any frame thumbnail to quickly add a comment without leaving the grid view. This is useful for rapid feedback sessions where you need to note changes across multiple frames.
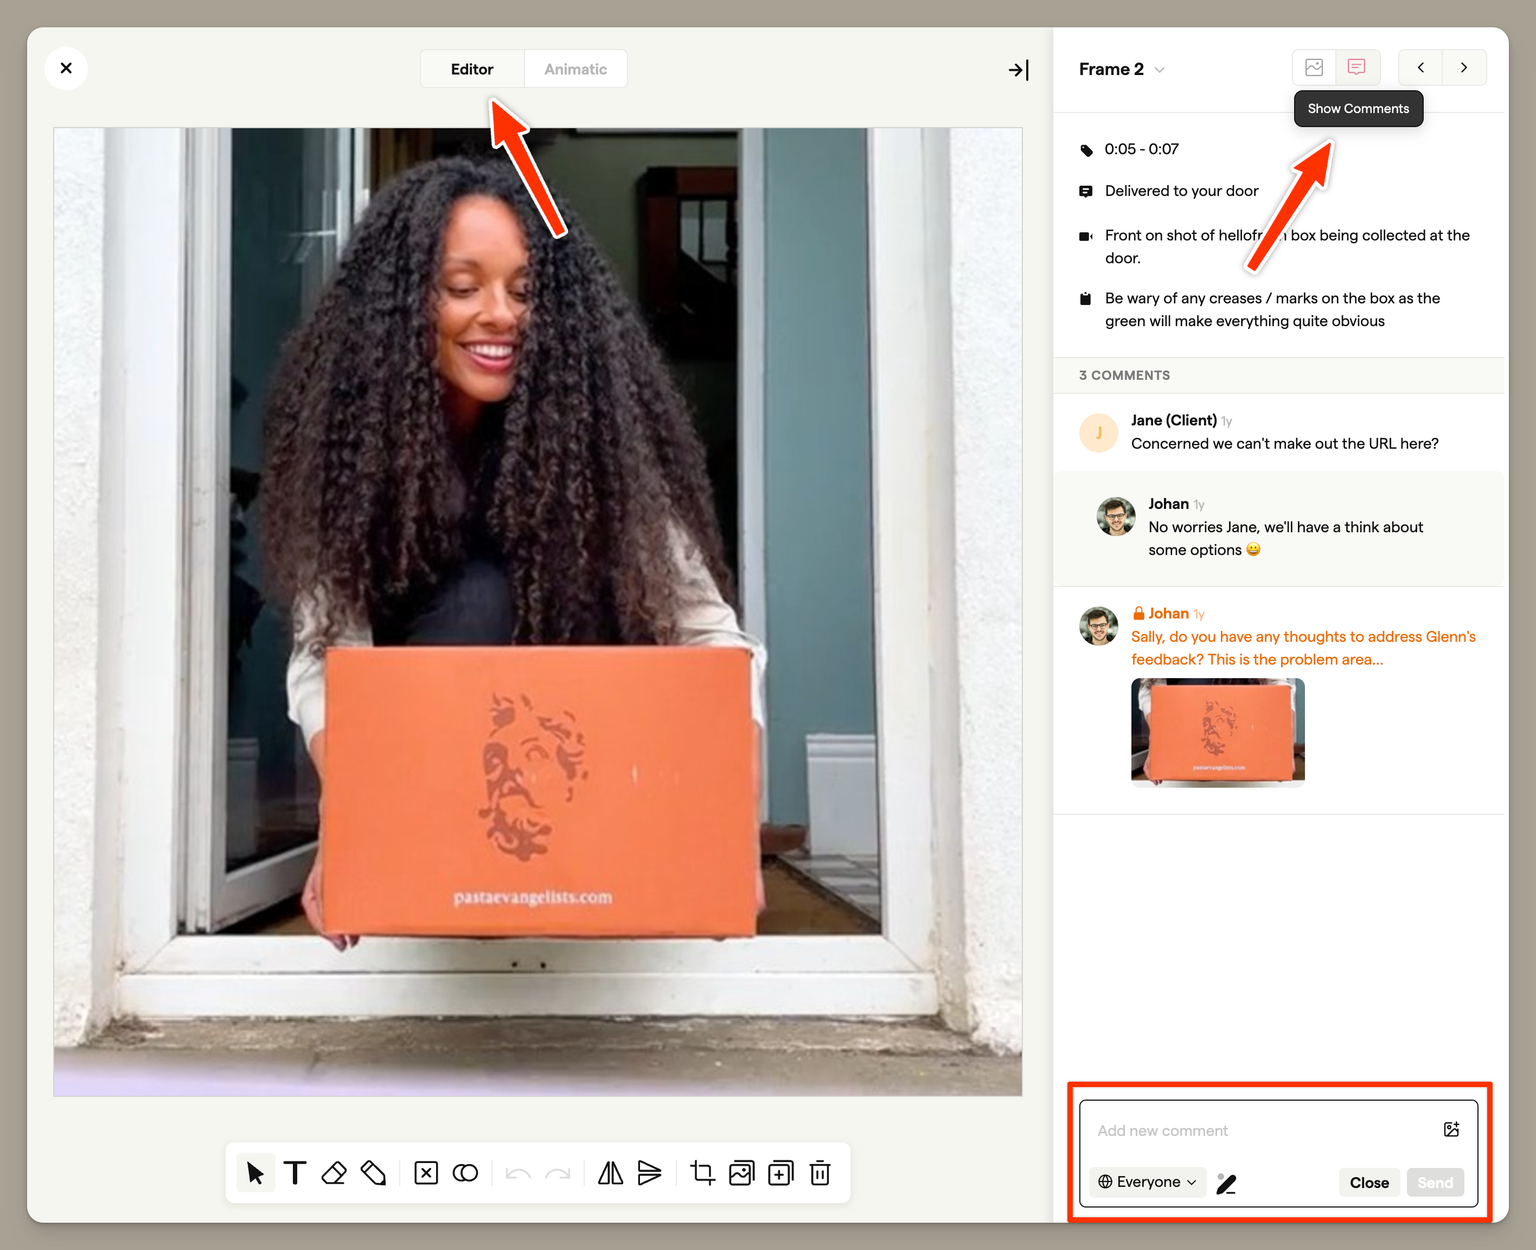
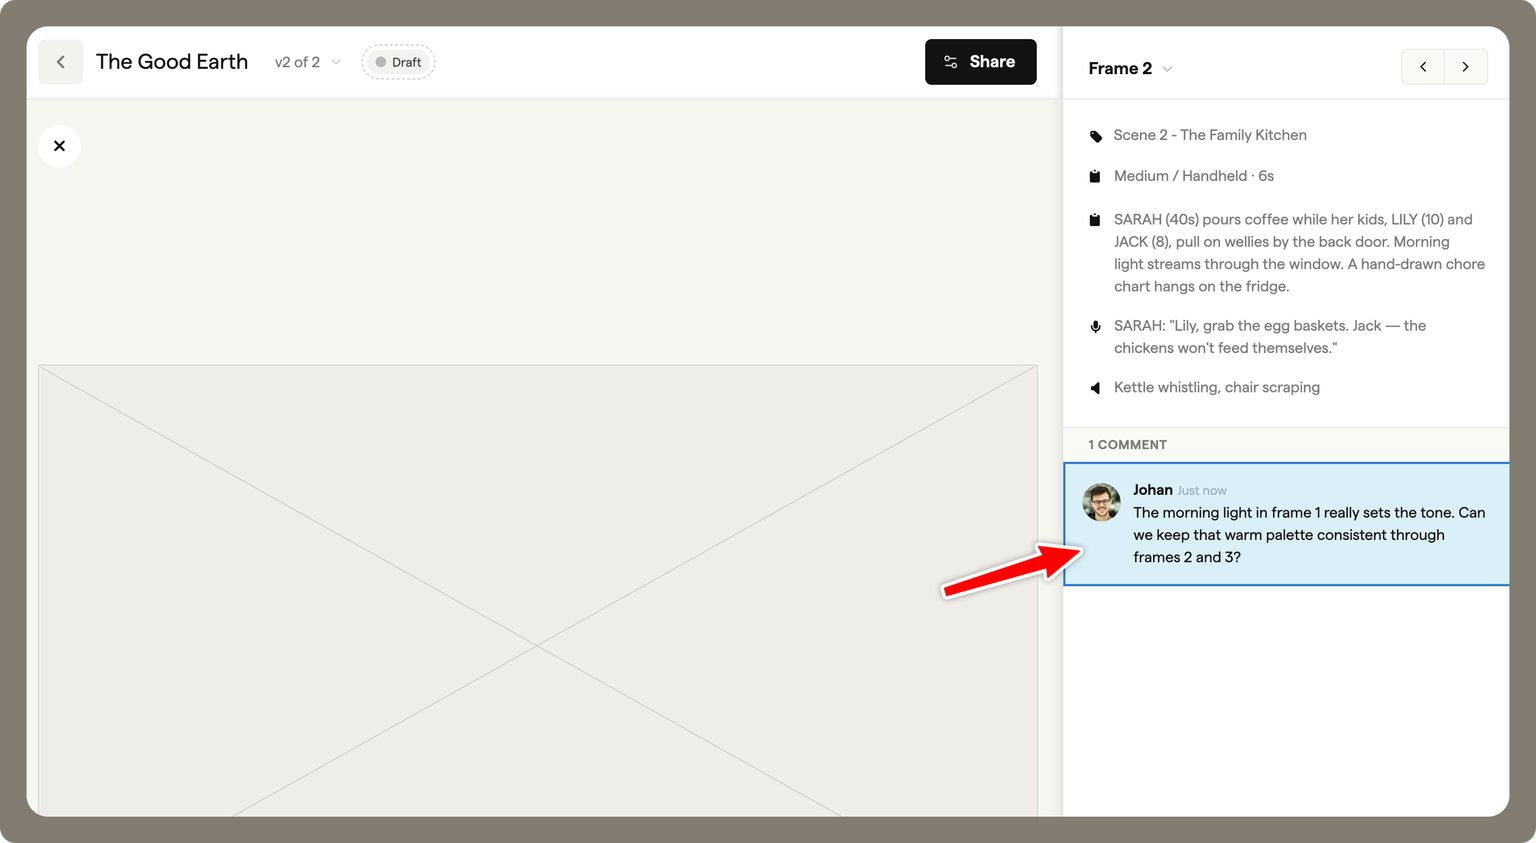
Frame editor
When editing a single frame, use the comments panel in the sidebar to add detailed feedback. This view is ideal for in-depth discussions about specific frames.
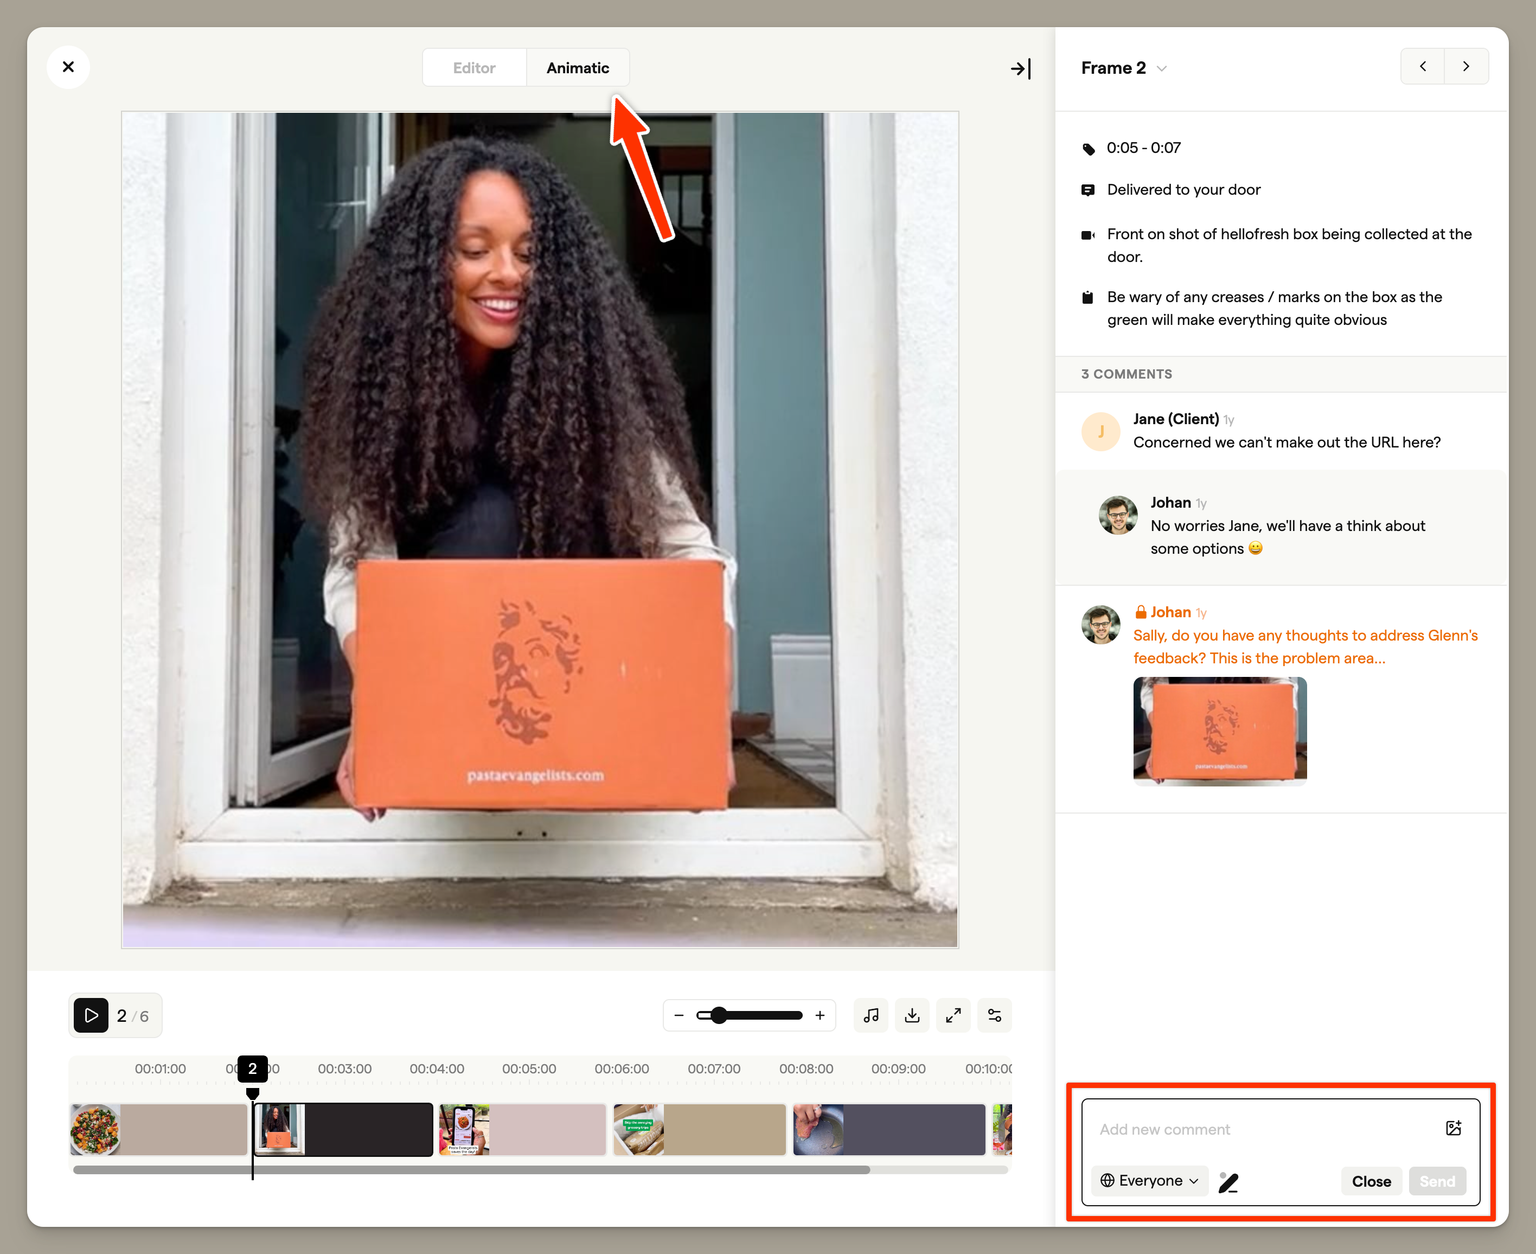
Animatic player
While reviewing your animatic, you can pause on any frame and add comments directly. This helps capture timing-related feedback during playback review.
Shareable links
When you share a storyboard with clients or collaborators, they can add comments directly on the shareable link — no Boords account required. See Guest comments for more details.
Comment features
Threaded replies
Comments support threaded replies, allowing you to have focused conversations about specific feedback. Reply threads can be collapsed or expanded to keep your comment panel tidy during busy review rounds.
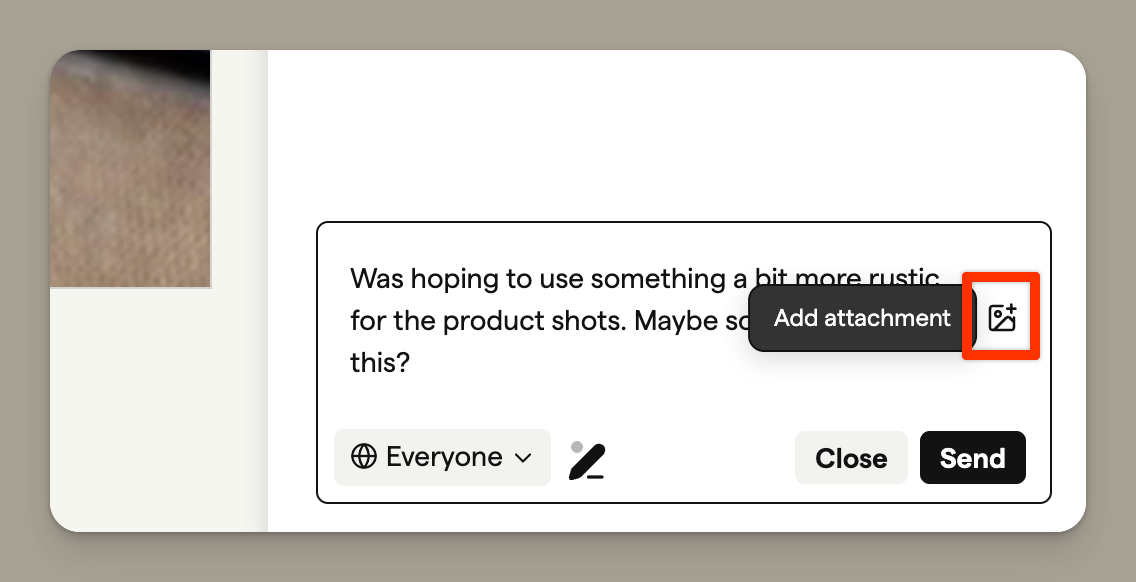
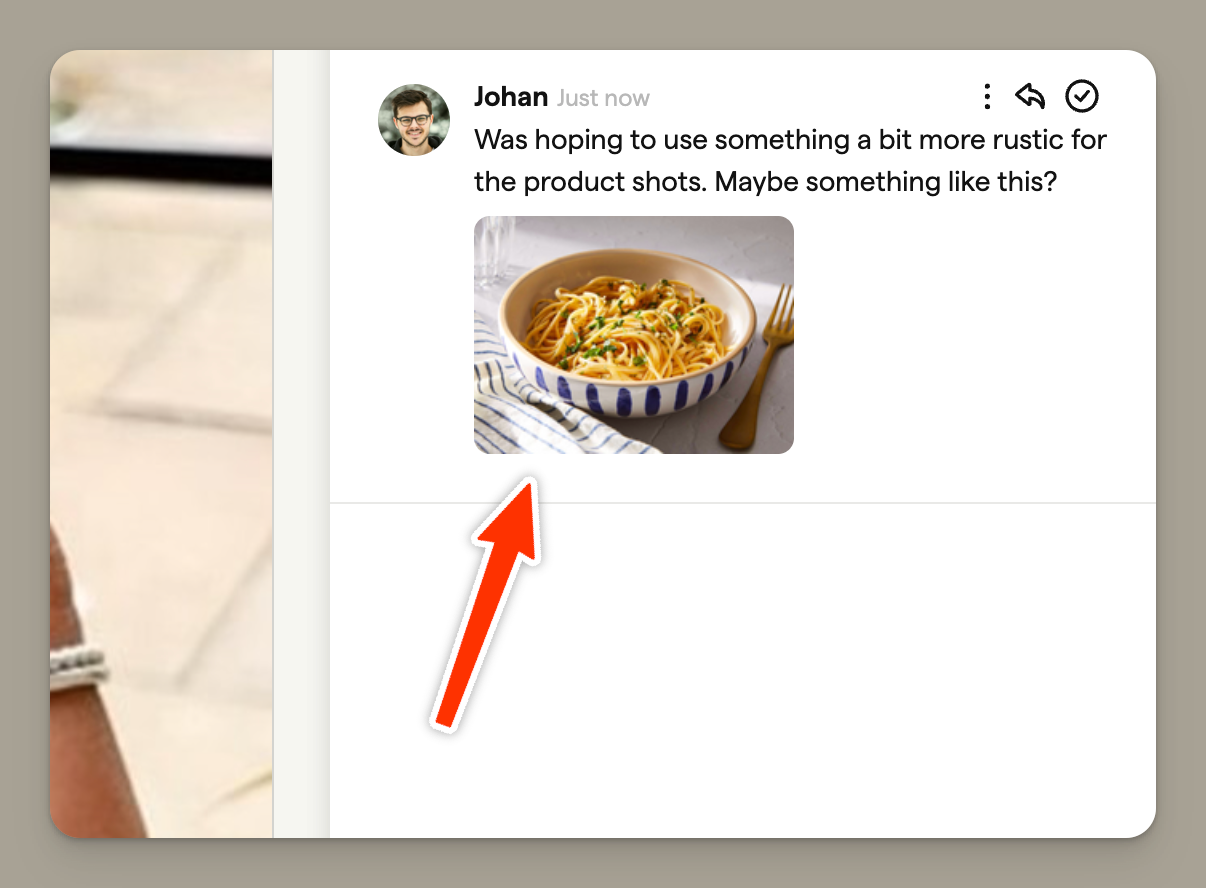
Attachments
Attach reference images to your comments to share visual references, approved artwork, or examples of the changes you're requesting.
To add an attachment, click the image icon in the comment editor toolbar before submitting your comment. You can select an image from your device or paste a URL.
Once attached, the image appears as a thumbnail preview in your comment. Other reviewers can click the thumbnail to view the full-size image.
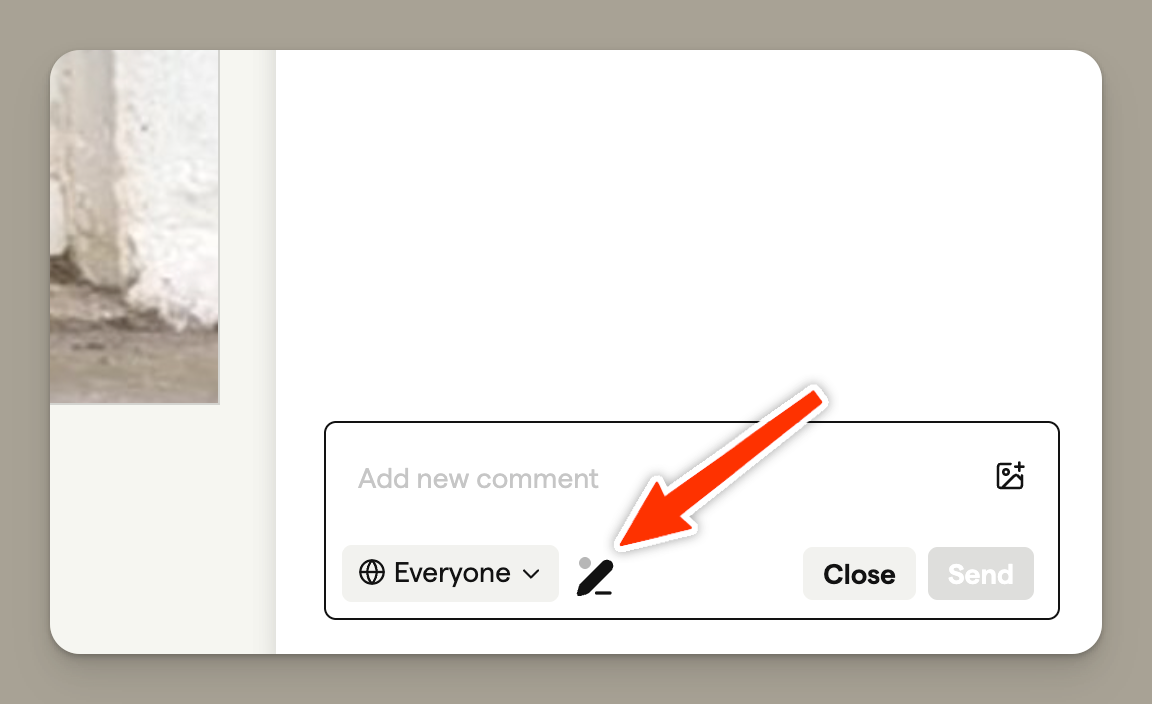
Annotations
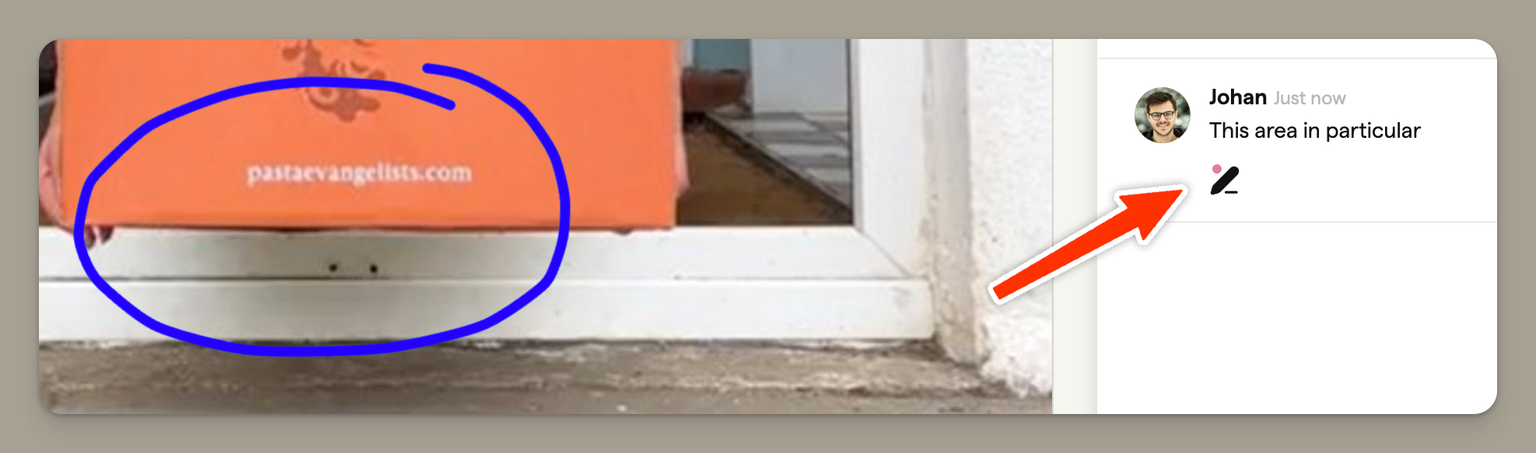
Draw directly on frames to highlight specific areas when leaving feedback. Annotations help you pinpoint exactly what you're referring to, making feedback clearer for your team and clients.
1. Open the annotation tool
Click the pen icon in the comment editor toolbar. This opens the annotation overlay on the frame.
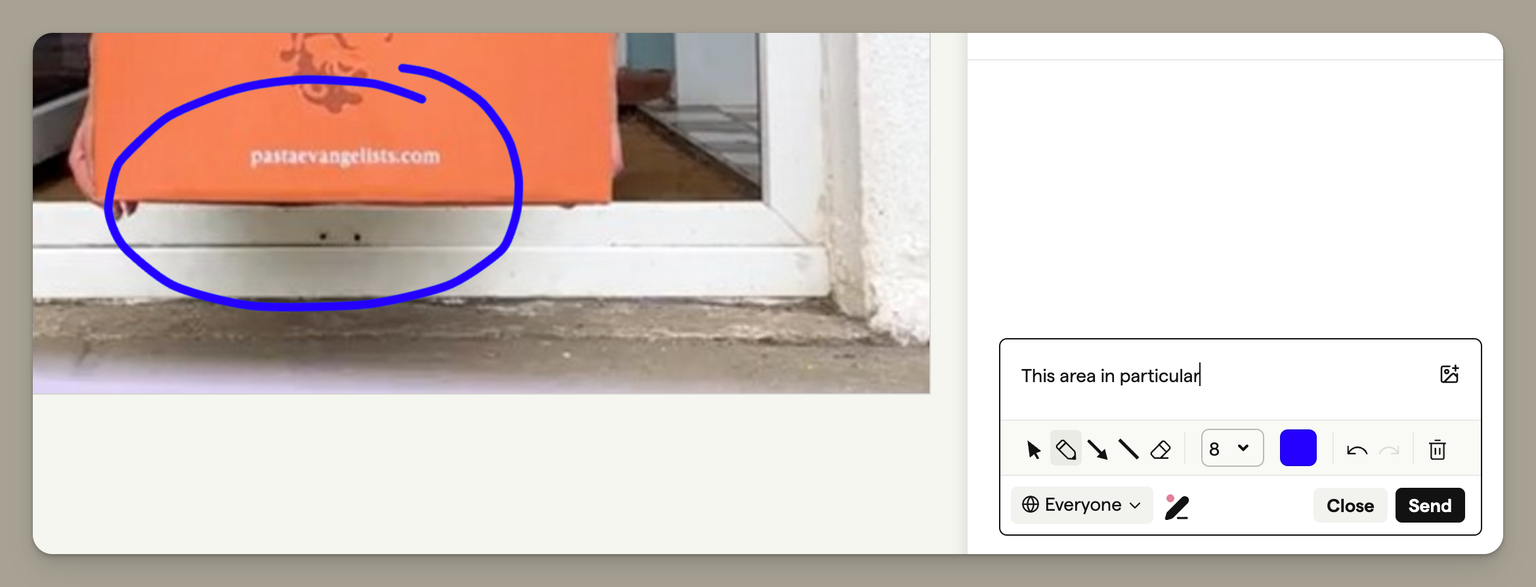
2. Draw your annotation
Once the annotation toolbar appears, use the drawing tools to mark up the frame:
- Selection tool — Move and resize your drawings
- Freehand draw — Sketch freely on the frame
- Arrow — Point to specific elements
- Line — Draw straight lines
- Eraser — Remove parts of your annotation
3. View annotations on comments
Annotations are saved with your comment. To view an annotation, click the pen icon below the comment text — this shows and hides the annotation overlay on the frame.
Team-only comments
This feature is available on the Team and Agency plans.
Keep internal notes separate from client-facing feedback with team-only comments. When enabled, these comments are only visible to your team members and hidden from guests viewing shareable links.
Team-only comments are visually distinct with an orange border and a lock icon, making it easy to identify which comments are internal.
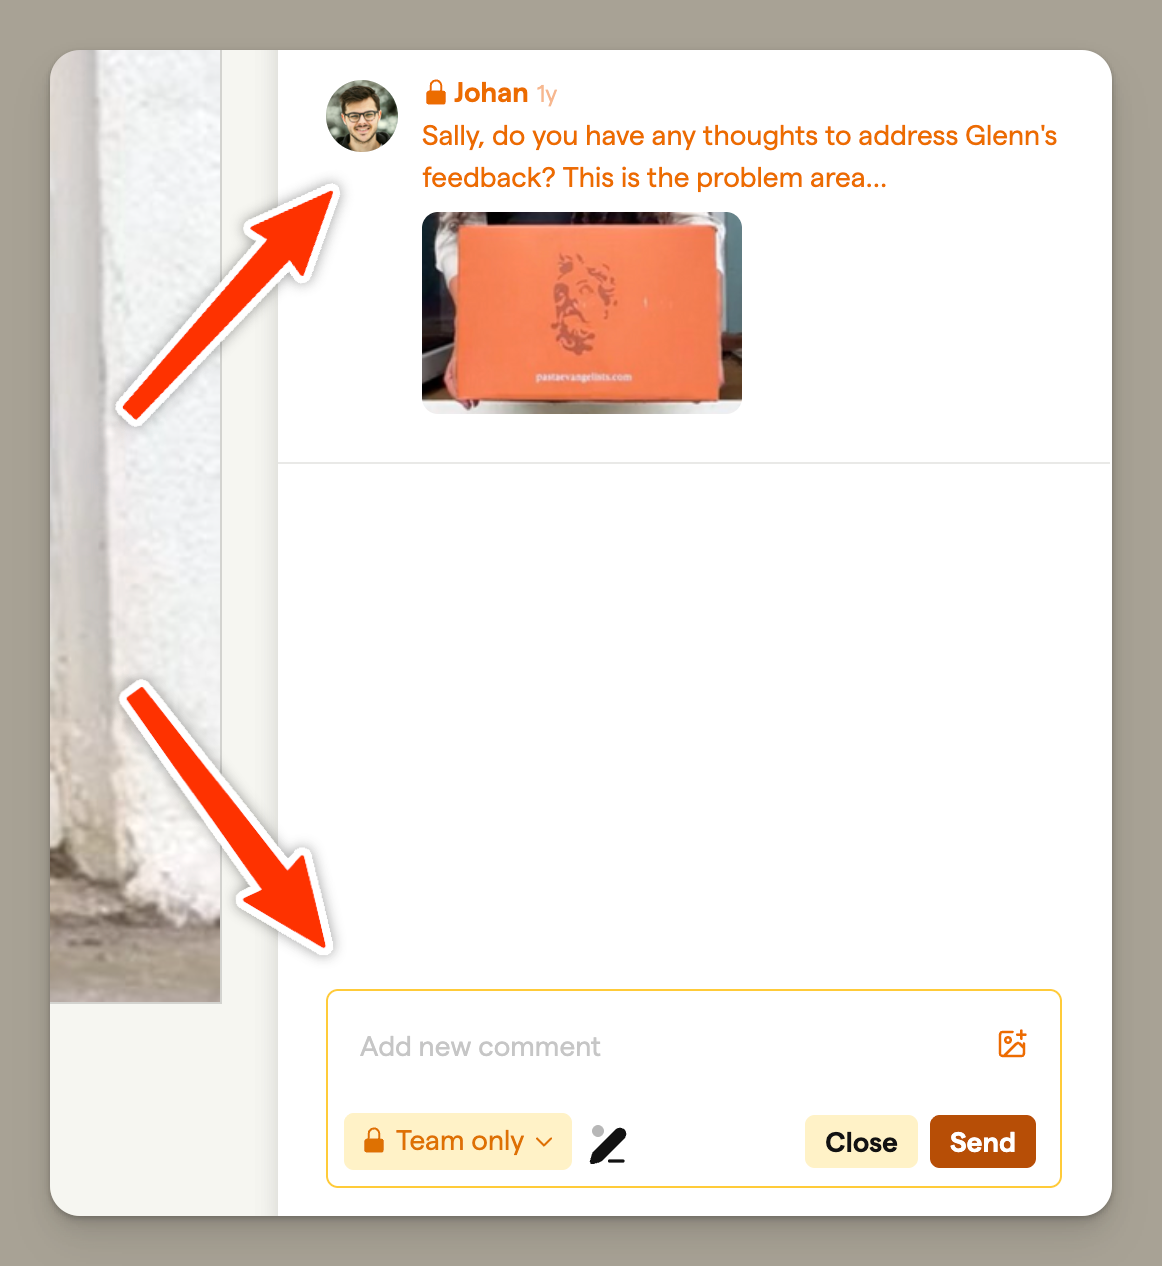
To create a team-only comment, toggle the visibility dropdown from "Everyone" to "Team only" before submitting.
@mentions and notifications
Type @ in any comment to mention a teammate. They'll get a notification in their inbox, and an email summary if they have direct attention emails turned on. See Notifications for the full picture, including how to follow storyboards, watch projects, and manage your notification preferences.
Comment links
Copy a direct link to any comment and share it with your team. Click the ⋮ menu on a comment and select Copy link.
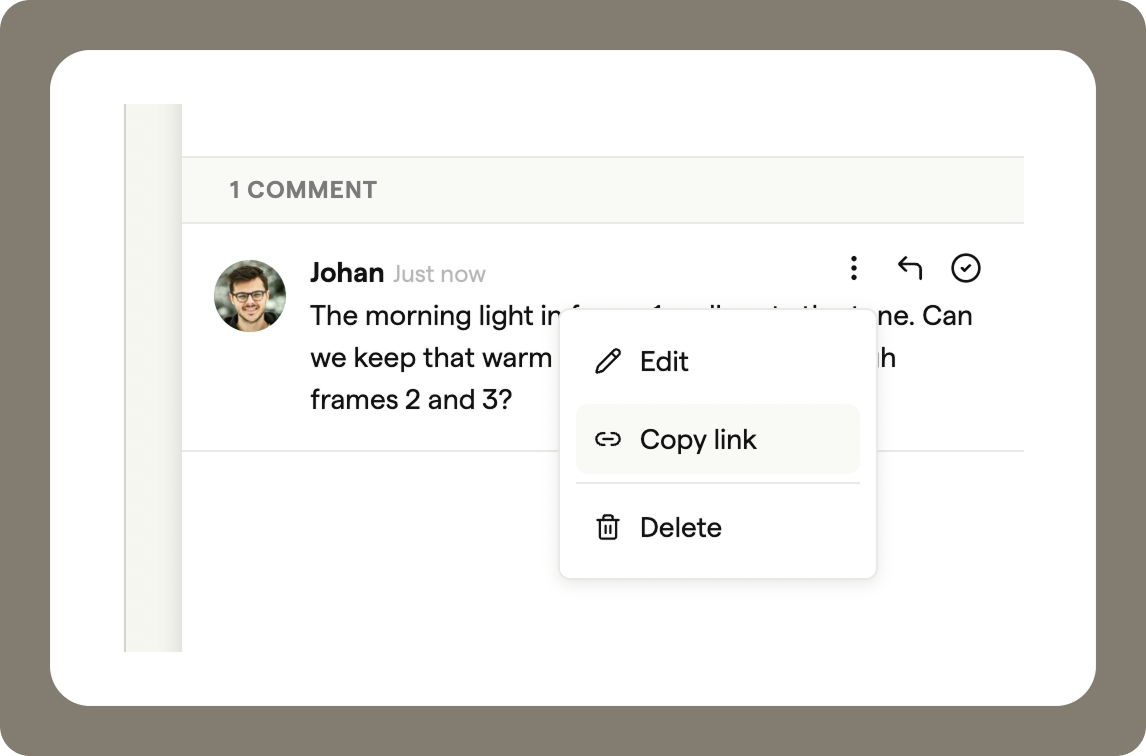
Anyone who follows the link will be taken to the same view - storyboard, editor, or shareable - with that comment highlighted.
This is useful for calling out specific feedback in a message or email without asking people to hunt it down themselves.
Managing feedback
Marking comments as complete
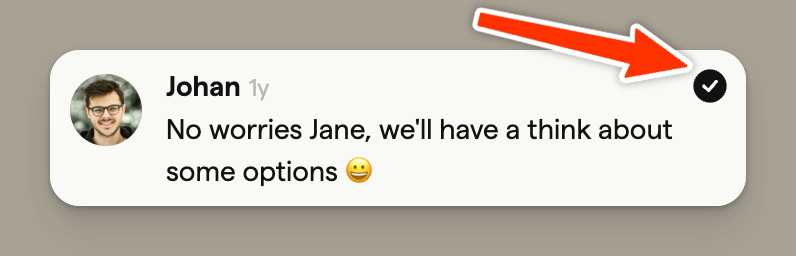
As you work through feedback, mark comments as complete by clicking the checkmark icon. This helps you track which notes have been addressed during revision rounds.
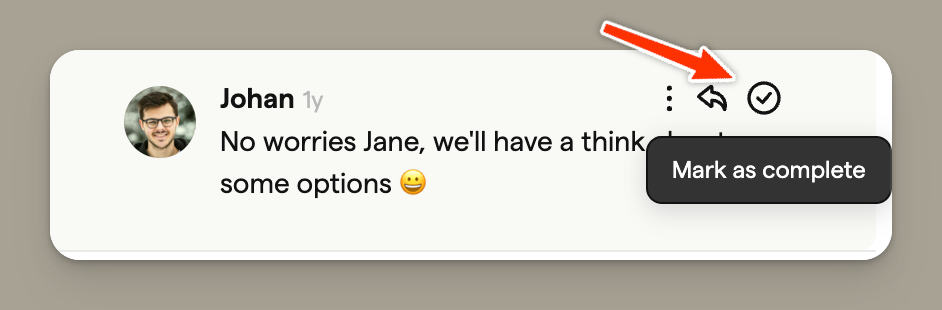
Completed comments show a filled checkmark, giving you a clear visual indicator of your progress.
Hiding completed comments
To focus on outstanding feedback, you can hide completed comments from view. Click the filter icon in the comments panel to toggle completed comments on or off.
When comments are hidden, you'll see a notice indicating how many are filtered from view. Your actual comment count remains unchanged.
Guest comments
Guest comments allow anyone with your shareable link to leave feedback without creating a Boords account — perfect for client review rounds.
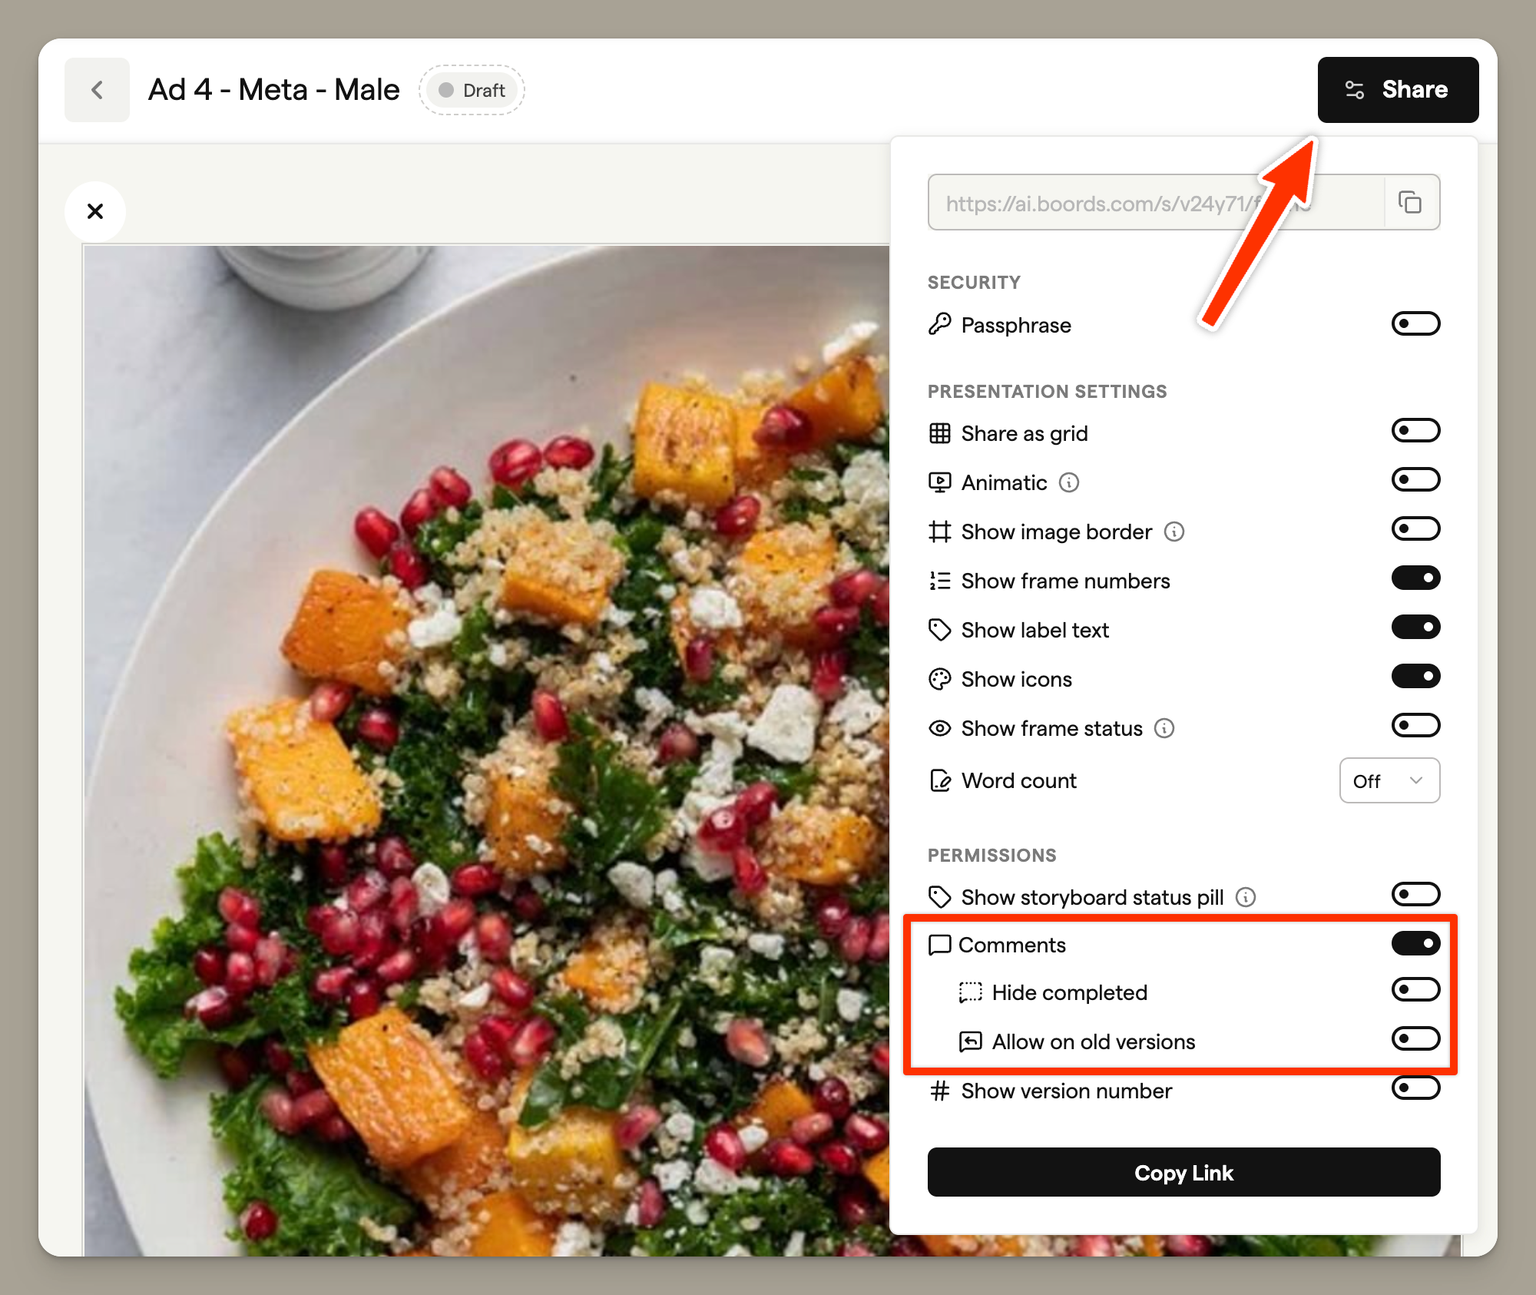
Enabling guest comments
- Open your storyboard and click Share
- In the Share panel, ensure Comments is toggled on
- Share the link with your reviewers
When guests comment, they'll be asked to enter their name, which appears alongside their feedback.
Additional shareable settings
Fine-tune what guests can see and do on your shareable links:
- Show status indicator — Display the storyboard's approval status
- Show word count — Include dialogue/action word counts
- Show version numbers — Display which version they're viewing
- Allow version switching — Let guests navigate between versions
- Allow comments on old versions — Control whether guests can comment on previous versions