Editing storyboards
Boords includes a range of tools to help you edit and manage your storyboards as they develop. You can make changes to individual frames, organise feedback, and keep track of progress as your work moves forward.
From quick frame updates to managing statuses, versions, and archived work, these tools help you stay in control as your storyboard evolves.
Frame actions
The frame actions toolbar brings common frame actions into one place, making it quicker to edit, organise, and manage your storyboard frames.
Accessing frame actions
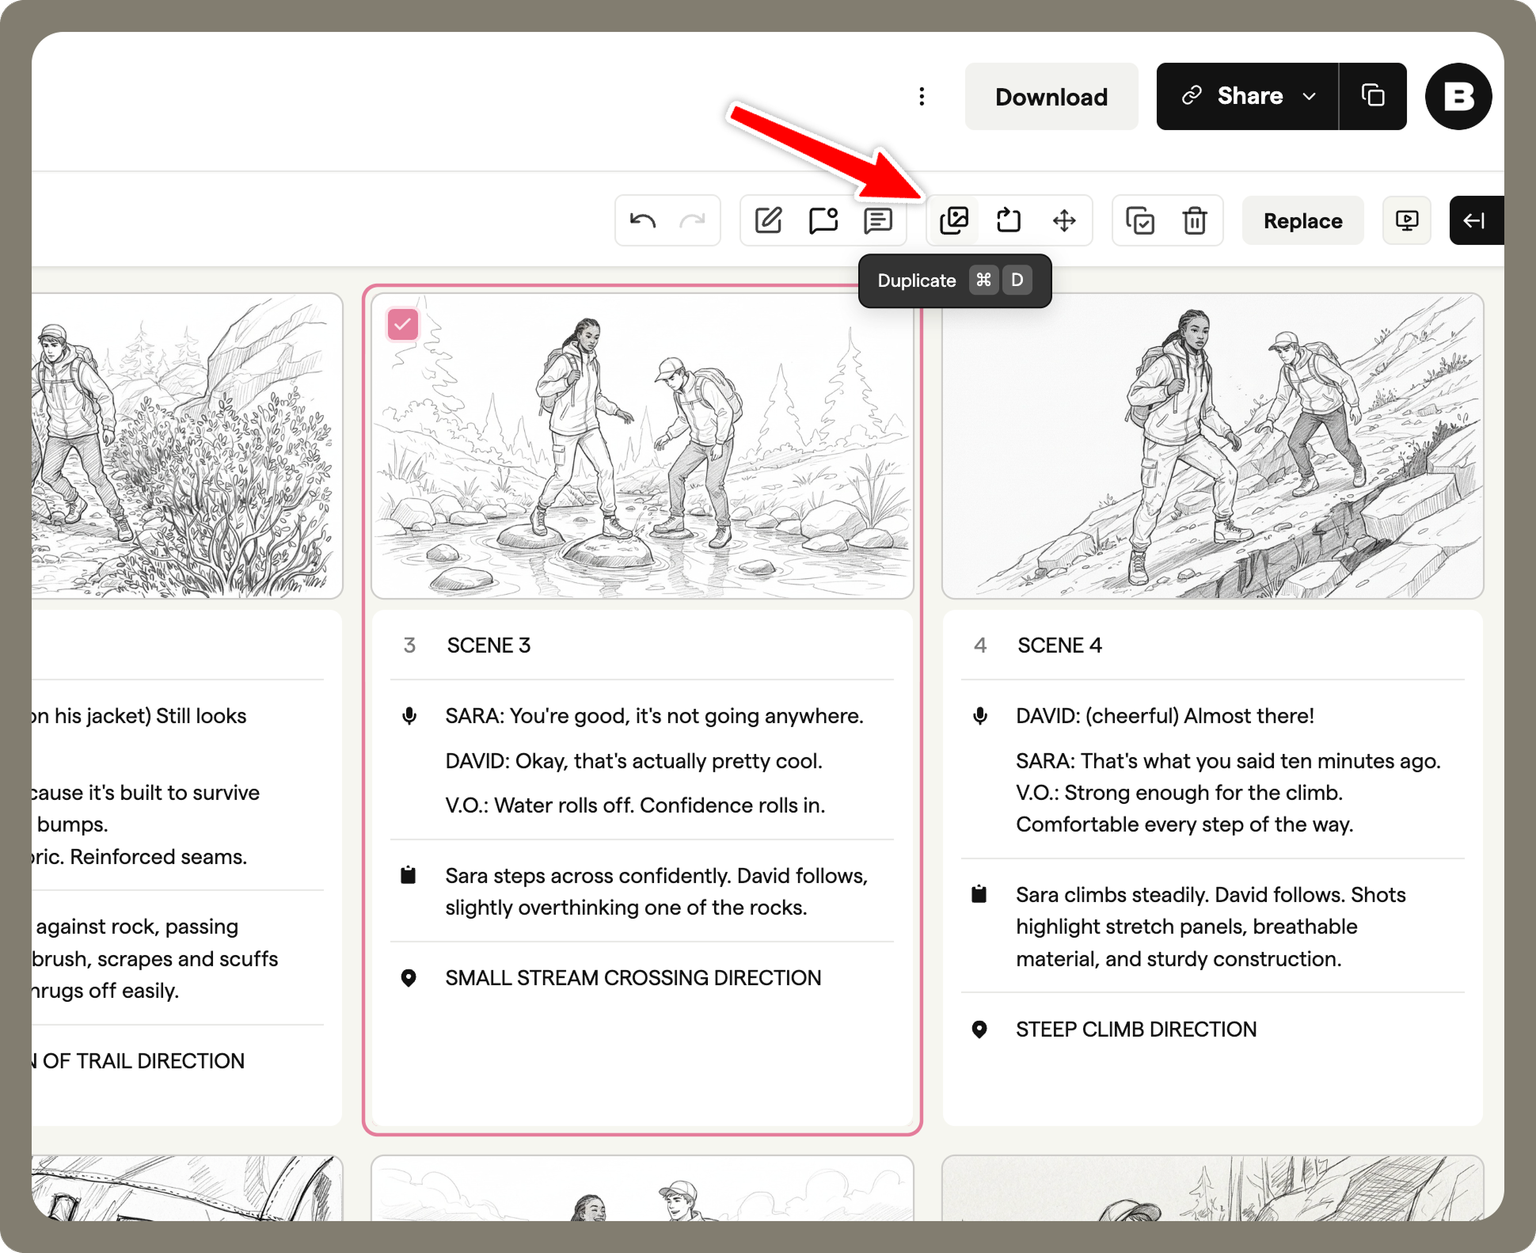
To open the frame actions toolbar, select one or more frames in your storyboard.
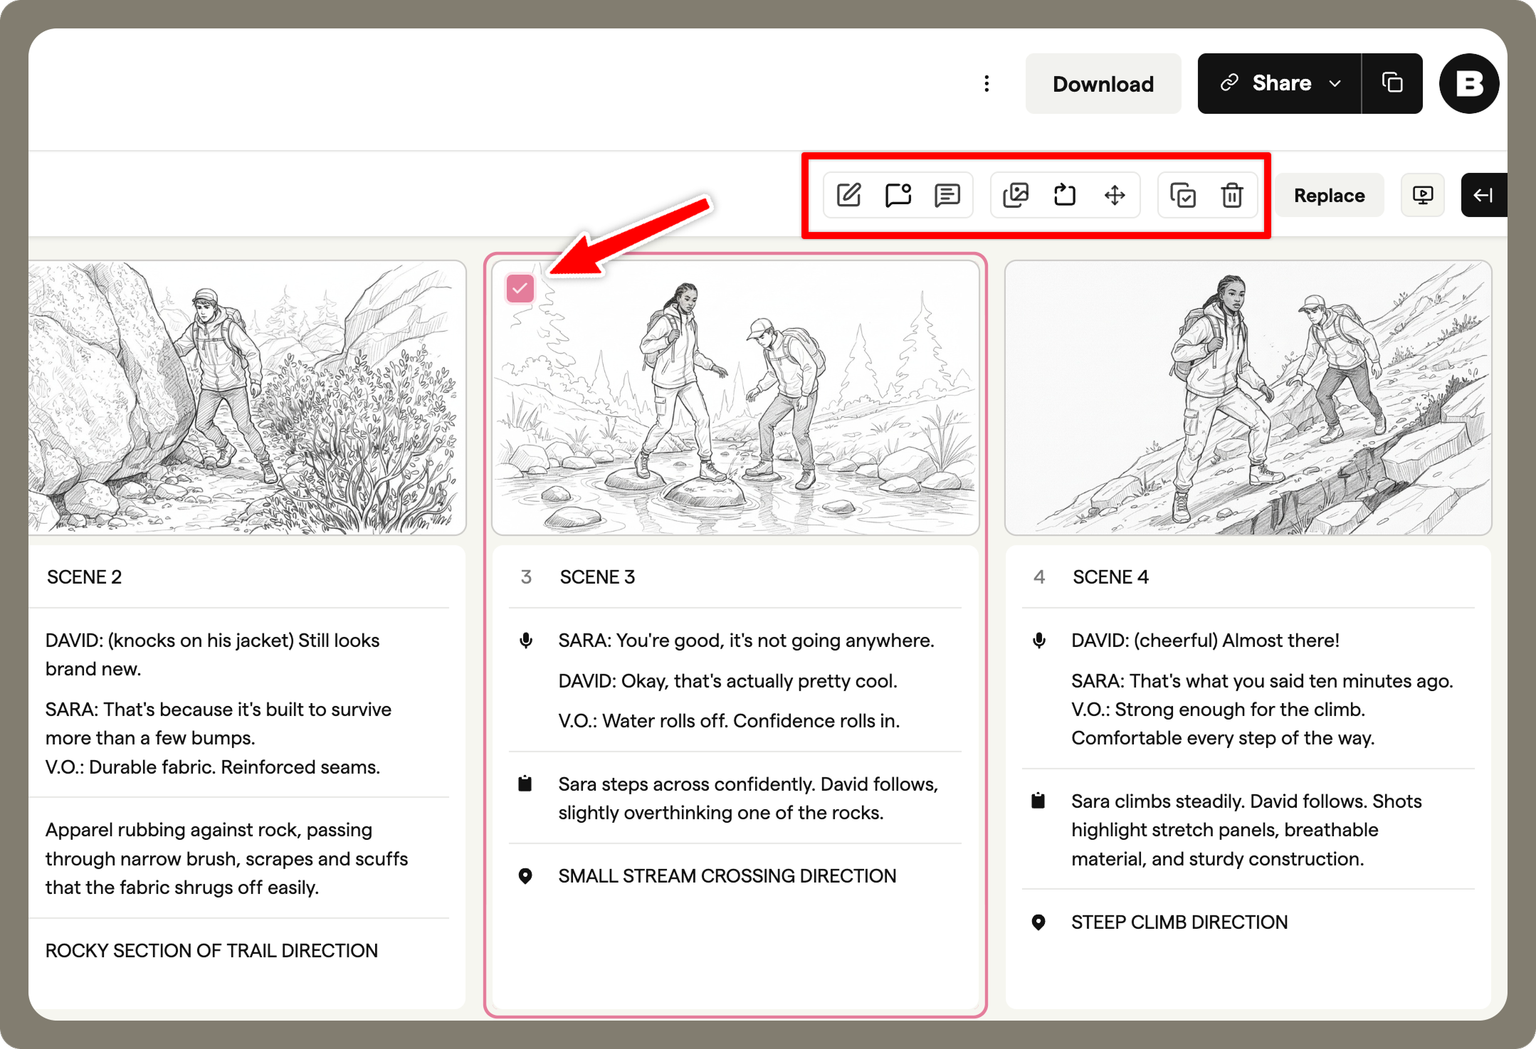
Selected frames will appear with a border around them. Once a frame is selected, the toolbar appears, showing the available actions. Some actions only appear when multiple frames are selected.
Using frame actions
The frame actions toolbar lets you perform a range of actions without leaving the storyboard view.
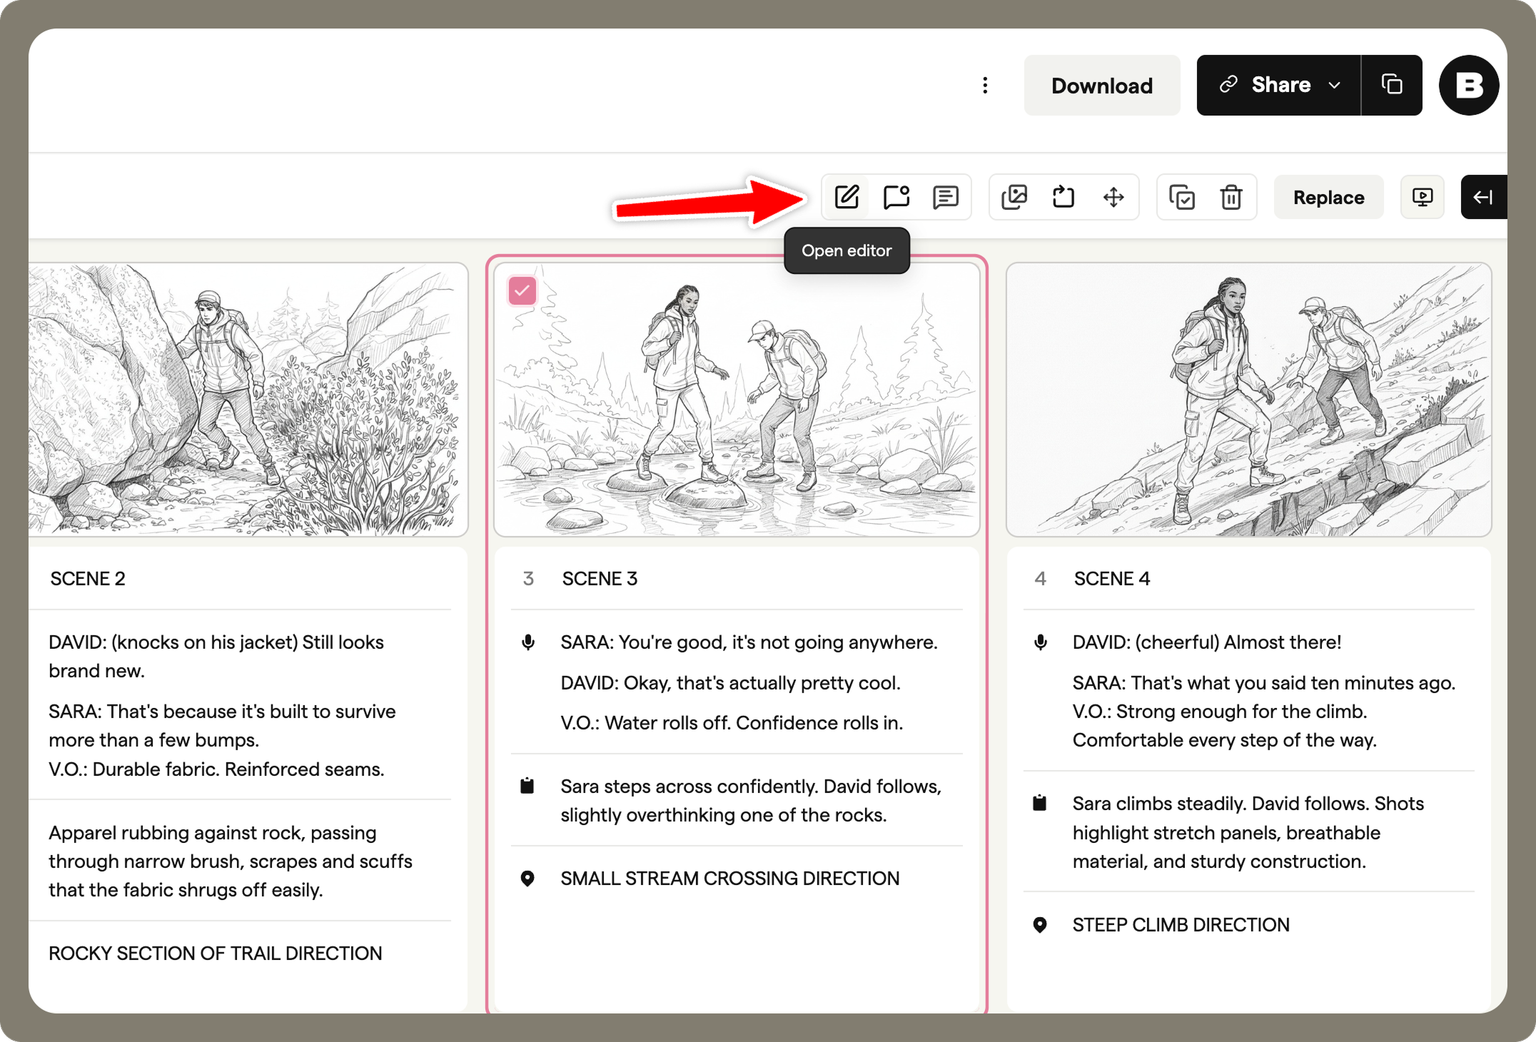
Edit frames
Open the frame editor to edit the frame image in detail
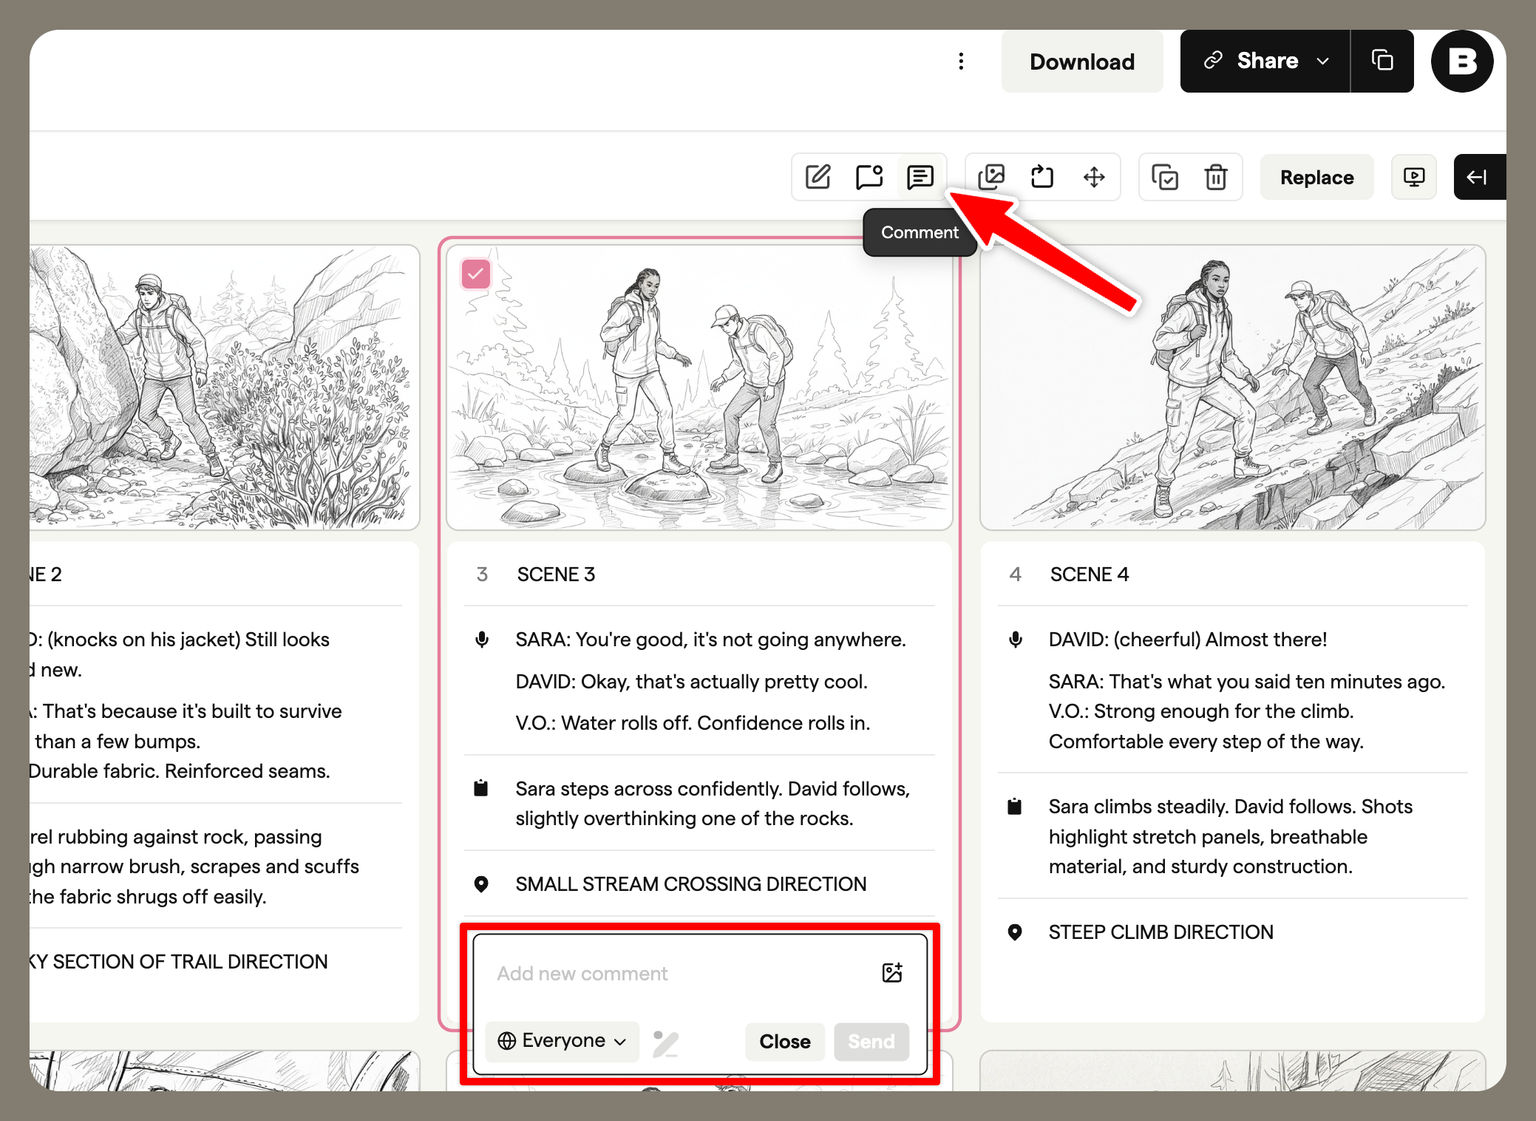
Add comments
Share feedback by adding comments
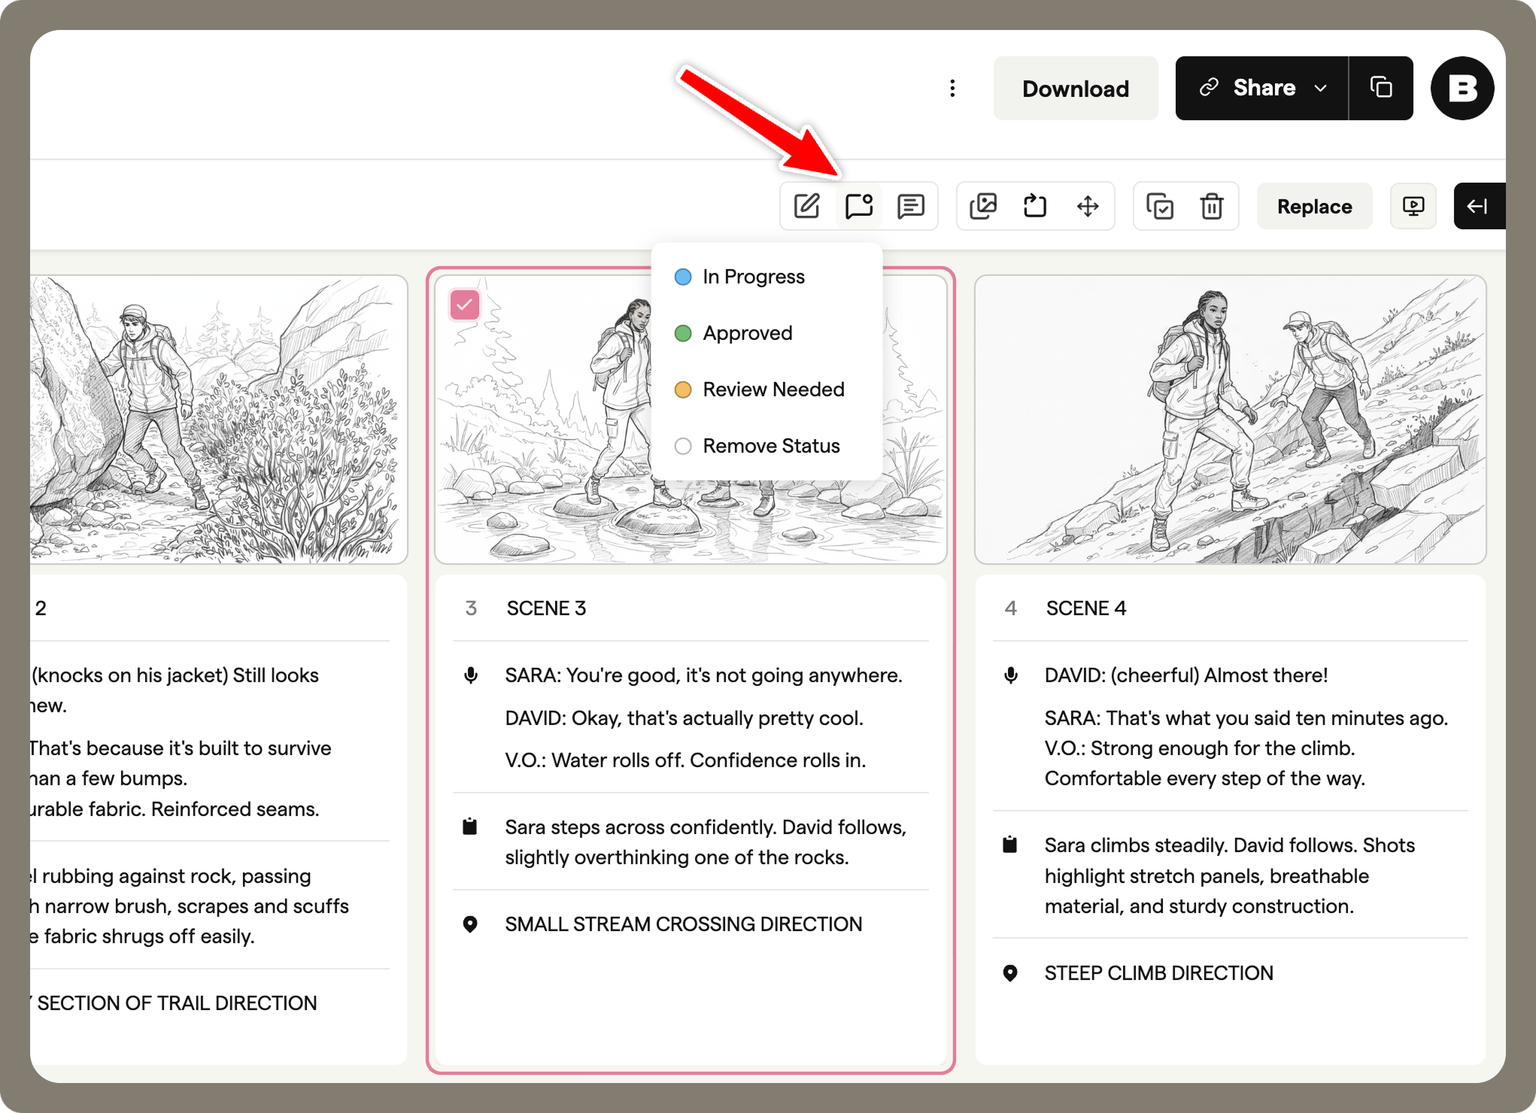
Track progress
Set a status on frames to track progress or review stages
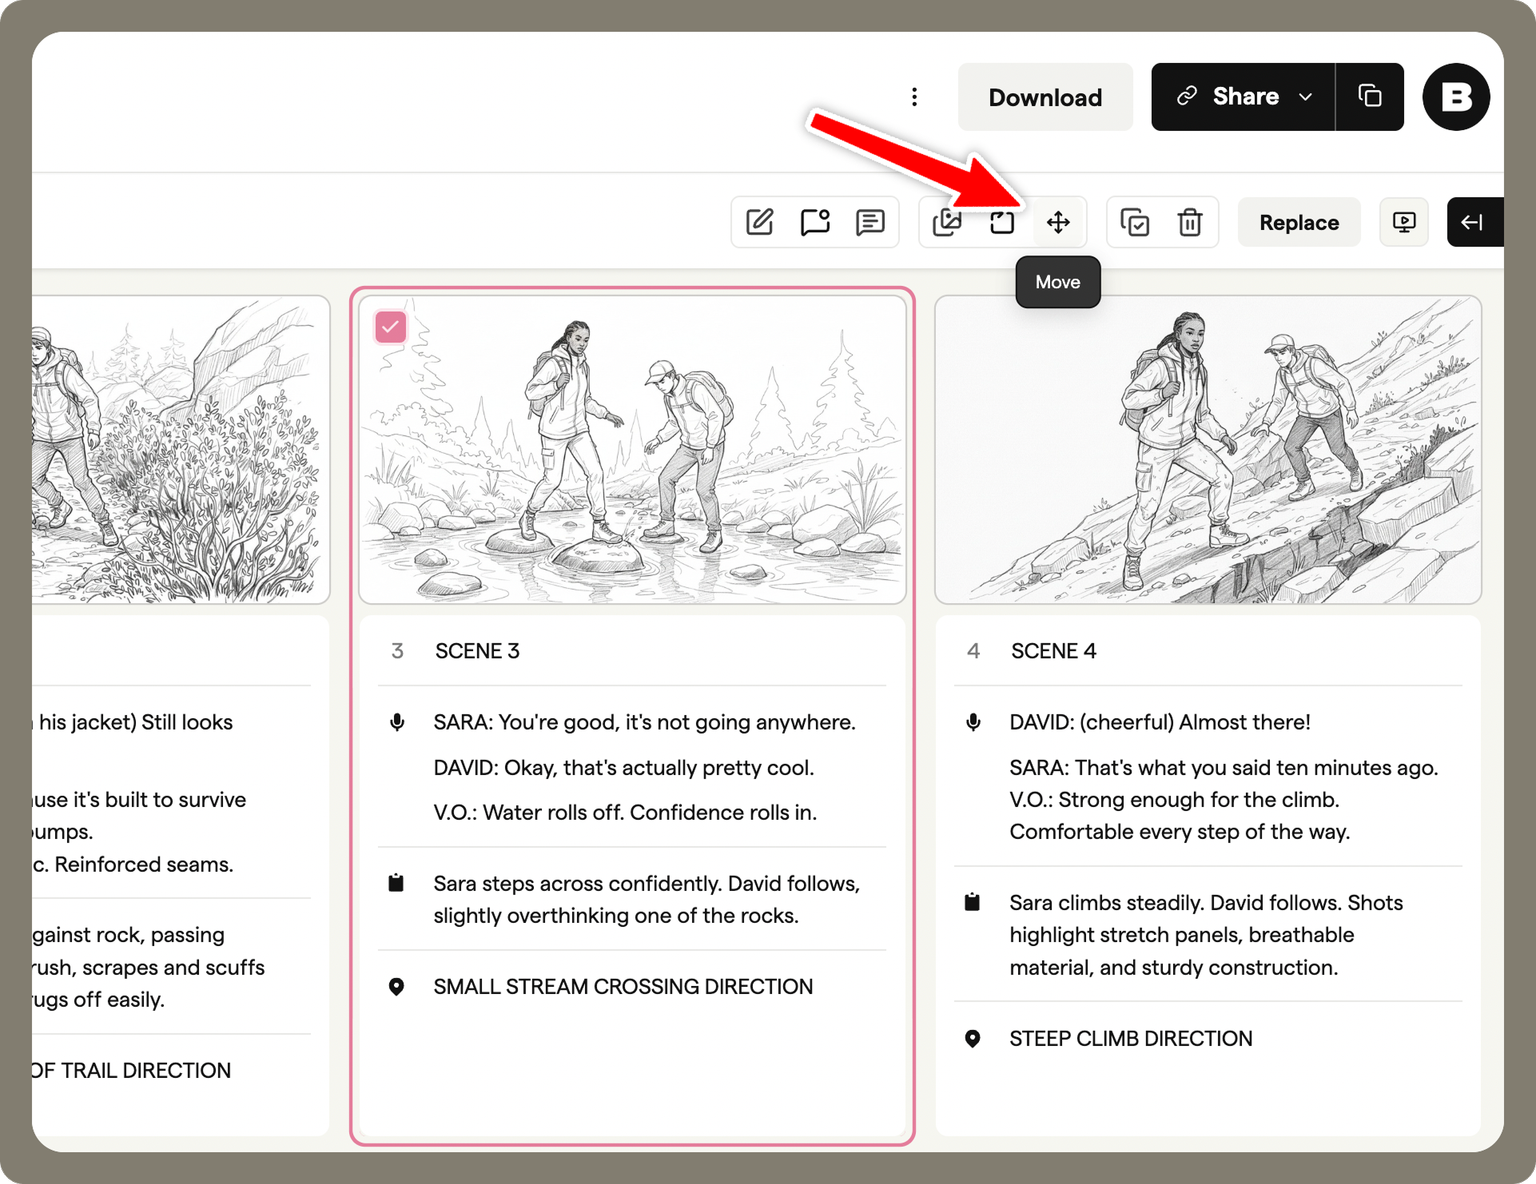
Organise frames
Move frames to a new position within the storyboard
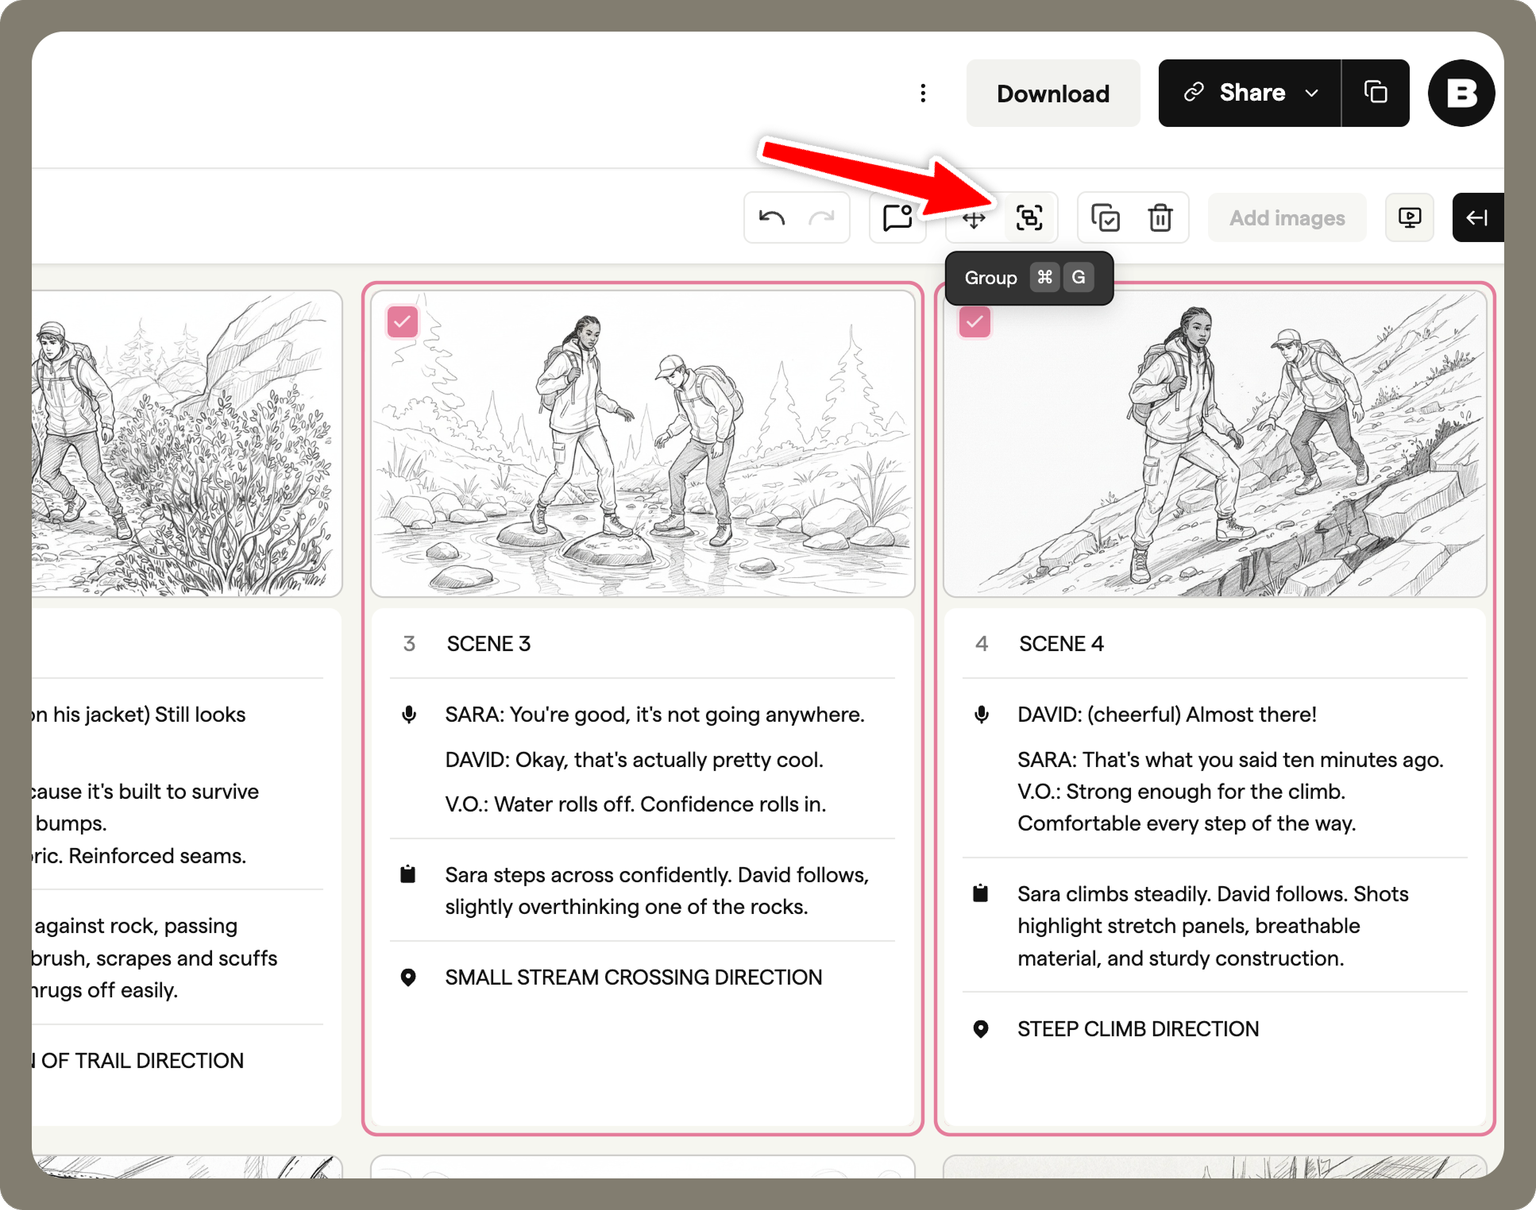
Group frames together. This is available when selecting multiple consecutive frames
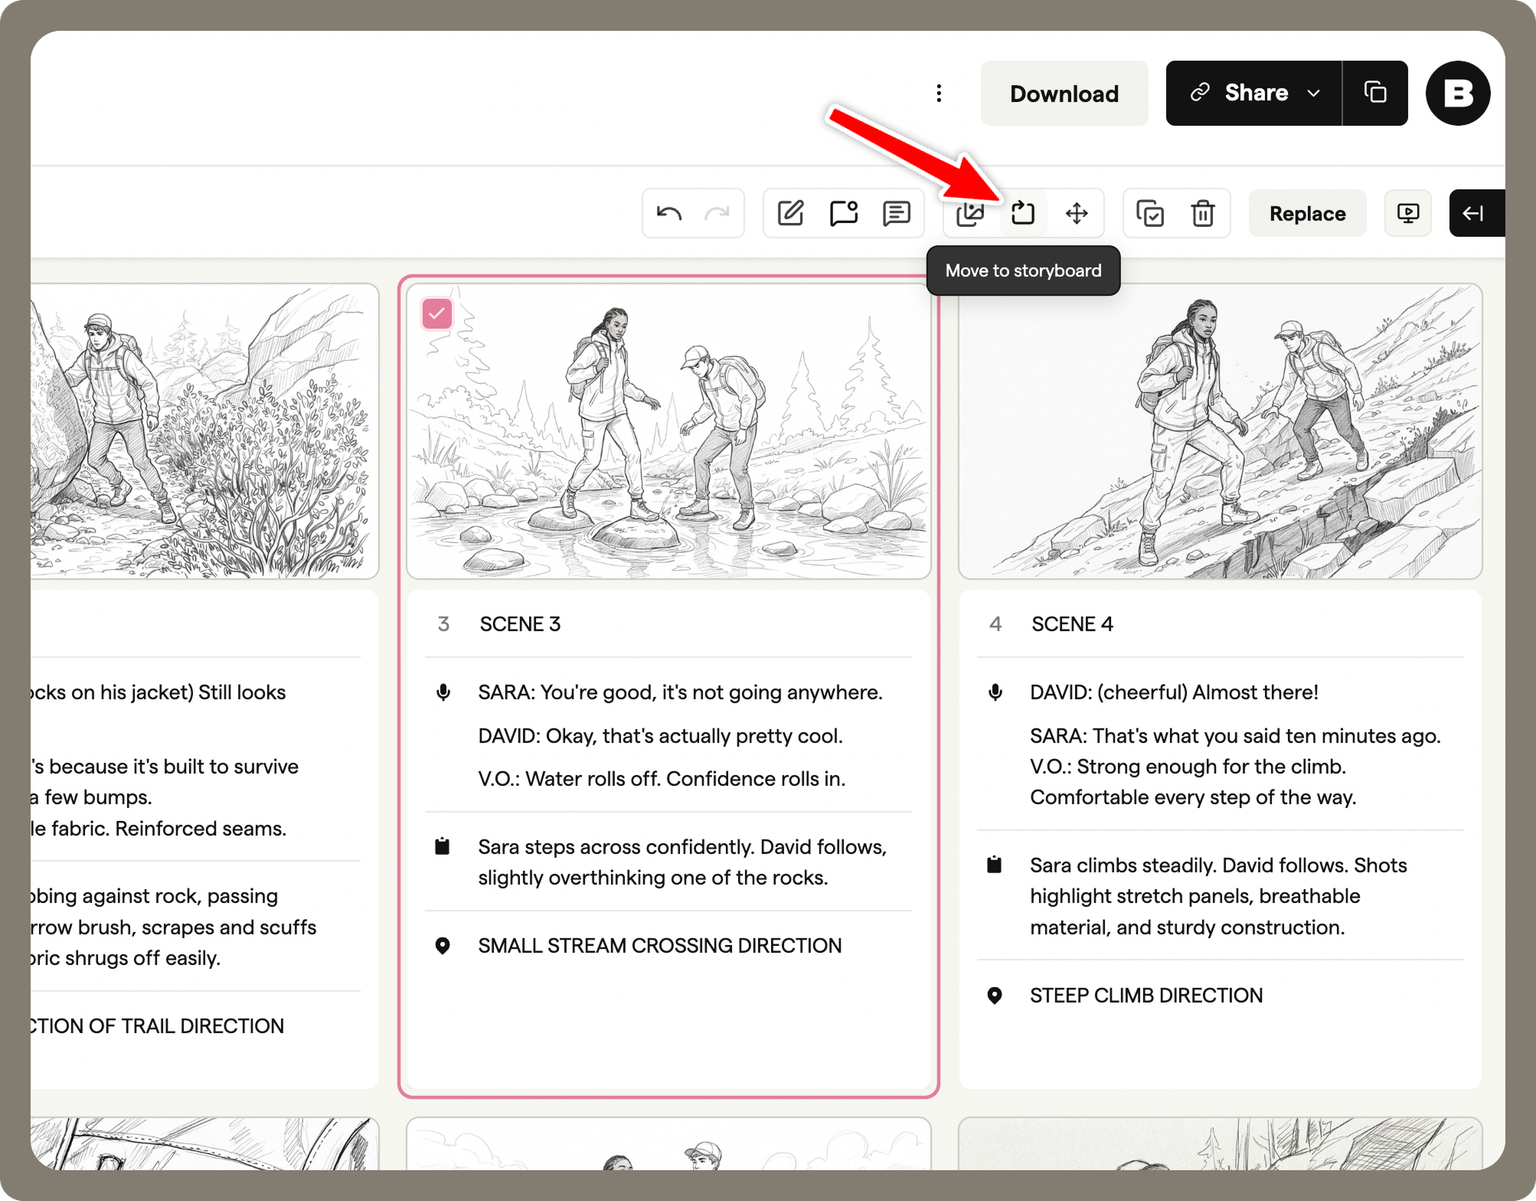
Move frames to another storyboard
Manage frames
Duplicate frames
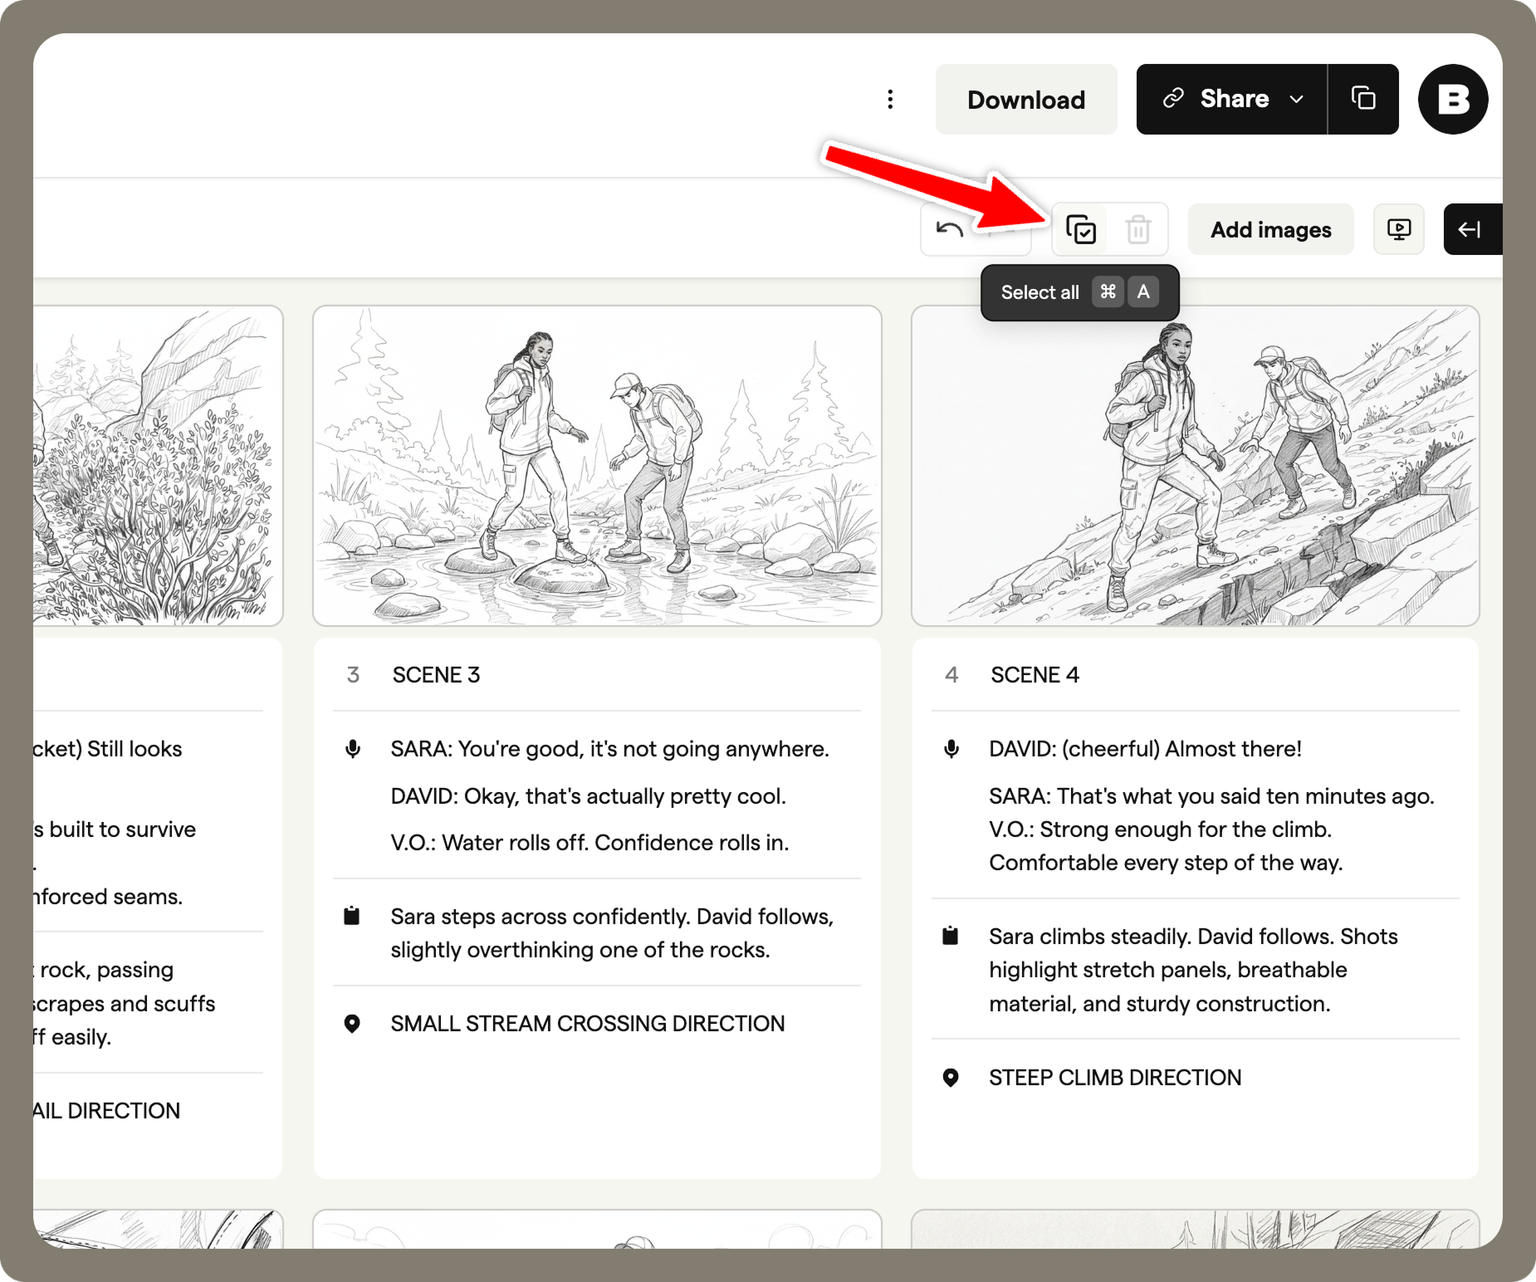
Select all frames in the storyboard
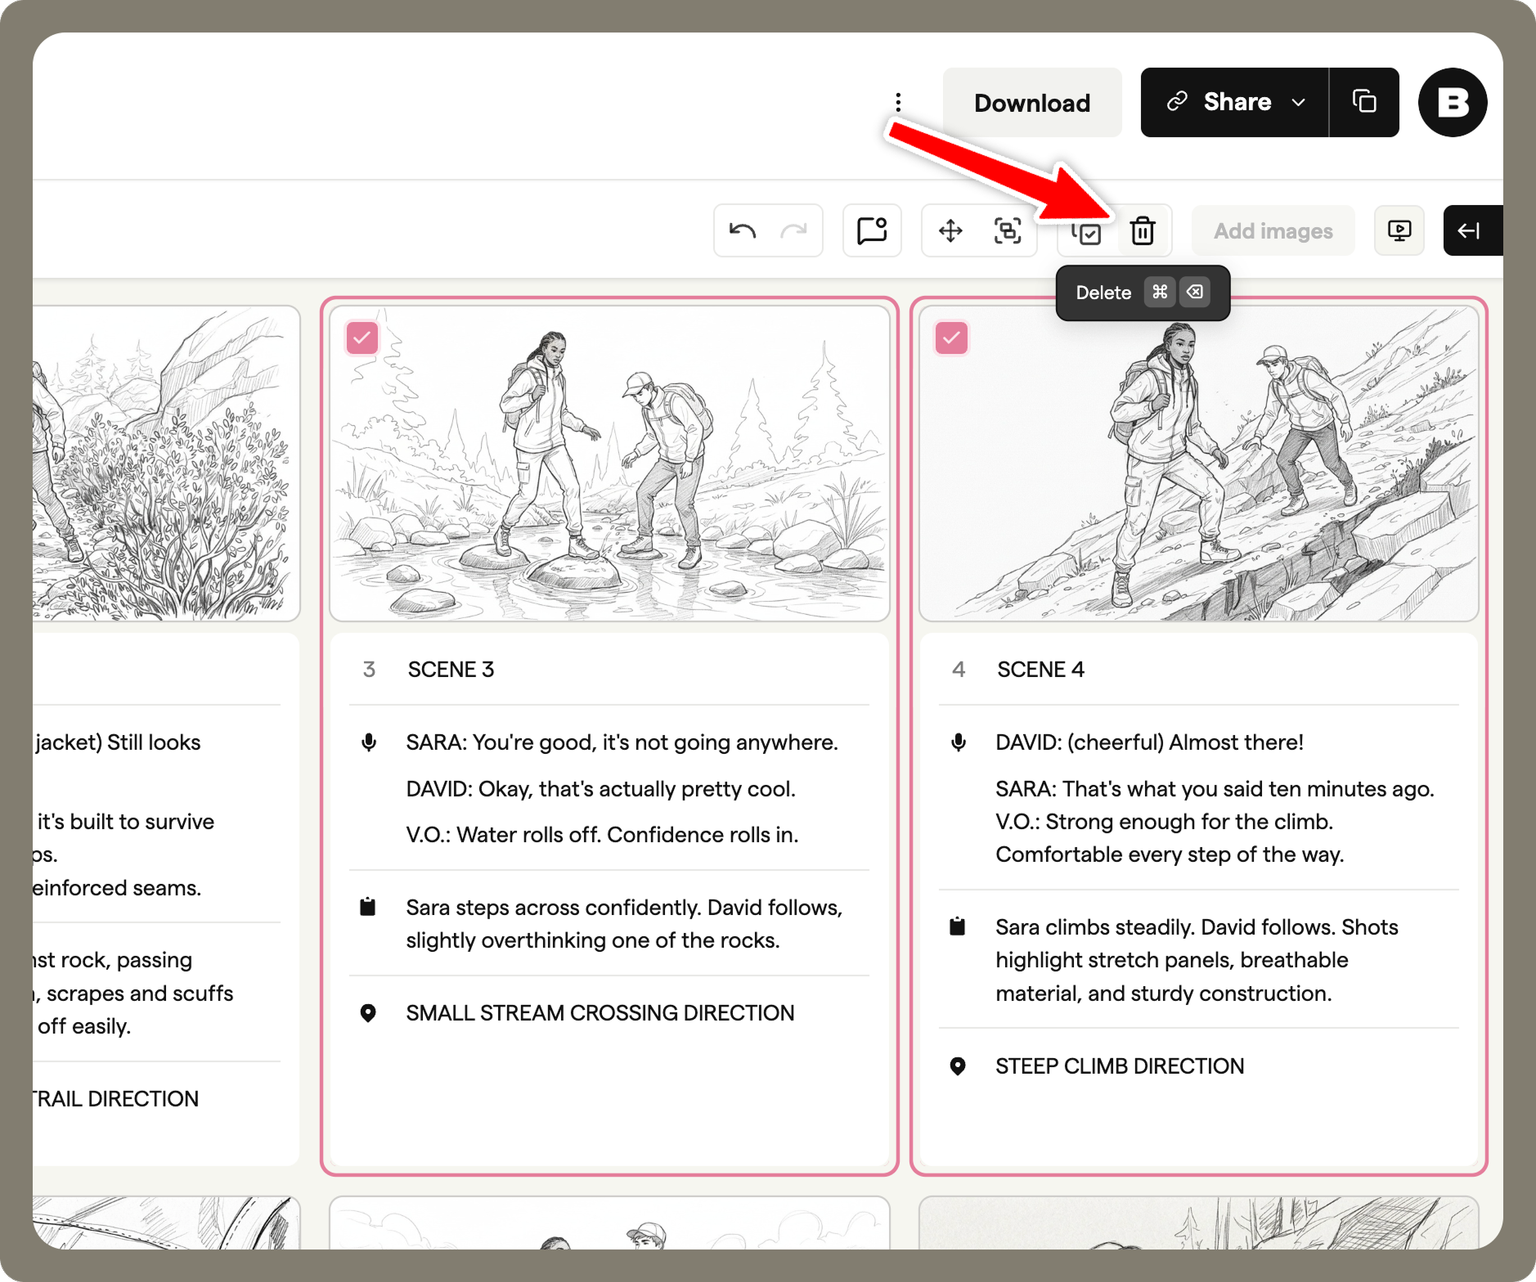
Delete selected frames
Storyboard lifecycle
As a storyboard moves from early ideas to final approval, Boords provides tools to help you track progress, iterate clearly, and keep projects organised.
These tools help you manage your storyboard as it evolves, and include:
- Statuses
- Versioning
- Archiving
Statuses
Boords uses two types of statuses to help track progress:
- Storyboard statuses show the overall progress of a storyboard
- Frame statuses show the progress of individual frames within a storyboard
Both are designed to make collaboration and review easier.
Storyboard statuses
Storyboard statuses reflect the overall state of a storyboard and are useful for managing work at a project level.
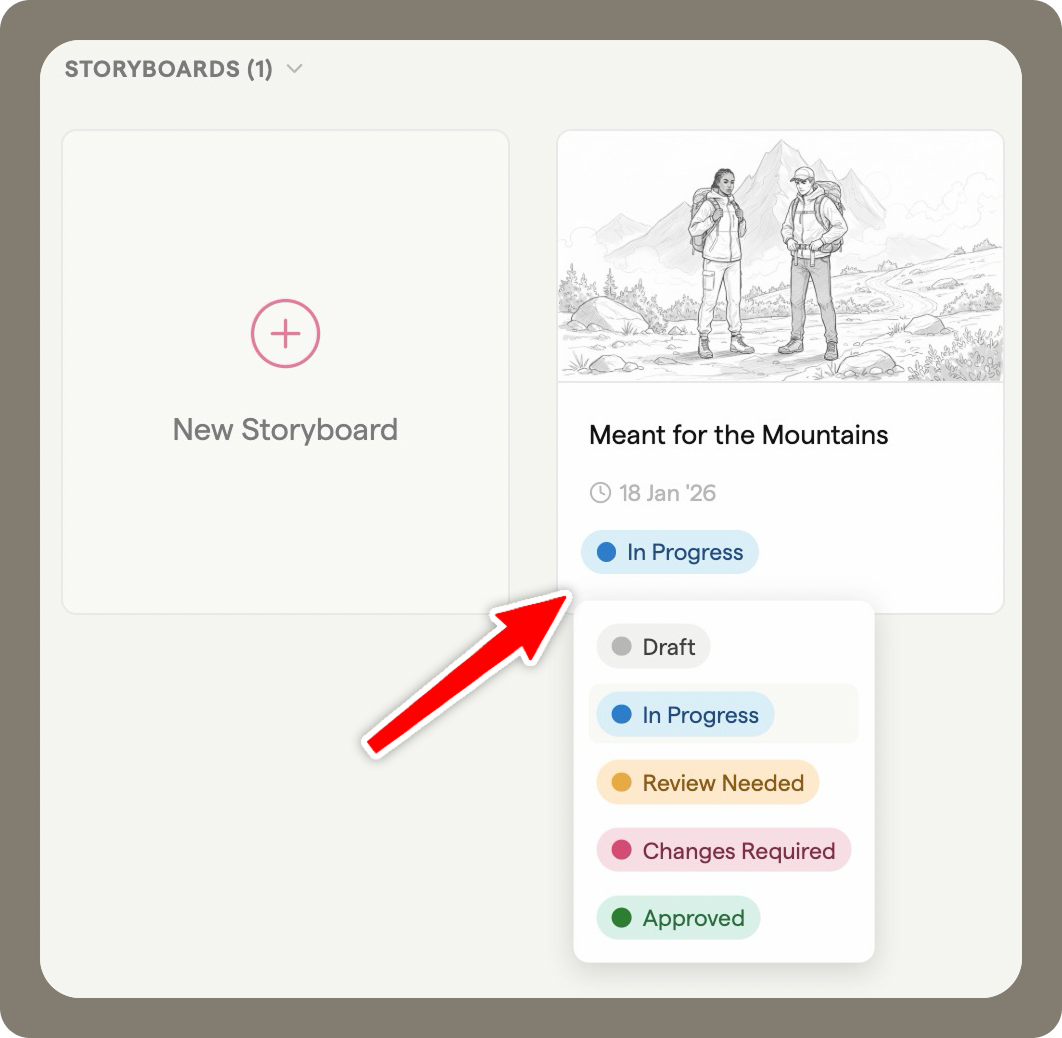
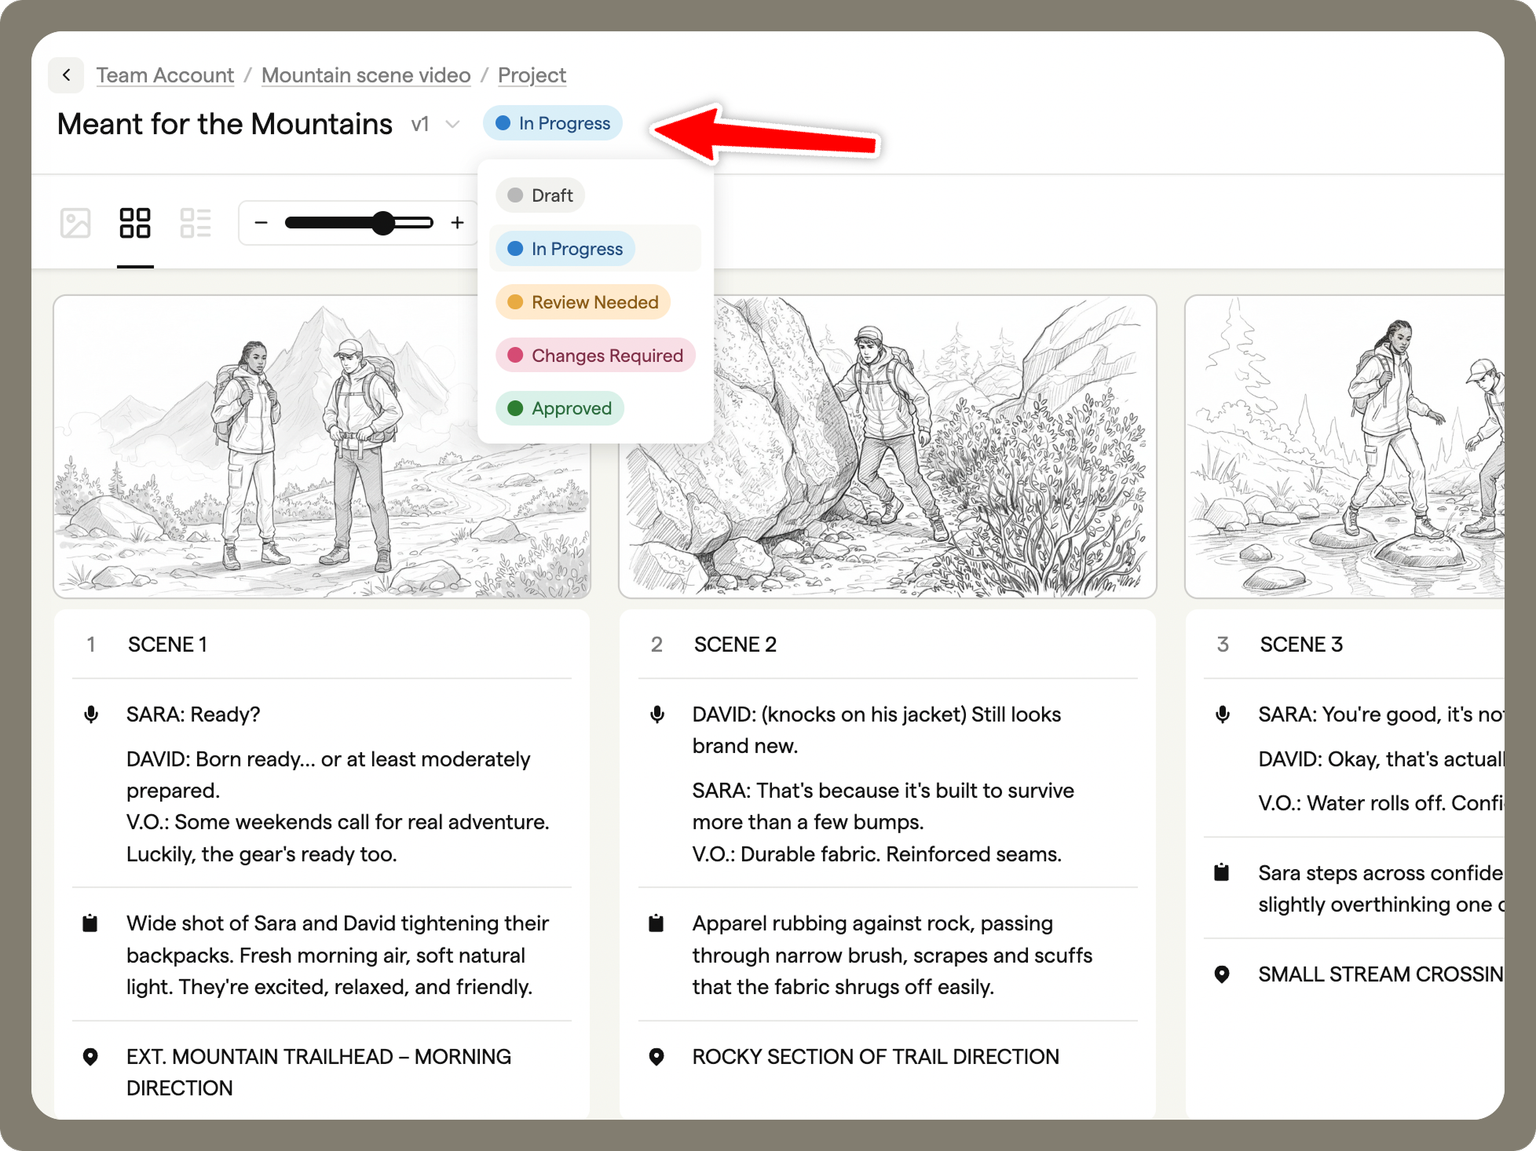
Available storyboard statuses
- Draft
- In Progress
- Review Needed
- Changes Required
- Approved
Changing a storyboard status
You can change a storyboard's status in two places:
- From the project dashboard, using the status dropdown selection
You can also manage storyboard statuses using the Kanban view. Switch to the Kanban board on the project dashboard, then drag storyboards between columns to update their status.
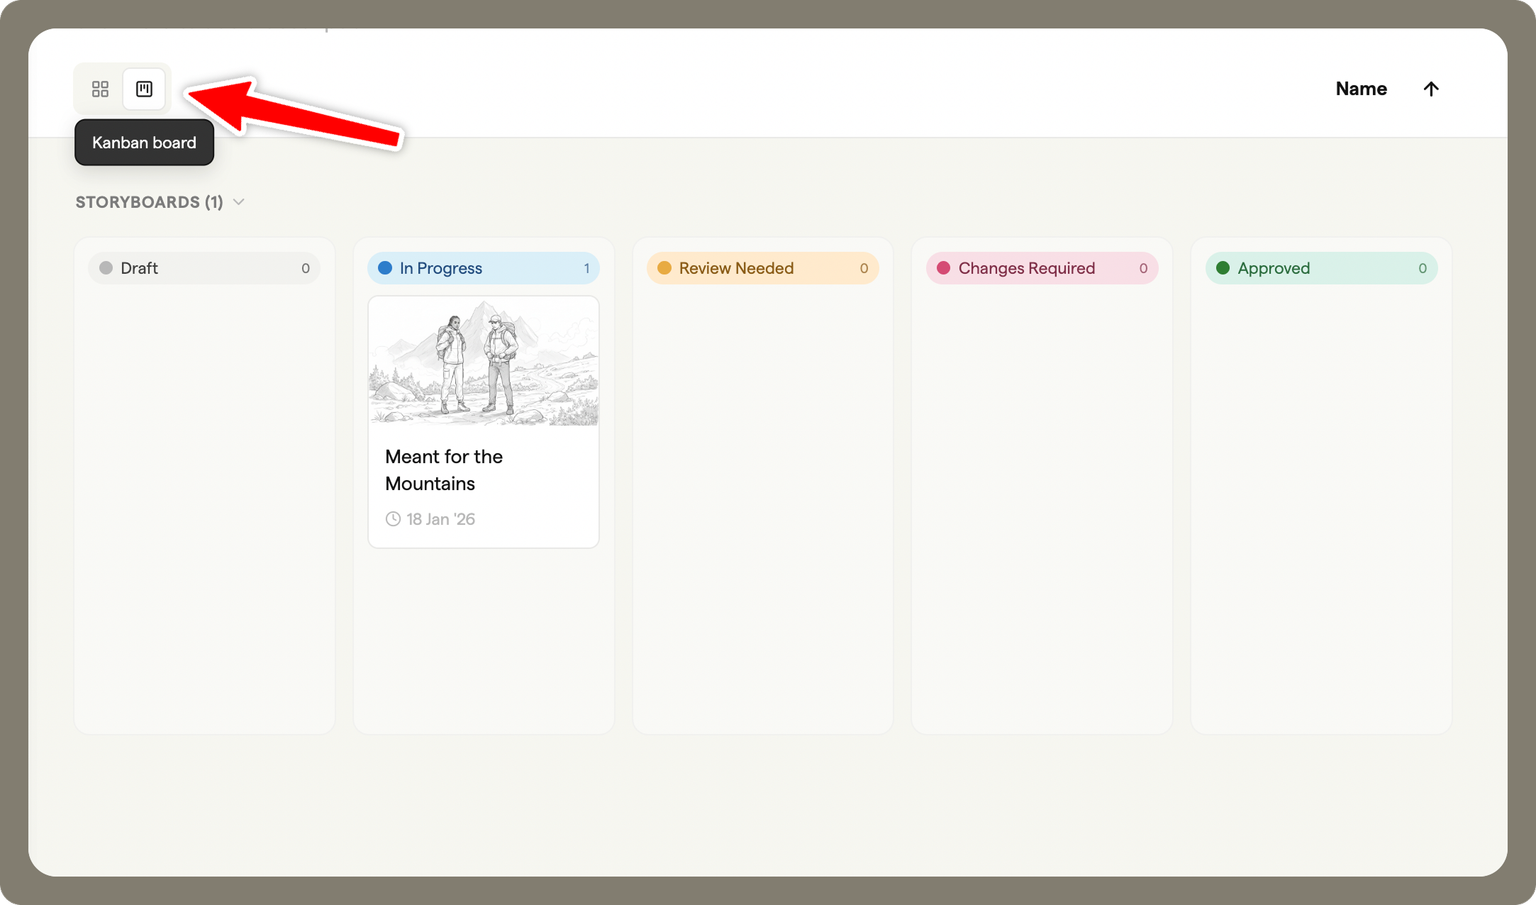
When a storyboard status is changed, it's visible to collaborators, making it easy to understand what stage the storyboard is at.
- From within the storyboard, using the same dropdown selection
Frame statuses
Frame statuses are used to track the progress of individual frames within a storyboard. This is especially useful when some frames are still being worked on, while others are ready for review or approval.
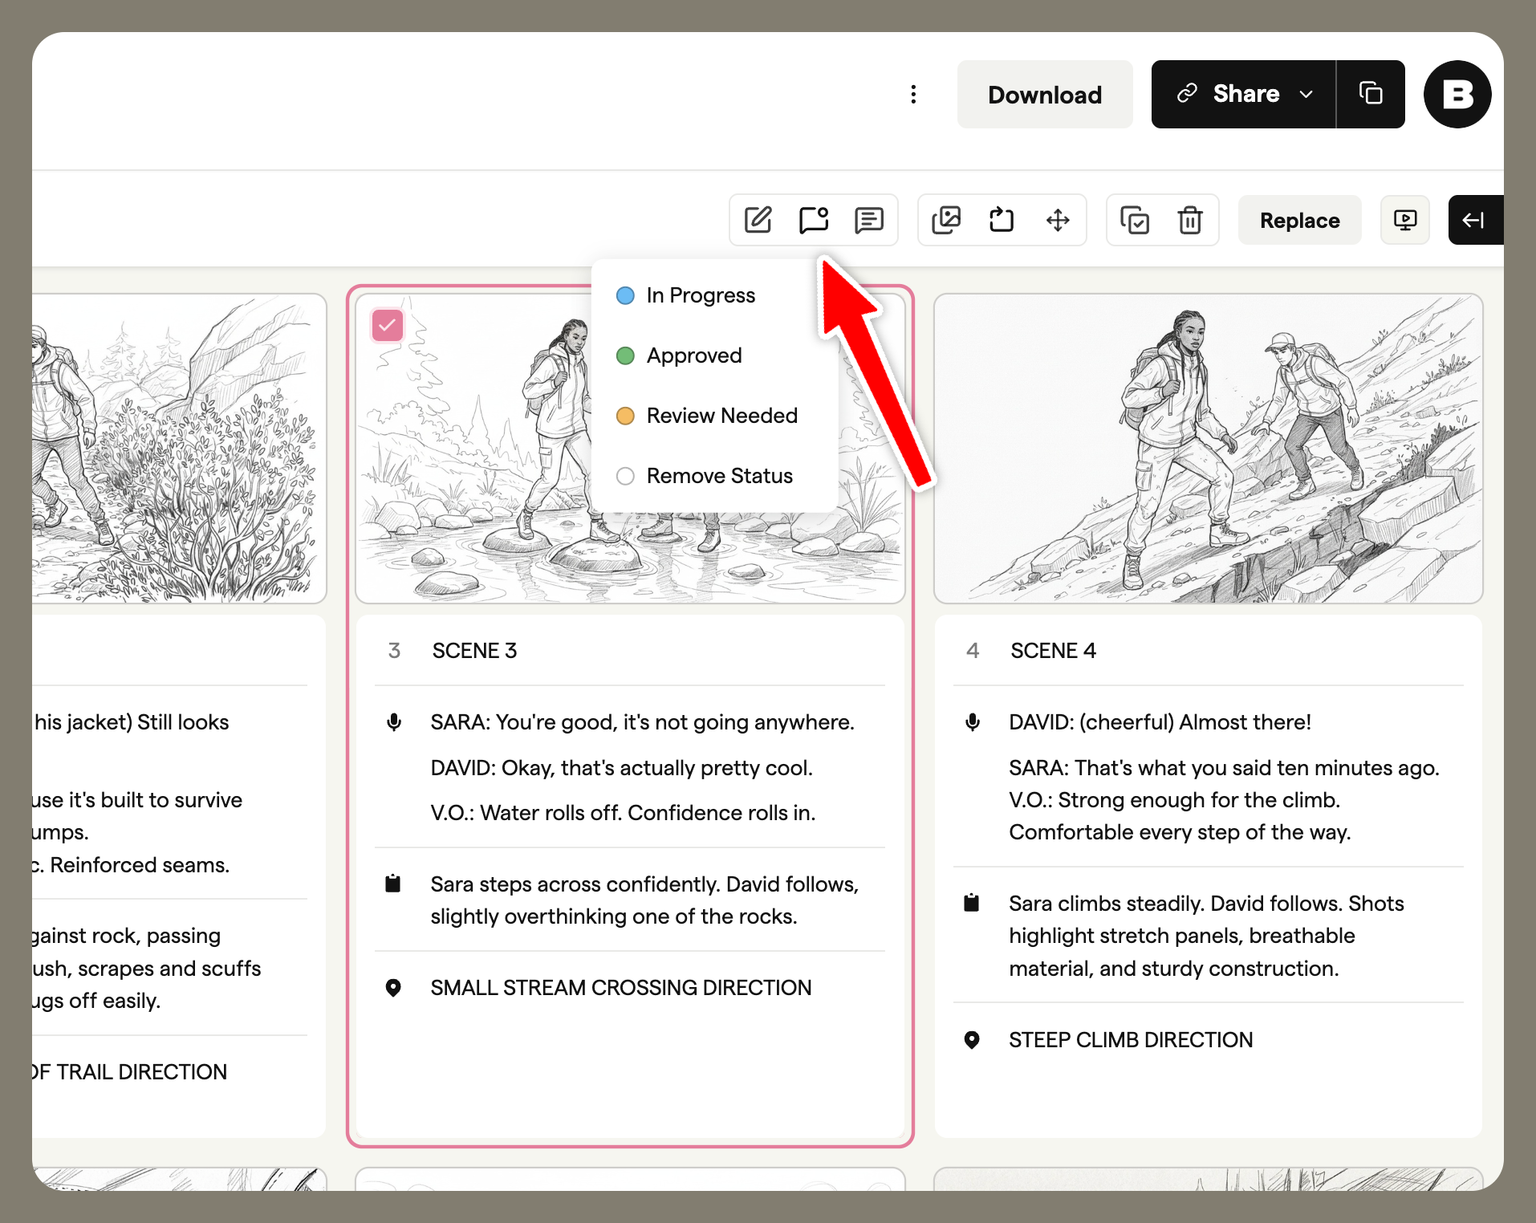
Available frame statuses
- In Progress
- Review Needed
- Approved
Frame statuses make it easy to see which frames need attention and which are ready to move forward during production.
Versioning
Versioning allows you to create multiple versions of the same storyboard, making it easy to make changes while keeping earlier iterations intact.
Creating a new version
At the top of the storyboard, you'll see the current version number (for example, v1).
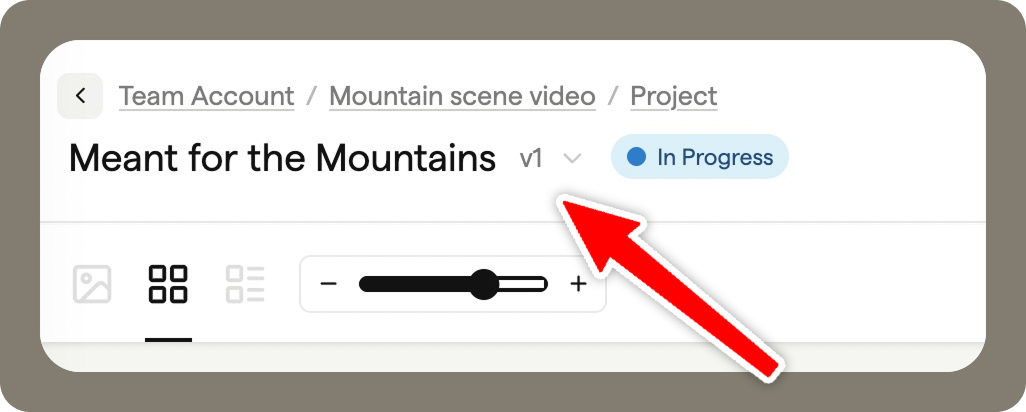
Click the version number to open the version menu. Select New version to create a new version.
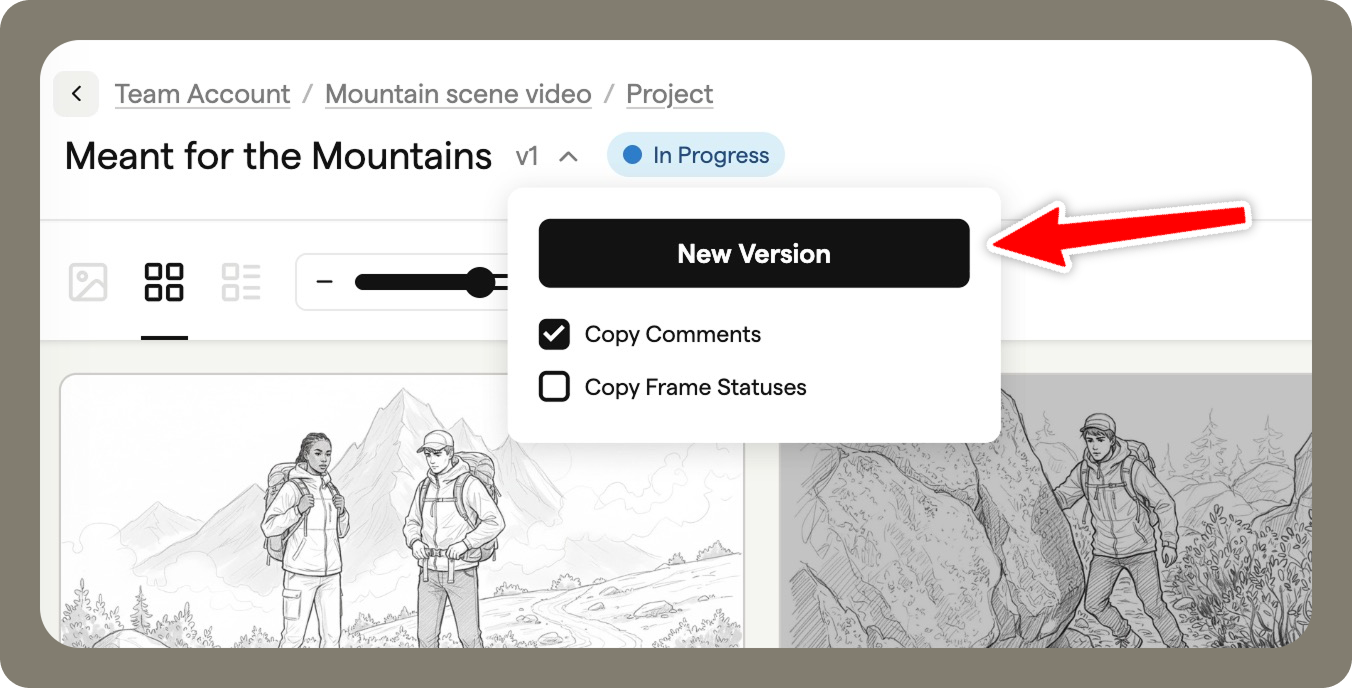
When creating a new version, you can choose to:
- Copy comments
- Copy frame statuses
All storyboard content is copied into the new version, so you can continue making updates without affecting previous versions.
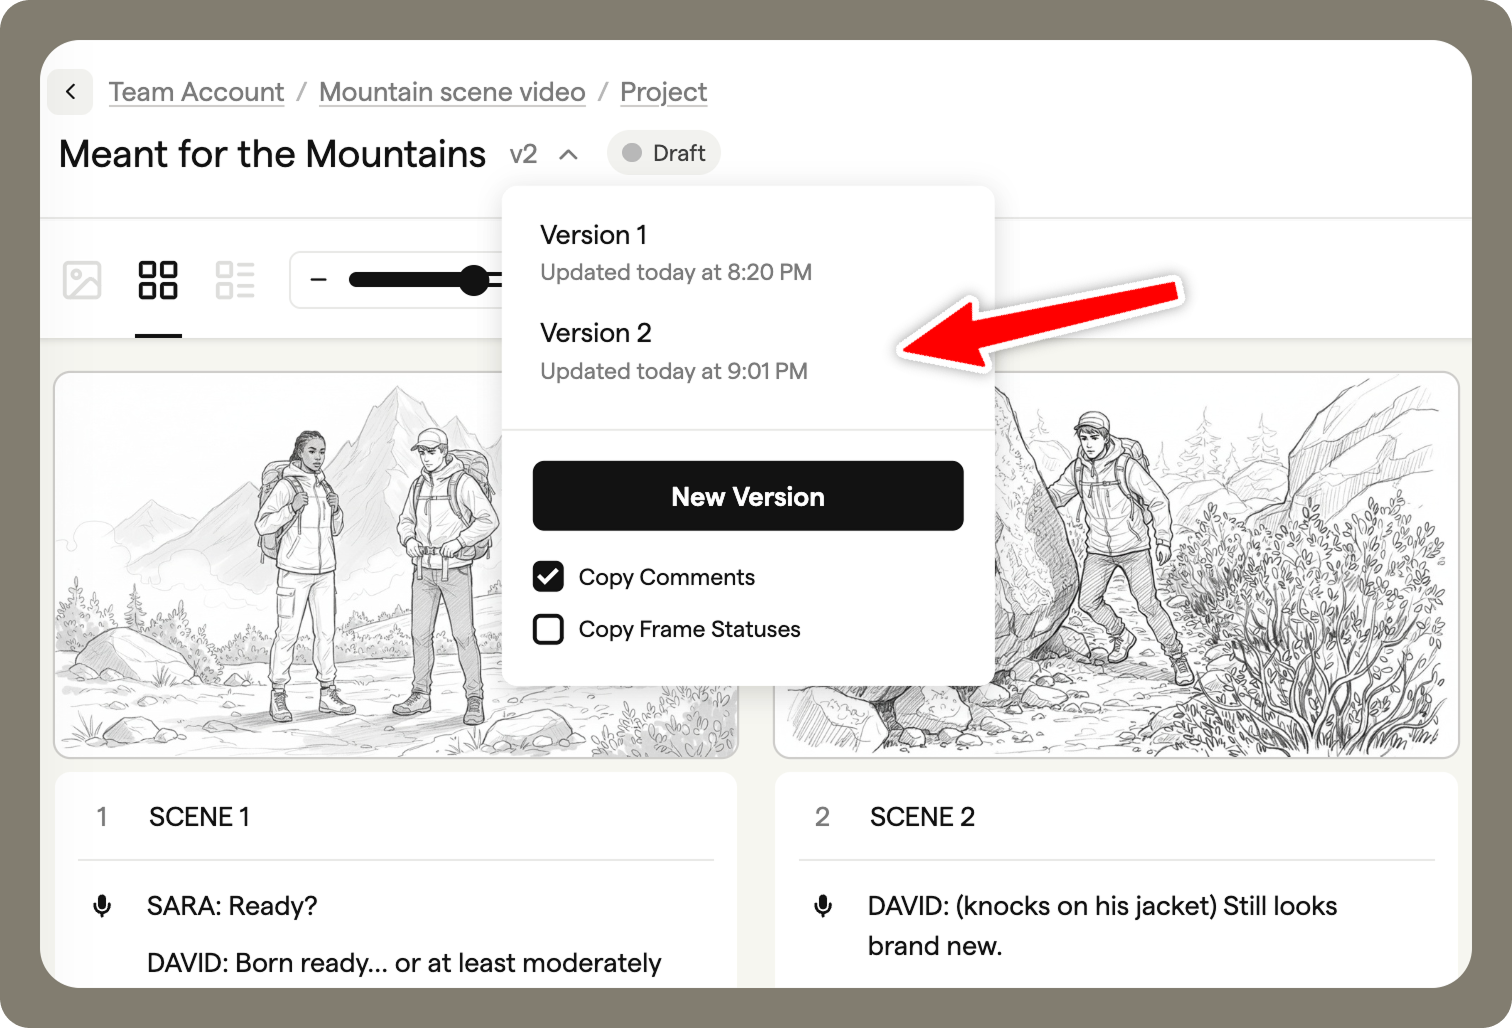
Switching between versions
Use the version dropdown to move between storyboard versions at any time. This makes it easy to review earlier iterations or compare changes as the storyboard develops.
Archiving
Archiving helps keep your project dashboard organised once a storyboard is complete or no longer needed.
Archiving a storyboard
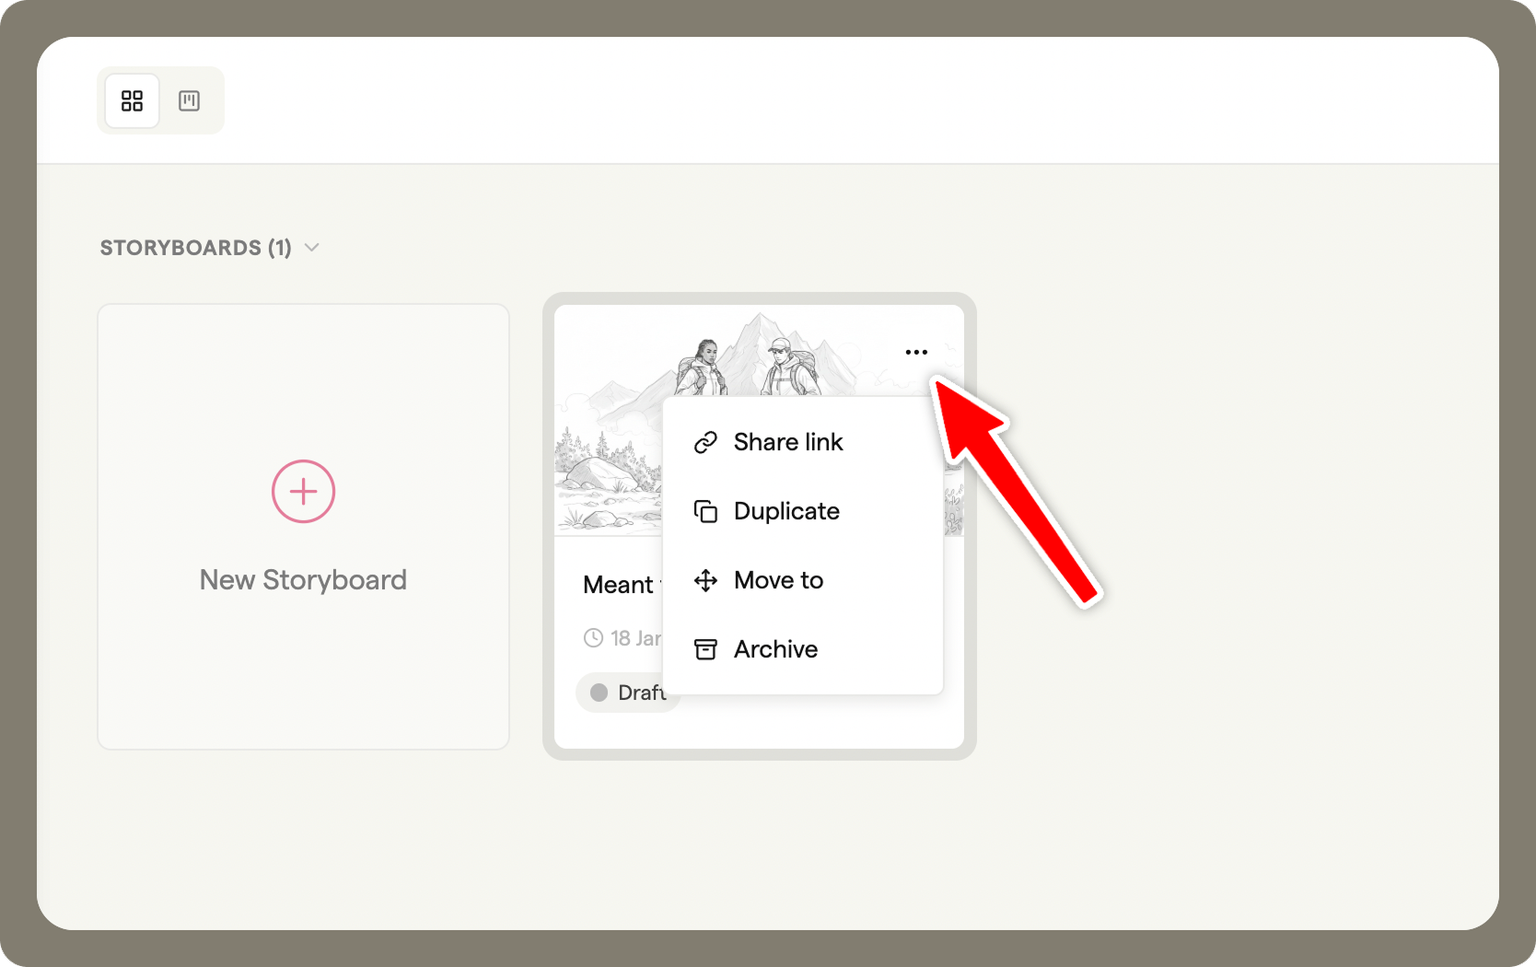
You can archive a storyboard from:
- The project dashboard. Use the menu to select Archive
- Within the storyboard itself, using the menu and selecting Archive
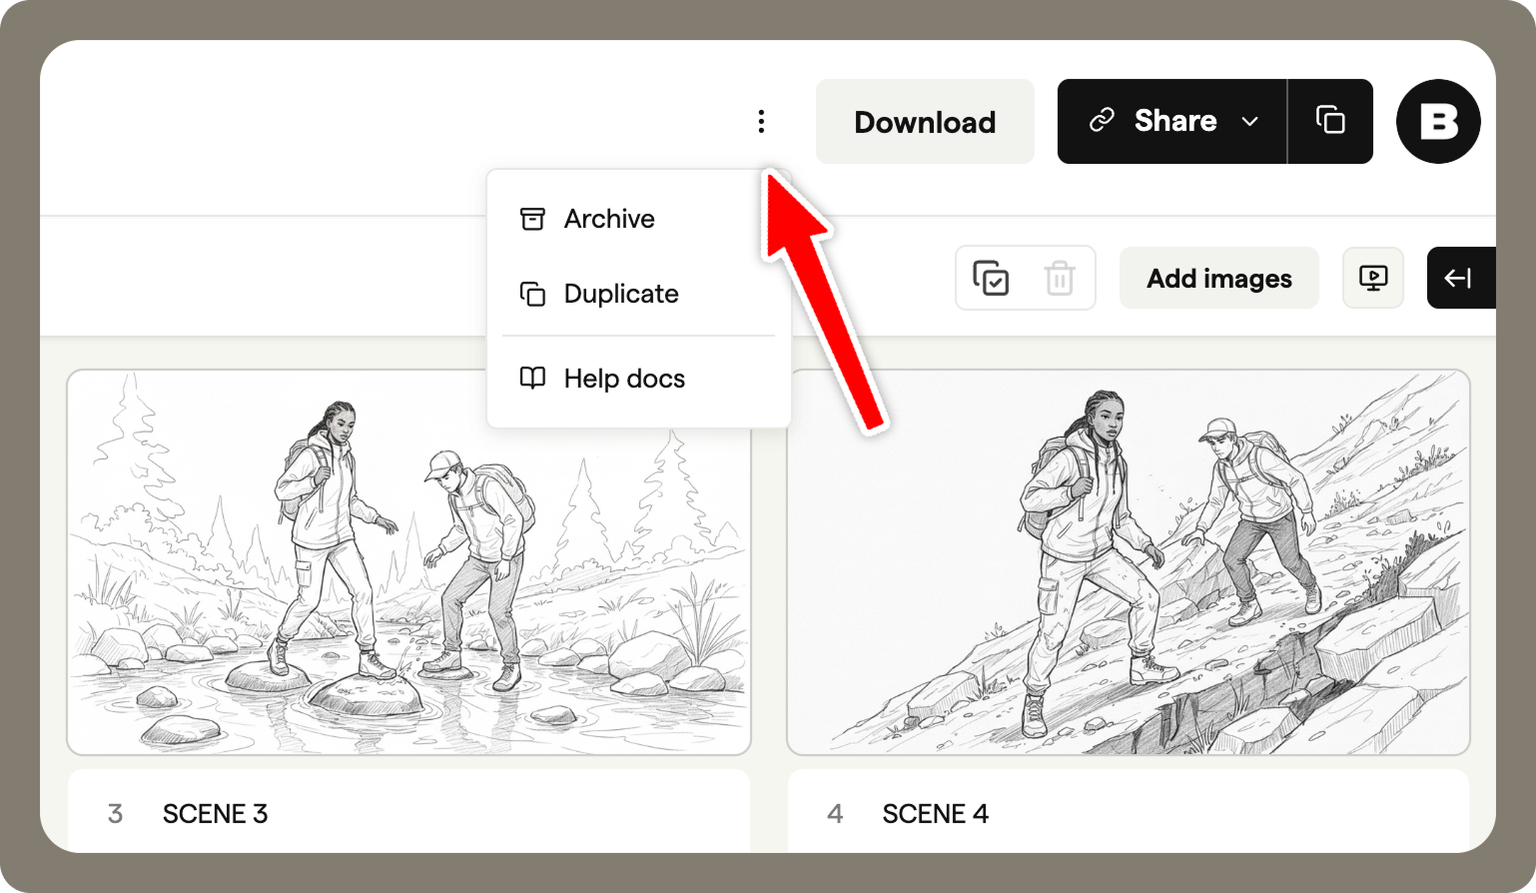
Once archived, the storyboard is removed from your main dashboard view.
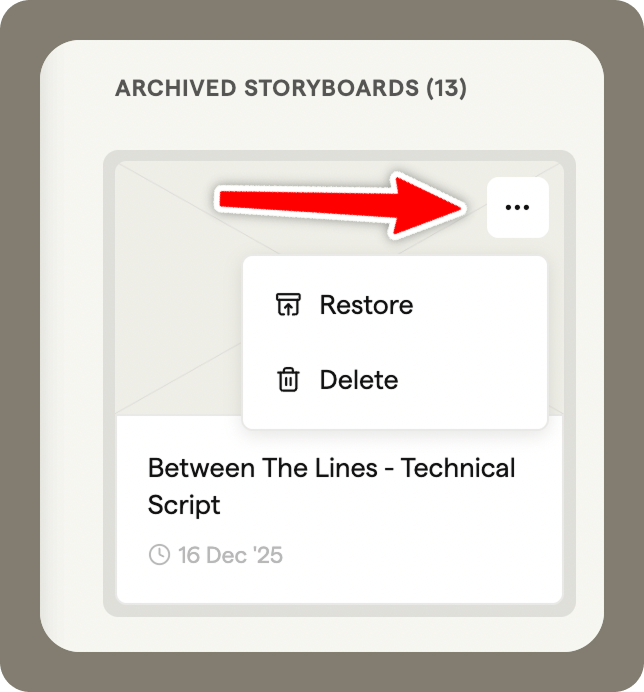
Accessing archived storyboards
Archived storyboards are stored in the Storyboard Archive:
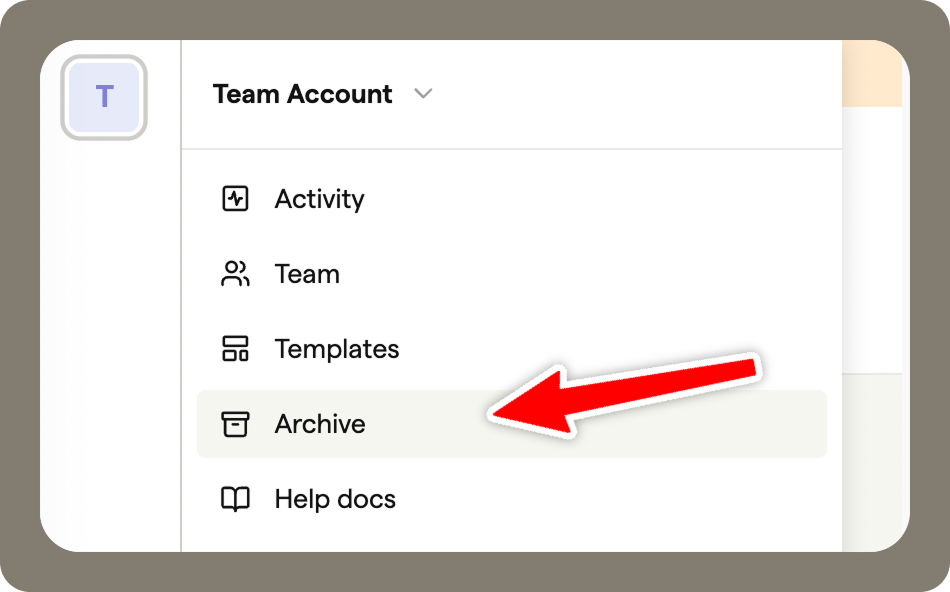
On the project dashboard, select Archive from the left-hand menu
From the archive, you can restore a storyboard to bring it back to the project dashboard, or delete it permanently if it's no longer needed.