
Asset Library
Save, organise and @mention characters, locations and props across your team
The Asset Library is one place for the characters, locations, props and reference images your whole team reuses, available in every project and every storyboard.
Opening the Asset Library
Click Assets in the left sidebar of your dashboard. The library opens with All images selected, your folders listed on the left, and the image grid on the right.
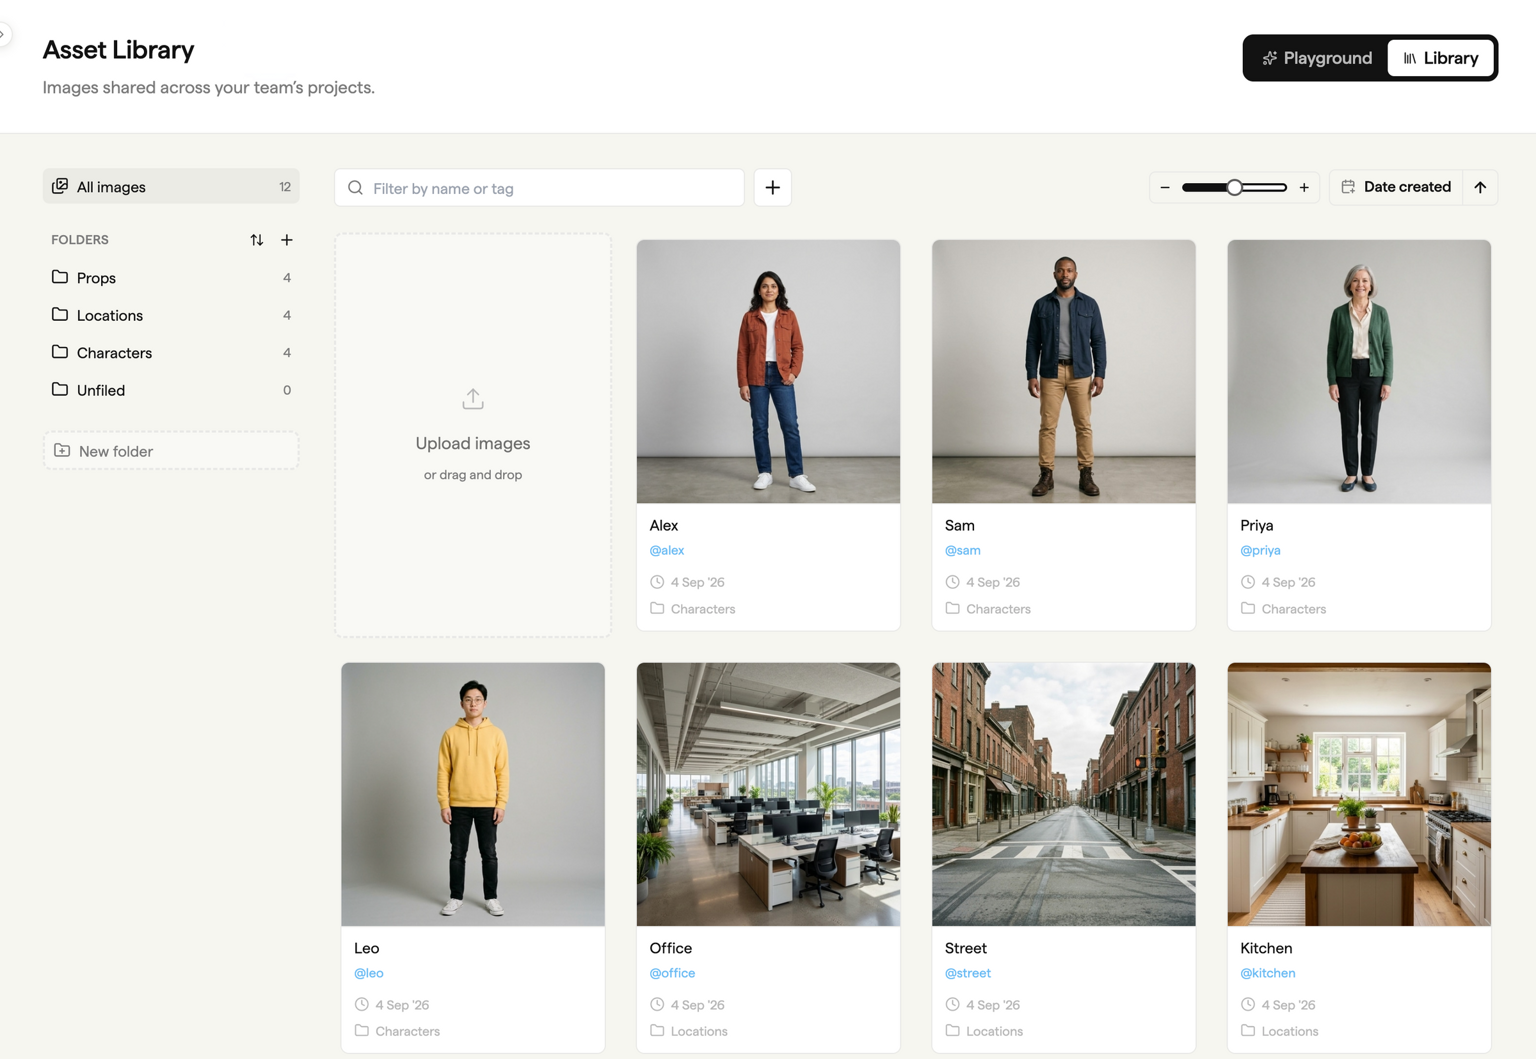
The library belongs to your team, not to a project. Anything you add here is available to everyone on the team, in any storyboard they open.
Uploading images
Click Upload images in the first tile of the grid, or drag files from your computer anywhere onto the grid. You can drop several files at once.
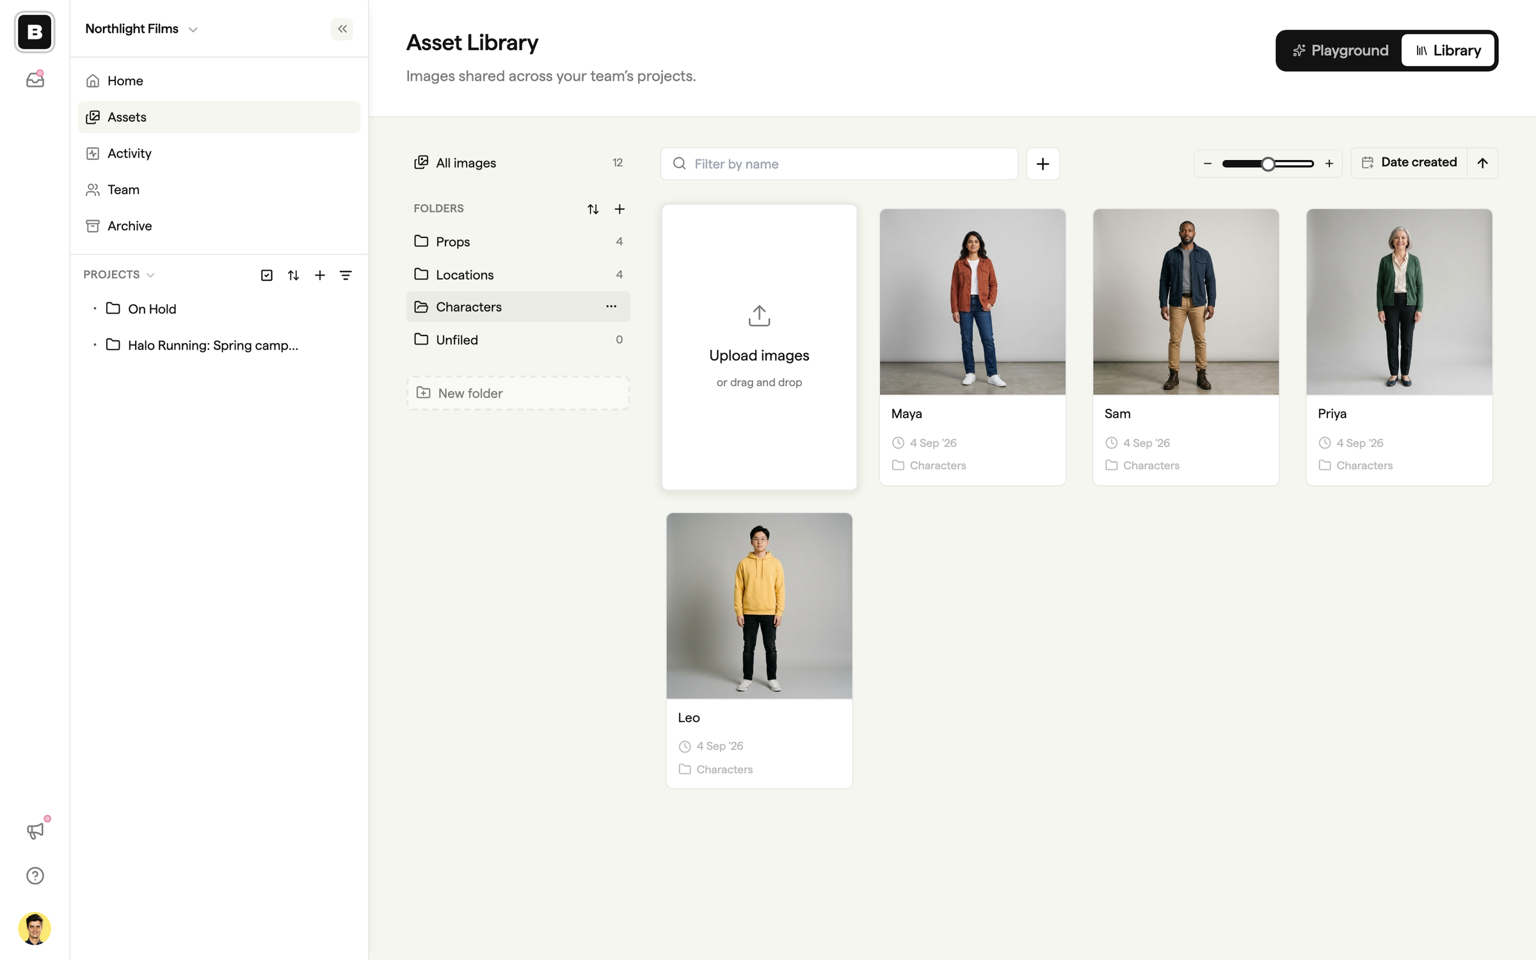
New uploads land in whichever folder you are viewing. If you are on All images, they go to Unfiled.
Boords accepts PNG, JPG and GIF files up to 20 MB each.
Adding images from a project
Images uploaded inside a storyboard belong to that project only. To share one with the whole team, click Add from project, tick the images you want, and click Add assets. They move into Unfiled.
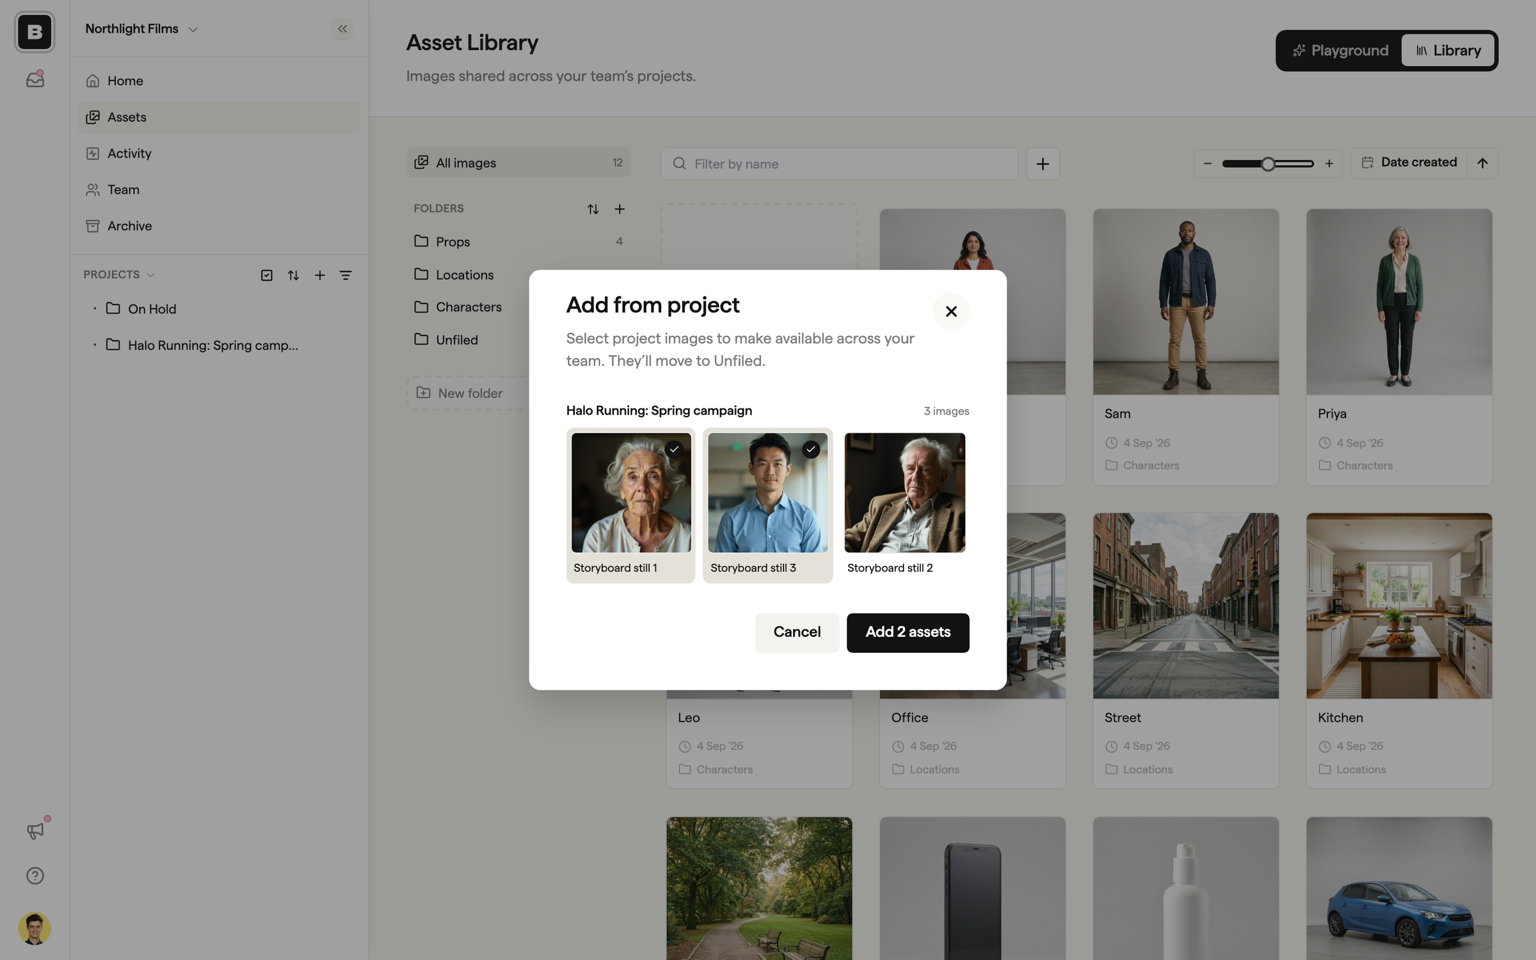
You can do the same from inside a storyboard. Open the Image Library tab in the storyboard sidebar, hover over an image under Project assets, and choose Add to Asset Library from its menu.
Organising with folders
Folders keep a large library easy to scan. Most teams start with a folder per kind of asset: characters, locations, props, brand elements.
- Create a folder: click the + next to Folders, or click New folder at the bottom of the list.
- Move images: drag an image onto a folder in the left rail, or open the image's ⋯ menu and choose Move. The Move dialog lets you create a new folder on the spot.
- Rename or delete a folder: hover over the folder and open its ⋯ menu.
- Reorder folders: drag them in the left rail, or use the sort button next to Folders to switch between A to Z, Z to A, Newest and Oldest.
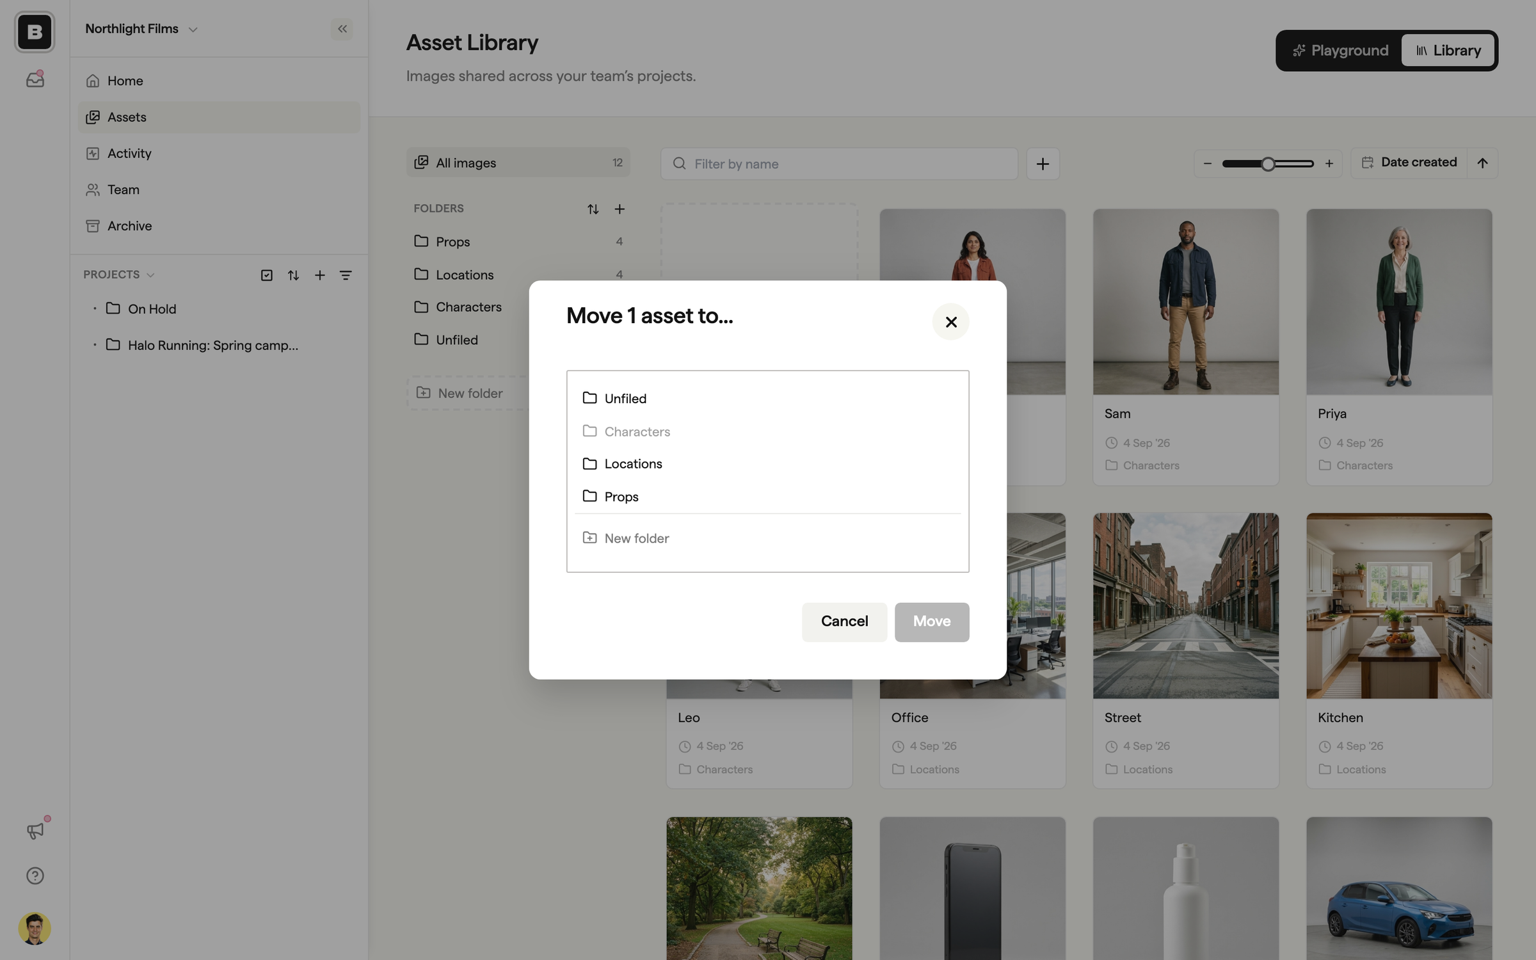
Deleting a folder does not delete its images unless you tick Also delete images in folder. Left unticked, the images move to Unfiled.
Folders are one level deep. You cannot nest a folder inside another.
Finding and viewing images
- Filter by name or tag: type in the search box above the grid. The filter applies within the folder you are viewing.
- Sort: choose Name, Date created or Date modified from the sort menu, and click the arrow to flip the order. Your choice is remembered per team.
- Grid size: use the slider to make thumbnails larger or smaller.
- Expand: double-click an image, or choose Expand from its menu, to view it full size.
- Download: choose Download from the image's menu to save the original file.
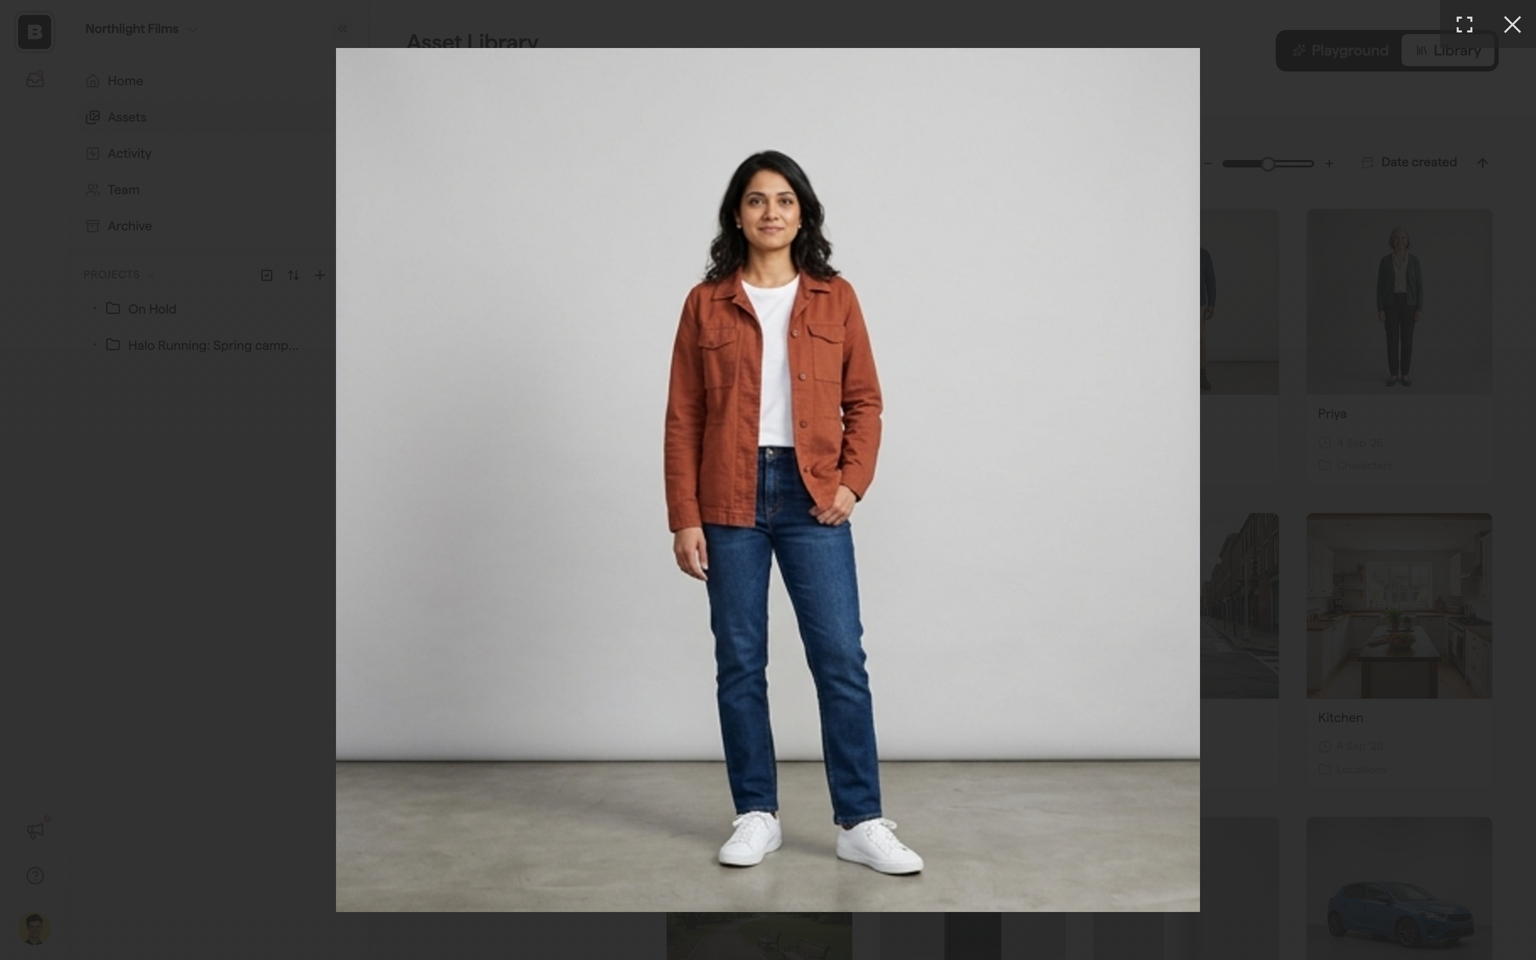
Renaming images
Open an image's ⋯ menu and choose Rename. Give images names your team will recognise, such as "Alex", "Office" or "Box". The dialog shows a preview of the mention tag that will be created from the name.
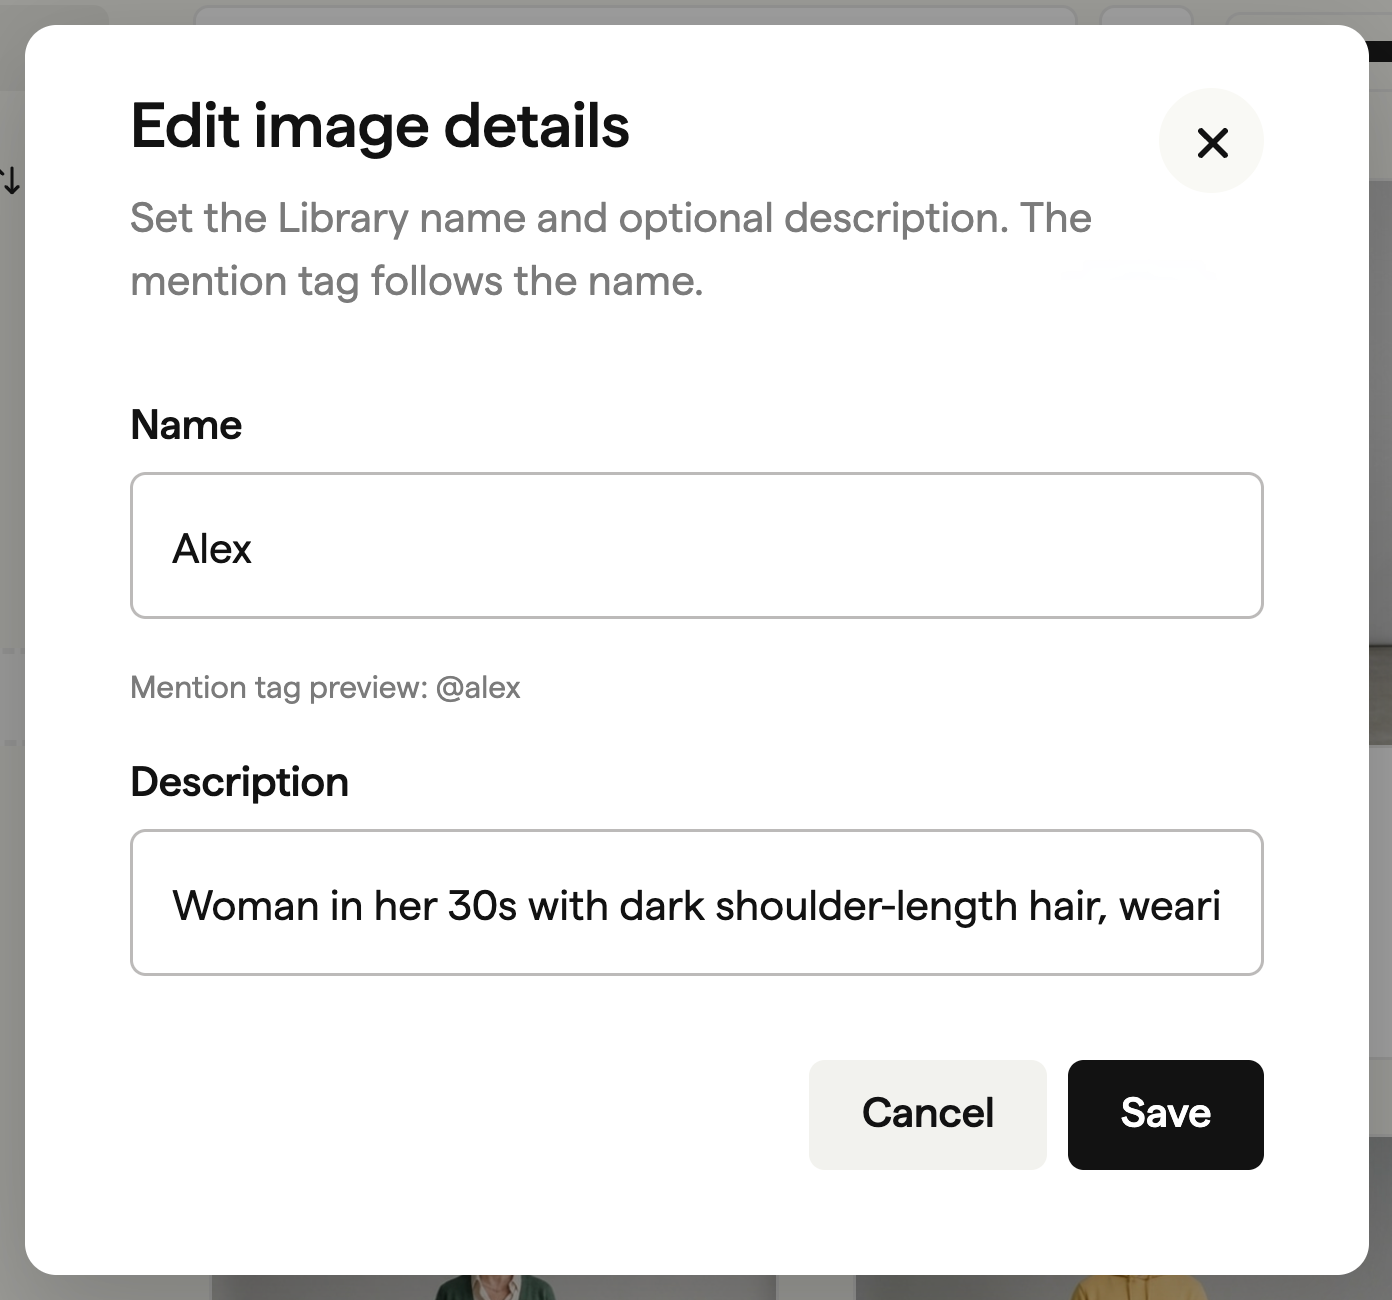
Mention tags
Each named library image has a tag below its thumbnail. For example, Alex becomes @alex, and Hero product becomes @hero-product. Tags use lowercase letters, numbers and hyphens. If a tag is already taken in your team, Boords adds a number, such as @alex-2.
You can also click the tag below a thumbnail to edit the image's name. Renaming the image updates its tag too. If an older image shows Add tag, click it and save a name.
Type @ in an AI prompt and select the image from the list to use it as a reference. Your team's folders help you find the right character, location or prop, and the preview lets you check it before selecting.
Project-only images don't appear in the mentions picker. Use Add from project to move them into the team library first.
Selecting several images
Click an image to select it, then click others to add them. Hold Shift and click to select a range. A toolbar appears at the bottom of the screen with Move and Delete for everything selected, plus Clear selection.
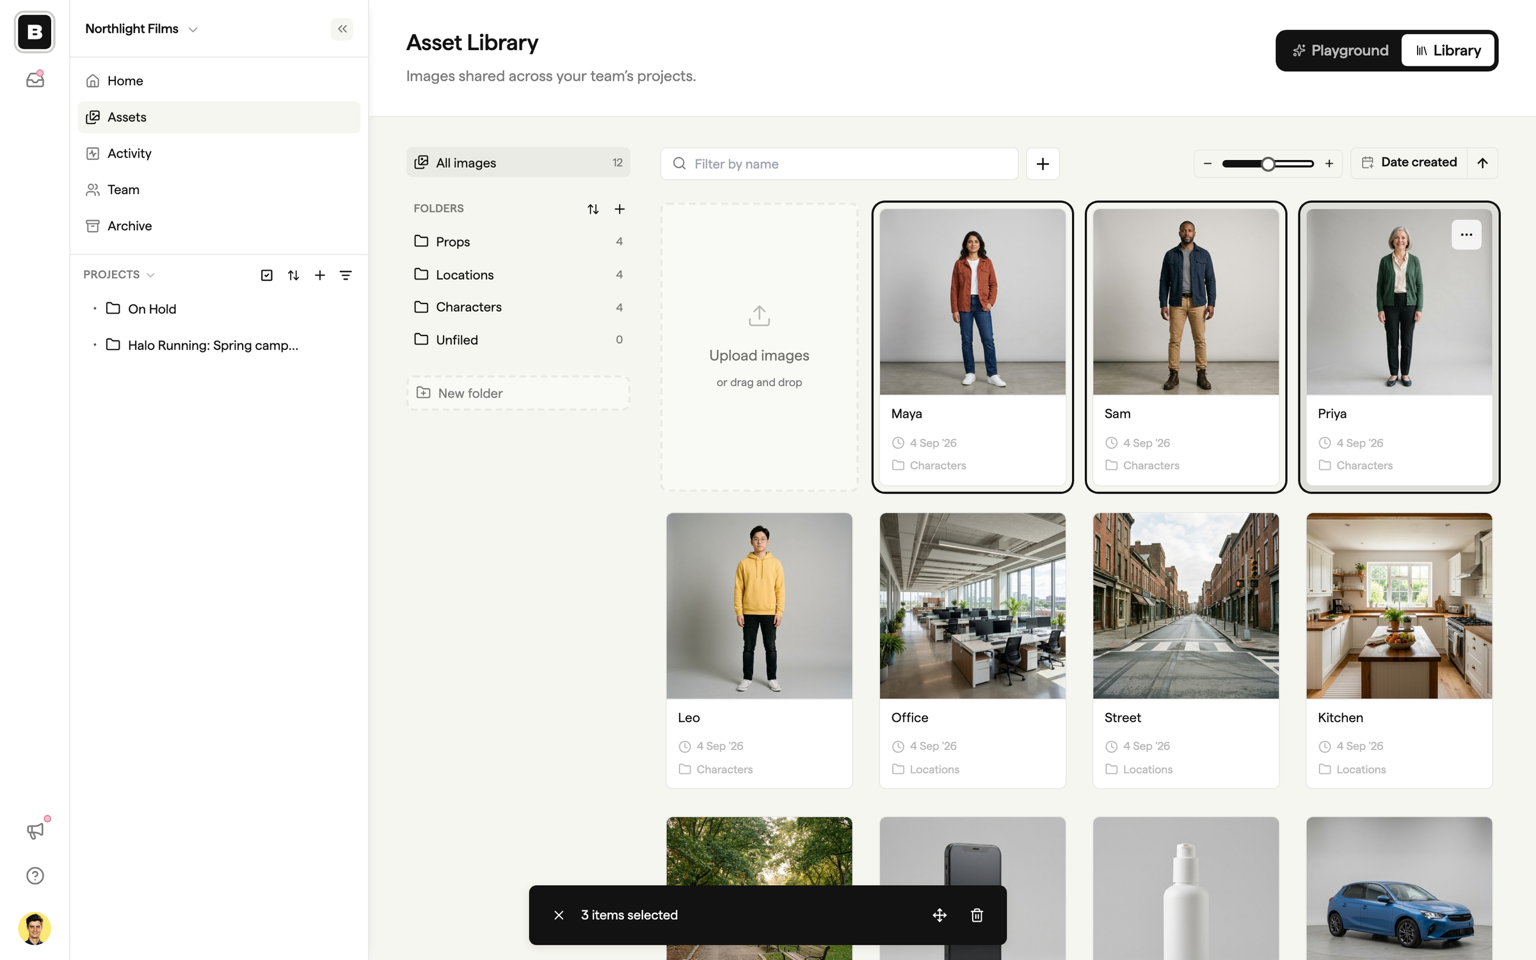
Deleting images
Choose Delete from an image's menu, or select several and click Delete in the toolbar, then confirm. Deleting is permanent. Frames that already use the image keep their picture, but AI generations that used the image as a reference can no longer resolve it.
Using library images in a storyboard
Use library images to replace a frame's picture or as references when generating images.
Replacing a frame image
Open the Image Library tab in the storyboard sidebar. Under Saved Assets you will see your team folders; Project assets above them holds images uploaded to this project only. Drag any image onto a frame to replace that frame's picture.
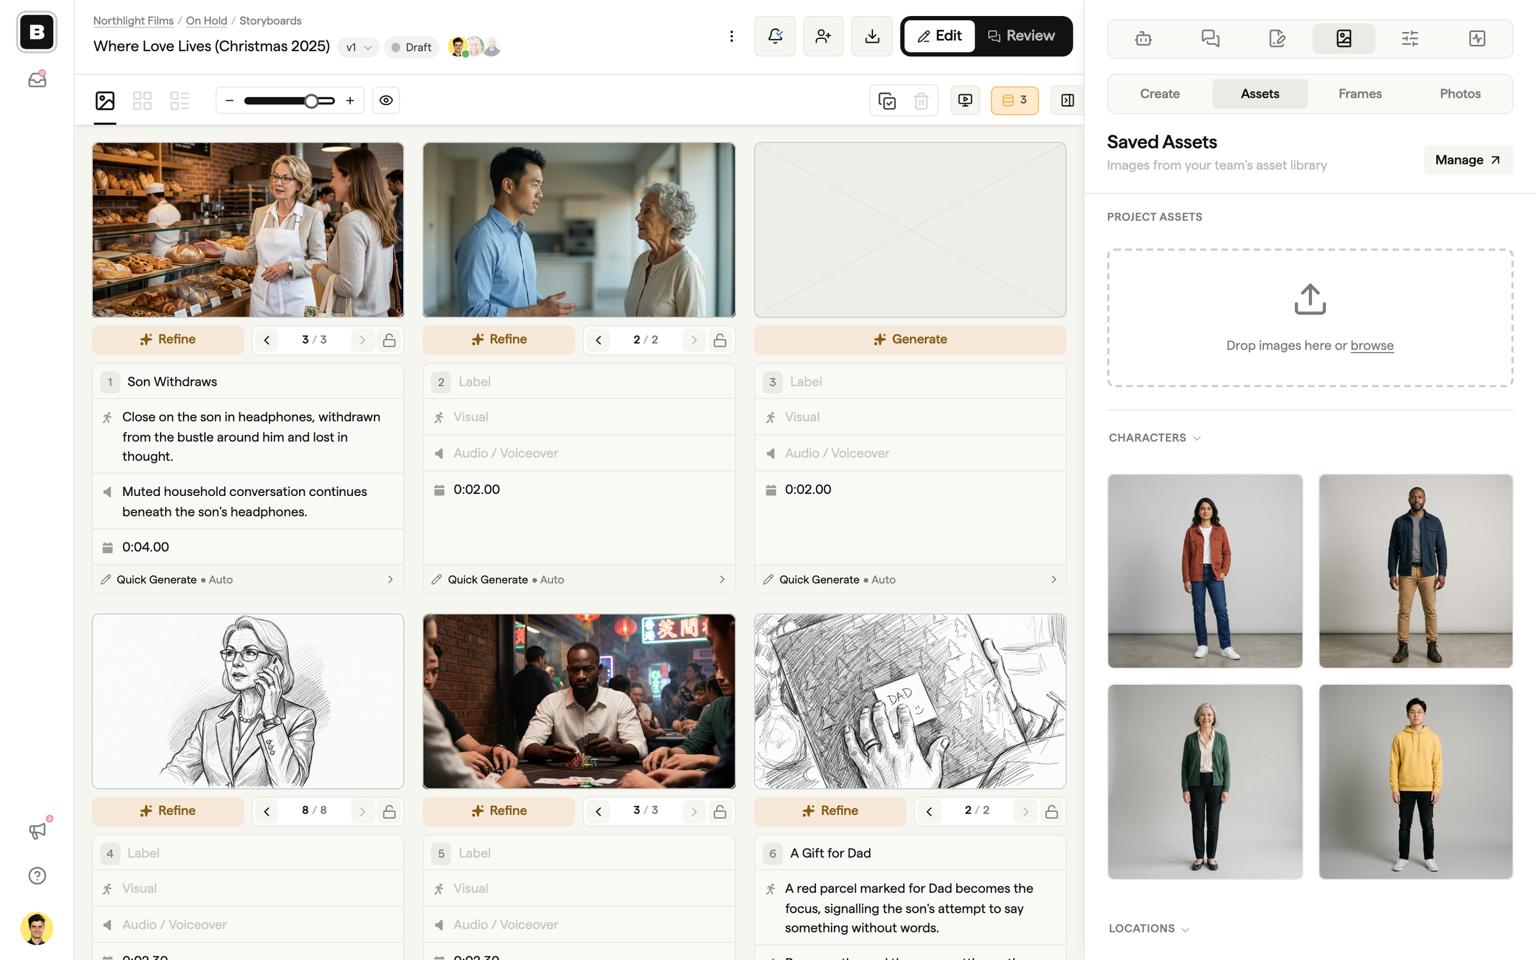
Click Manage in the Saved Assets header to jump back to the full Asset Library.
Reference images for AI generation
In the Generate sidebar, type @ in the prompt and select a library image. For example, select Alex, Box and Office while writing "Show @alex holding @box in @office." Boords includes those images as references for the scene.
You can use up to four content references, including any images added through the reference picker. To use that picker, click the reference button and open the Assets tab.
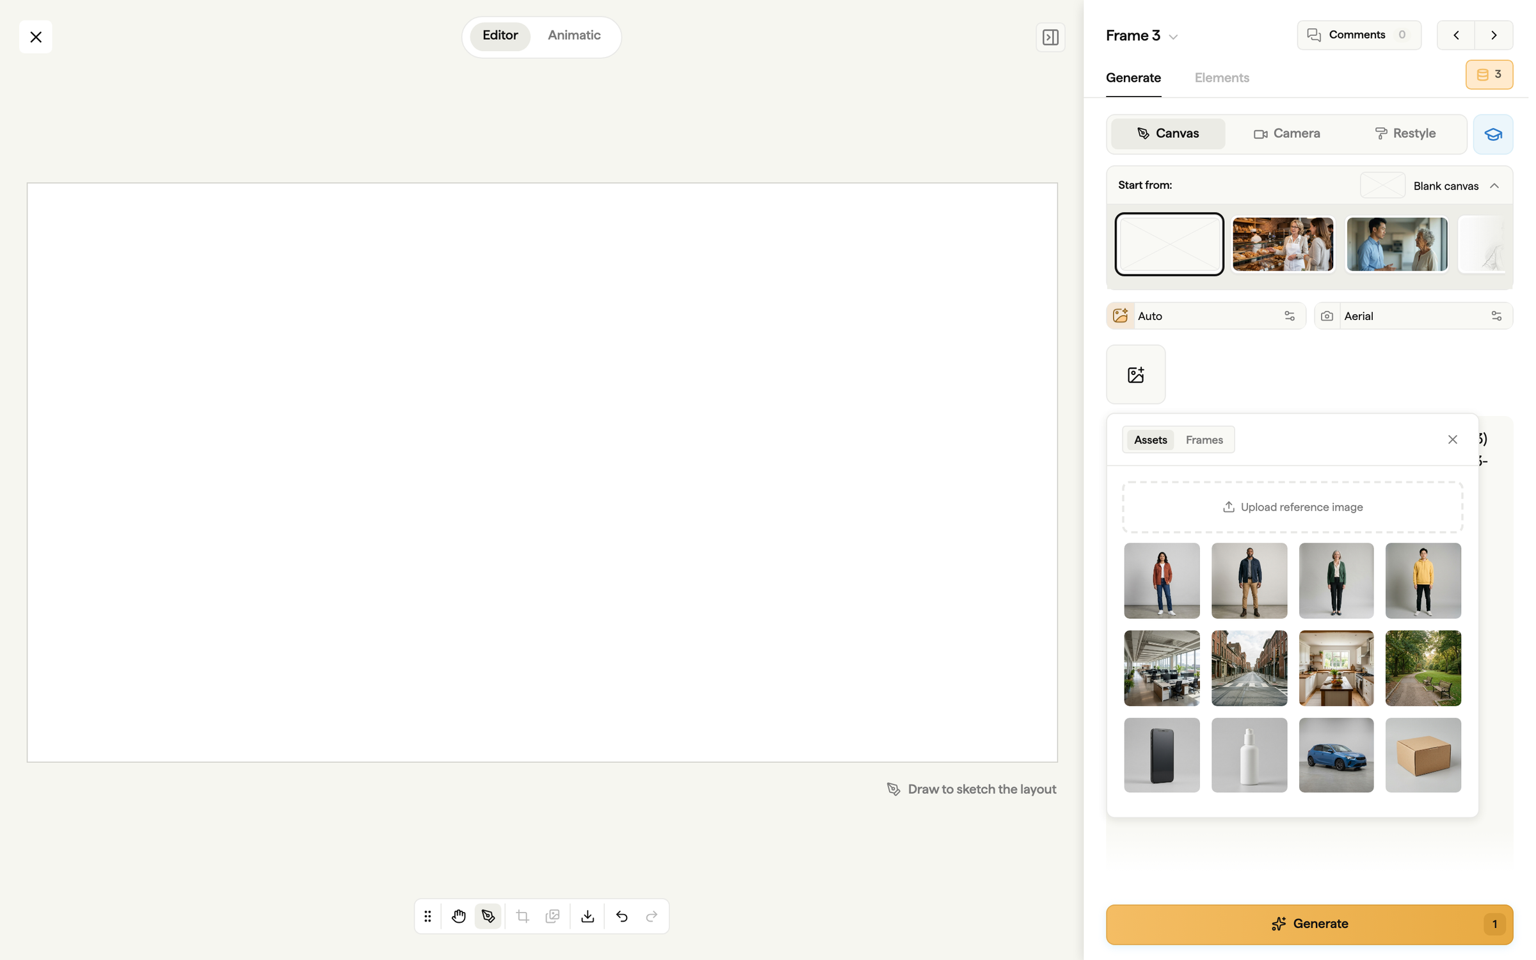
See Using @mentions for the full walkthrough. You can also select library images in the storyboard Agent.
The Playground tab
If AI image generation is enabled for your team, the Asset Library has a Playground tab. It is the same Playground you use inside a storyboard, but scoped to the whole team: generate a character or prop here, click Save, and it lands in Unfiled ready for every project.
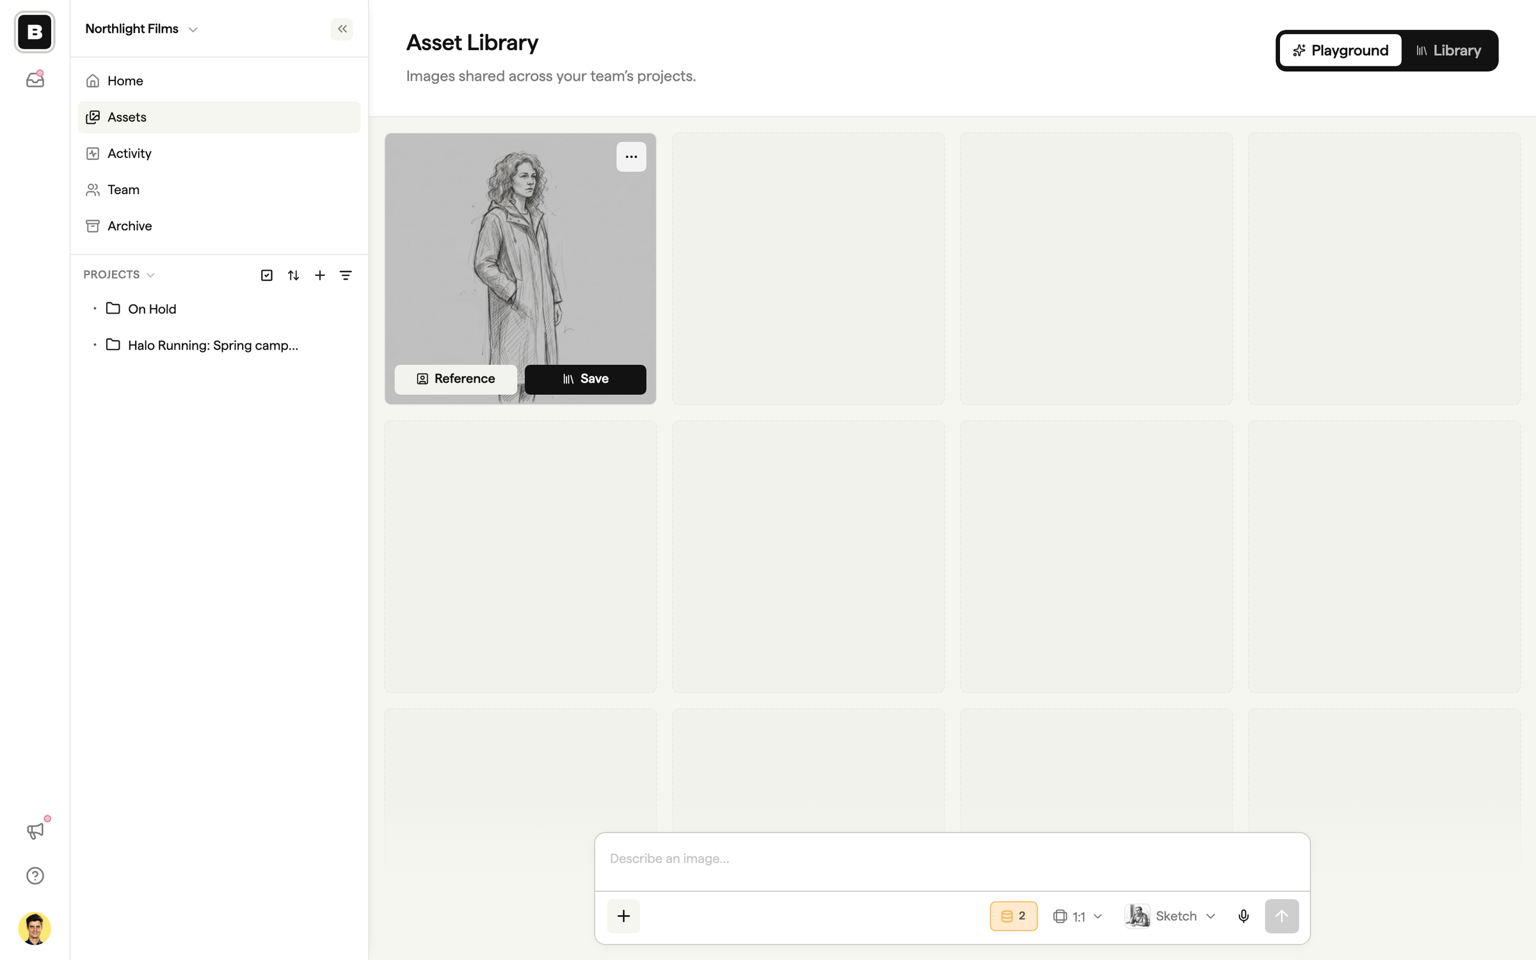
Type @ in the Playground prompt to select a library image and generate a new asset that matches it. You can also use Add reference images to open the reference picker.
For prompts, styles and credits, see Playground.
Tips
- Name before you need to search. A library of "Untitled image" is hard to use six months in.
- One folder per kind of asset. Characters, Locations, Props and Brand cover most teams.
- Keep reference images clean. Full-length characters on a plain background and empty locations give the AI the clearest starting point when you combine them.
- Promote, don't duplicate. If a project has a good image, use Add from project rather than uploading it again.
Public API
Developers can manage library images and folders programmatically. See the Public API guide.
FAQ
Everyone on your team can browse and download library images, including reviewers and guests. Uploading, organising, renaming and deleting need a role that can create storyboards, so read-only members see the library without the upload tile or action menus.
They move. The image leaves the project's own assets and appears in the library's Unfiled folder, where every project on the team can use it. Frames that already use the image are not affected.
Yes. Type @ in Generate, Playground or the storyboard Agent and select a library image to include it as a reference. You can use up to four content references. You can also select images through the reference picker.
No. Deleting from the Asset Library is permanent and there is no trash folder. Download a copy first if you are unsure. Frames that already use the image keep their picture, but AI generations that referenced it may no longer resolve that reference.
There is no cap on the number of images or folders. Each file can be up to 20 MB, in PNG, JPG or GIF format.