

- The Challenges of Traditional Storyboarding

- Step-By-Step Guide on How to Storyboard for Animation
- Common Mistakes to Avoid When Storyboarding for Animation
- The Benefits of Using Boords for Storyboarding in Animation
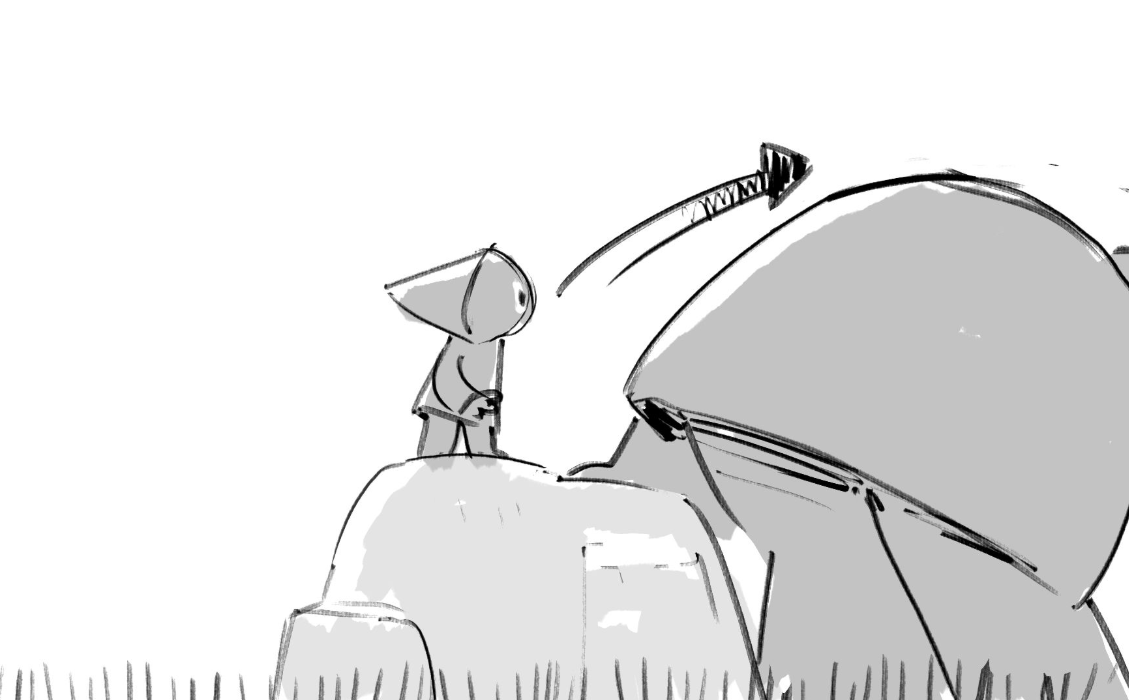
Introduction: The Importance of Storyboarding in Animation
Storyboarding is a vital part of the animation process, serving as a visual blueprint that guides the production from start to finish. It's the preliminary stage where ideas are translated into visual form, allowing animators to map out the narrative, characters, and settings in a coherent and organized manner.
We'll delve into the challenges of traditional storyboarding and how Boords, a modern AI storyboarding tool, can simplify and enhance the process. We'll provide a step-by-step guide on how to use Boords for storyboarding, along with practical tips and real-life examples. So, whether you're a seasoned animator or a beginner, this guide will equip you with the knowledge and skills to create effective storyboards for your animation projects.
Storyboard software for video agencies & brand teams
One workspace for storyboards, animatics, comments, and approvals. Spend time on the creative, not the back-and-forth.

The Challenges of Traditional Storyboarding
One of the primary challenges of traditional storyboarding is the time and effort it requires. Drawing each scene by hand is a meticulous task, especially when revisions are needed. If a scene needs to be altered or removed, it often means redrawing several frames, which can be a tedious and time-consuming process.
For instance, consider the experience of an animator working on a complex project. In the middle of the process, they realize a particular scene doesn't flow well with the rest of the narrative. They have to erase and redraw several frames, which not only consumes time but also disrupts their workflow and creative momentum.
Once a storyboard is drawn up, making changes can be a messy affair, often leading to confusion and miscommunication within the team.
Another significant challenge is the lack of flexibility. Traditional storyboarding methods do not allow for easy alterations or additions. Once a storyboard is drawn up, making changes can be a messy affair, often leading to confusion and miscommunication within the team.
Take the case of a team working on a collaborative animation project. If one team member decides to make changes to the storyboard, communicating these alterations to everyone else can be a hassle. This lack of real-time collaboration and communication can lead to misunderstandings and inconsistencies in the final product.
Moreover, traditional storyboarding methods do not provide an efficient way to add notes or directions to the scenes. These crucial pieces of information are often scribbled in the margins or on separate pieces of paper, making it easy for them to get lost or overlooked.
Lastly, presenting the storyboard to stakeholders can also be a challenge. Traditional storyboards, being physical entities, can be difficult to share and present, especially in today's digital age where remote working and virtual meetings are commonplace.
These challenges, among others, can make traditional storyboarding a less-than-ideal method for animators. However, modern tools like Boords have been designed to address these issues, making the process of storyboarding more streamlined, efficient, and collaborative. The following sections will guide you on how to use Boords to overcome these challenges and create effective storyboards for your animation projects.
Step-By-Step Guide on How to Storyboard for Animation
In this section, we'll introduce you to Boords, a modern, efficient tool for storyboarding in animation. Boords is online storyboarding software that simplifies the storyboarding process, making it more collaborative, flexible, and efficient. It offers a range of features such as easy sketching and re-sketching of scenes, adding notes, creating animatics, incorporating dialogue and direction, real-time collaboration, and easy exporting and presentation options.
Step 1: Starting a New Project in Boords
 Create a new project from the Dashboard.
Starting a new project in Boords is simple. After logging into your account, click on the 'New Project' button on the dashboard. You'll be prompted to name your project and add a brief description. This step is crucial as it sets the foundation for your storyboard. Ensure the project name and description are clear and descriptive to provide a clear direction for your storyboard.
Step 2: Sketching Scenes in Boords
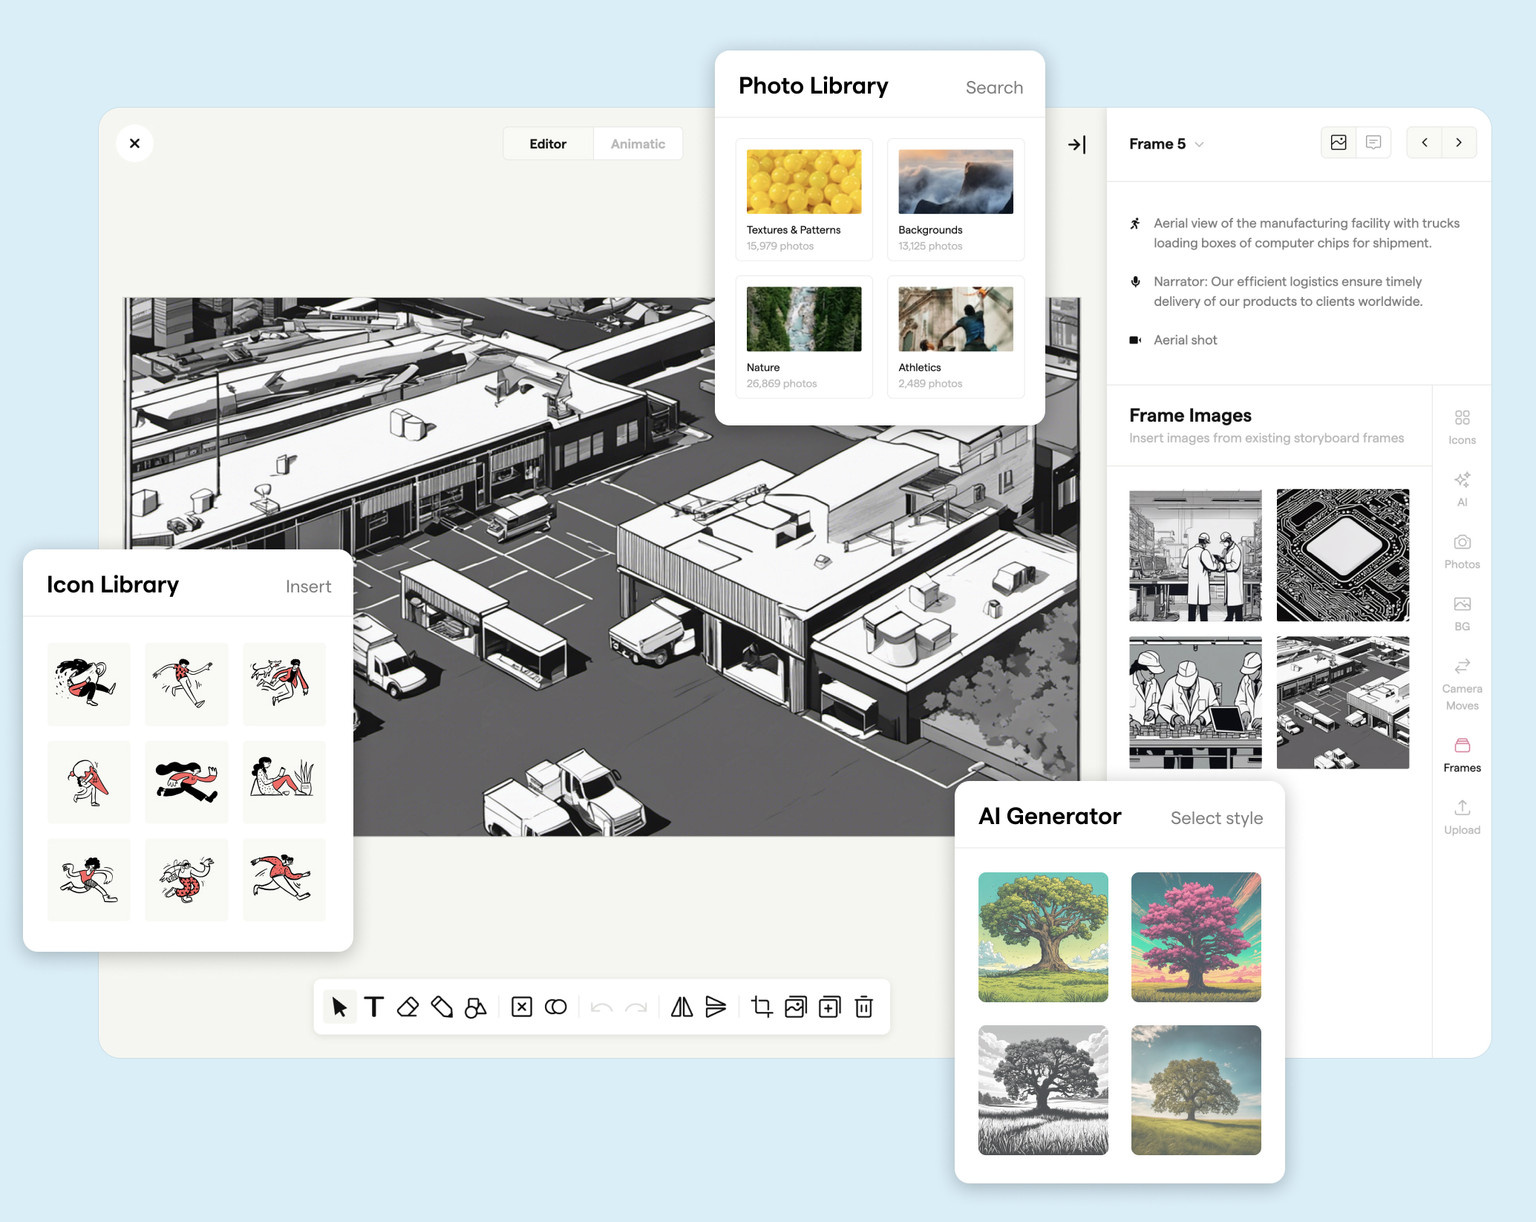 Sketch scenes or quickly create images with our AI Image Generator.
Once your project is set up, you can start sketching scenes. Boords offers a user-friendly interface that allows you to sketch your scenes directly on the platform. You can add, delete, or rearrange frames as needed. For instance, if you're working on an animation about a superhero's journey, you can sketch the initial scenes of the hero discovering their powers, the challenges they face, and their ultimate victory.
Step 3: Adding Notes and Timelines in Boords
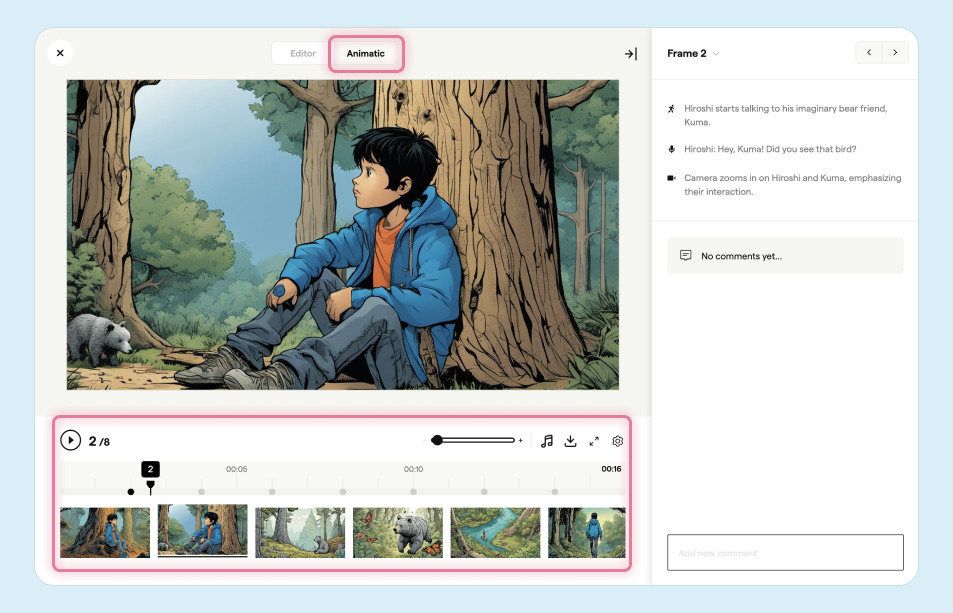 Time out your animatic using the timeline in the Animatic Editor.
Adding notes and timelines to each scene is crucial for providing context and direction. In Boords, you can add notes to each frame to describe what's happening in the scene, the characters involved, and any relevant dialogue.
Creating a timeline helps you map out the progression of your story. For example, if your animation is a three-part series, you can create a timeline that outlines the key events in each part.
Step 4: Adding Dialogue and Direction
 Quickly add notes and direction to your storyboard.
Incorporating dialogue and direction into each scene helps bring your storyboard to life. In Boords, you can add dialogue directly to each frame, making it easy to visualize how the conversation will flow in the animation.
Adding direction is also crucial for guiding the animation process. For example, you can add direction on how a character should move or react in a particular scene, or how the camera should pan to capture a dramatic moment.
Step 5: Collaborating on Storyboards in Boords
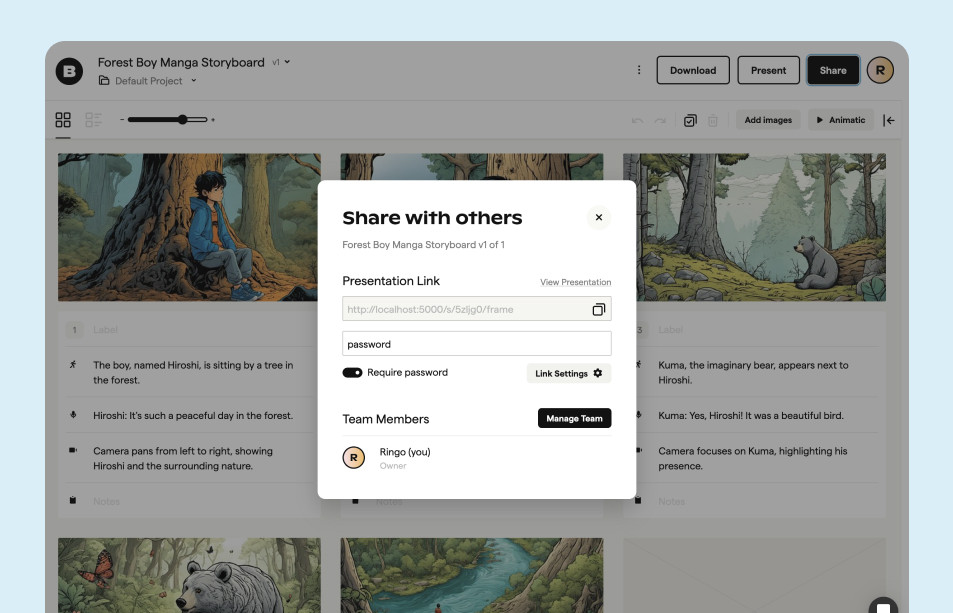 Share a password-protected link to your storyboard to gather feedback.
Boords makes it easy to collaborate with team members in real-time. You can share your storyboard with others, allowing them to view and comment on your work. This feature is particularly useful when working on a collaborative project, as it ensures everyone is on the same page and contributes to the creative process.
Step 6: Adapting Storyboards to Changes
 Add a status to individual frames indicate changes.
One of the key benefits of using Boords is its flexibility. If you need to make changes to your storyboard, you can do so quickly and efficiently without having to redraw entire scenes. This feature saves time and effort, allowing you to focus on refining and perfecting your storyboard.
Step 7: Exporting and Presenting Your Storyboard in Boords
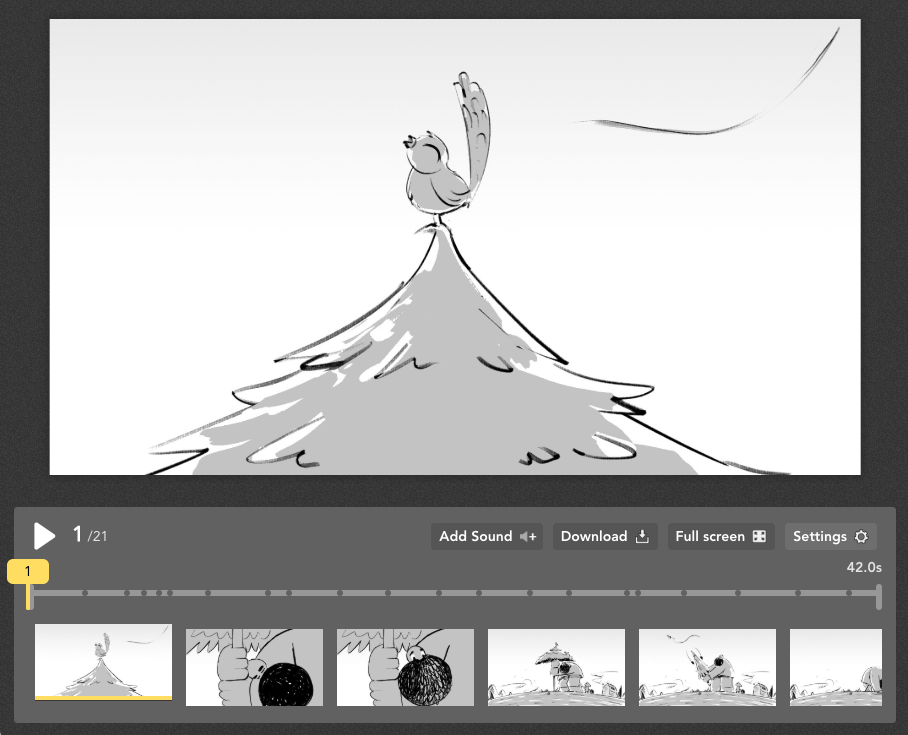
 Instantly export your storyboard in multiple formats.
Once your storyboard is complete, you can export it in various formats such as PDF, PNG, or MP4. This makes it easy to share your storyboard with stakeholders or present it in meetings. Boords also allows you to create a presentation directly from your storyboard, complete with transitions and timings, making it a versatile tool for presenting your ideas.
Common Mistakes to Avoid When Storyboarding for Animation
Storyboarding is a crucial stage in animation production, and mistakes made at this stage can impact the entire project. Here are some common pitfalls to avoid when storyboarding for animation:
1. Neglecting the Story Flow
One of the primary mistakes animators make is focusing too much on individual scenes without considering the overall story flow. Each scene should contribute to the narrative and move the story forward. When using Boords, ensure that your storyboard depicts the progression of events coherently and logically.
2. Overcomplicating the Storyboard
While it's essential to include key details in your storyboard, overcomplication can make it difficult to understand and follow. Avoid crowding your frames with too many elements or actions. Keep your scenes simple and clear, focusing on the main action that drives the story forward.
3. Ignoring Character Development
Character development is a crucial aspect of storytelling. Failing to show how a character evolves or reacts to events can make your story feel flat and unengaging. In Boords, use the notes feature to add character descriptions and directions, ensuring that your characters' actions and reactions are consistent and believable.
4. Skipping Dialogue
Dialogue can add depth to your characters and provide context to the scenes. Skipping dialogue or adding it as an afterthought can lead to inconsistencies and confusion. Use the dialogue feature in Boords to incorporate meaningful and relevant conversations in your storyboard.
5. Not Adapting to Changes
Storyboarding is often an iterative process, and changes are inevitable. Sticking rigidly to your initial plan can lead to problems down the line. With Boords, making changes to your storyboard is easy and efficient, so don't hesitate to adapt your storyboard as needed.
6. Poor Collaboration
Storyboarding is often a collaborative process, and poor communication can lead to misunderstandings and inconsistencies. Use the collaboration feature in Boords to share your storyboard with your team, encouraging feedback and suggestions to improve the storyboard.
7. Inadequate Presentation
Presenting your storyboard effectively is crucial for getting approval from stakeholders. Neglecting this aspect can lead to misunderstandings and misinterpretations. Boords offers various exporting and presentation options, ensuring that your storyboard is presented professionally and comprehensively.
By avoiding these common mistakes, you can create a compelling and effective storyboard that serves as a strong foundation for your animation project. Remember, a well-planned storyboard can save you time, effort, and resources in the long run, so take the time to get it right.
Conclusion: The Benefits of Using Boords for Storyboarding in Animation
Storyboarding is a critical step in the animation process, offering a visual guide that can help bring your artistic vision to life. As we've explored throughout this guide, traditional methods of storyboarding can be time-consuming, inflexible, and challenging to collaborate on. However, modern tools like Boords offer a solution to these challenges, making the process of storyboarding more efficient, flexible, and collaborative.
Boords is a powerful tool that simplifies the storyboarding process. With its user-friendly interface, you can easily sketch scenes, add notes and timelines, incorporate dialogue and direction, and collaborate with your team in real-time. Its flexibility allows for easy changes and adaptations, saving you from the tedious task of redrawing entire scenes. Moreover, Boords offers various exporting and presentation options, ensuring that your storyboard can be shared and presented professionally and effectively.
Sharper preproduction, less back-and-forth
Workflow tips and Boords product updates for video and brand teams, twice a week.
More from the blog

Storyboard software for video agencies & brand teams
One workspace for storyboards, animatics, comments, and approvals.
Spend time on the creative, not the back-and-forth.


Storyboard Activity
Sarah changed the status of Explainer Video v3 to Approved
8 JulSarah viewed Explainer Video v3
8 JulTom shared Explainer Video v3 with sarah@beacon.co, dev@beacon.co
7 JulTom changed the status of Explainer Video v3 to Review Needed
7 JulTom created Explainer Video v3, a new version of Explainer Video v2
7 JulAmara marked a comment on Explainer Video v2 as complete
7 JulDev commented on Explainer Video v2 - Frame 4
6 JulStoryboard Activity
Sarah changed the status of Explainer Video v3 to Approved
8 JulSarah viewed Explainer Video v3
8 JulTom shared Explainer Video v3 with sarah@beacon.co, dev@beacon.co
7 JulTom changed the status of Explainer Video v3 to Review Needed
7 JulTom created Explainer Video v3, a new version of Explainer Video v2
7 JulAmara marked a comment on Explainer Video v2 as complete
7 JulDev commented on Explainer Video v2 - Frame 4
6 Jul